

ETHICS STATEMENT: Although this shoot was for Sony and made to promote their cameras, this in no way compromises my impartiality and ethics. They hired me to make a film like any client. I have done work for most of the major camera manufacturers. I still use a huge variety of cameras for my work. The 1DC is still my favourite all rounder, with the Sony A7s and Panasonic GH4 right behind it! 🙂
WATCH THE RECORDING OF THE WEBINAR NOW BY CLICKING BELOW!!
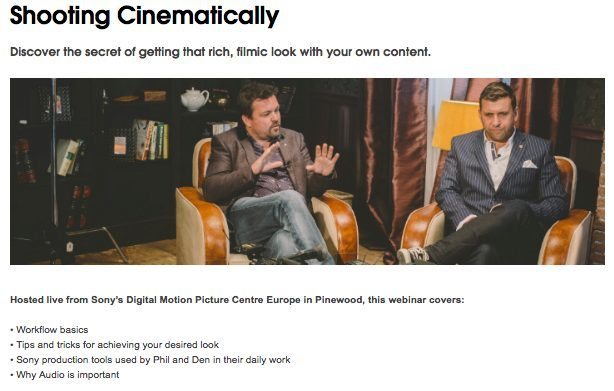
I was asked by Sony to make a film and a behind-the-scenes for a promotion they wanted to do called “Shooting Cinematically.”
They wanted a short film that could connect with the small production company crowd, the event and corporate filmmakers. They also specifically wanted it shot on the FS700 and to highlight its key selling points, 4K and super slow motion. The original plan was also to have the A7s as B-CAMERA. My pitch specifically included the amazing low light power of that camera. Unfortunately, when it came to it there were no cameras in the UK available, as this was back in May, so I substituted A6000 for it at the 11th hour. More on that later.
My idea was to do a mini doc about someone who does something visual, tell their story, and use these features they wanted me highlight in a natural way. I was doing some research on possible subjects. I wanted to also have a section that included lighting, as that is one of the things that is an afterthought for many people, like sound too.


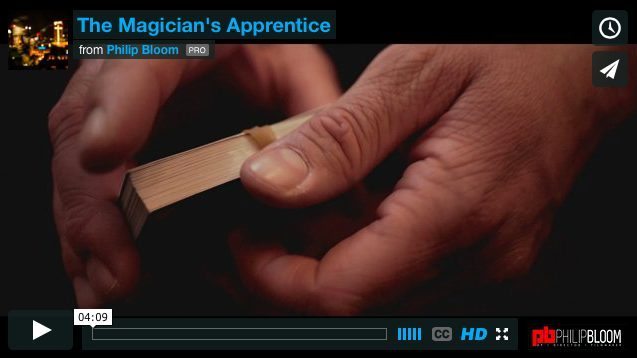

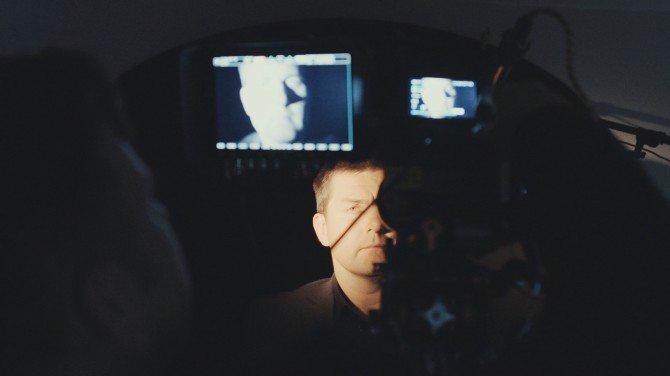
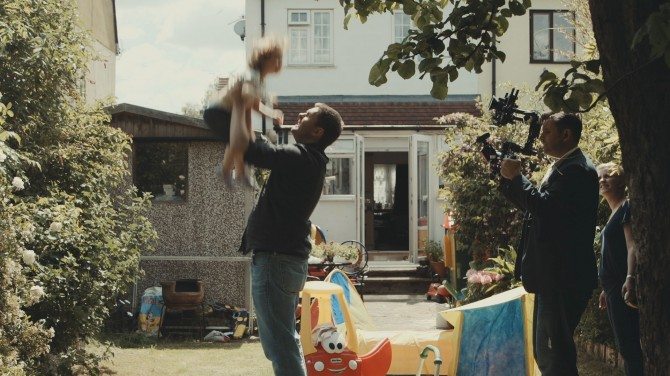
Dean Jorgensen is the husband of a good friend of mine. Whilst I was chatting to her, she vaguely suggested Dean. I asked more about what he does. He works full time as Sky TV as a transmission controller but performs magic every Thursday night in 2 bars in Soho, London. I imagined the things that I could do with this and I pitched the concept to Sony, who loved it.

What is “Shooting Cinematically”?
Much like that other phrase, “film look,” it’s more than one thing and is also incredibly subjective. It’s more than shooting progressive. It’s everything combined. Lighting, composition, movement, controlled depth of field, audio, content, grading. A big part is making things look more expensive than they actually are. After all, I shot a short with a DJI Phantom 2 with a GoPro. Total cost around £1200 and it had a huge reaction. It was down to movement, content, light, grading and structure.
Shooting cinematically doesn’t mean using an expensive camera, necessarily. With the arrival of cheap cameras with large sensors, this has been more and more achievable. Although a better camera is also preferable!
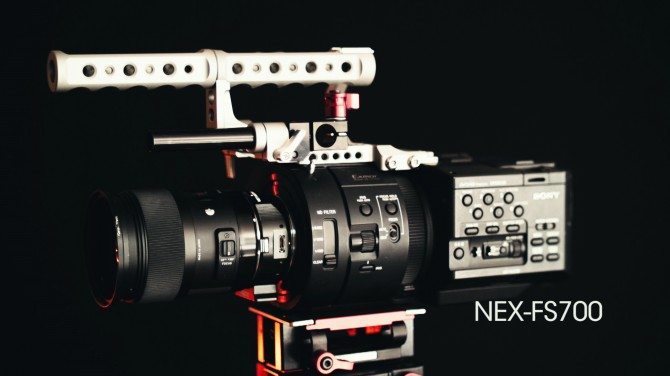
The FS700 is one of the most powerful cameras on the market for the price. The ergonomics frustrate me, as I have mentioned before, but the features and image really are superb. It can record up to 200FPS over crank in 50hz mode and 240fps in 60hz mode. It can also output 4K to an external recorder if it’s the newer R model or you have had it factory updated like I have mine.

The next step
So I’ve got my character and my story – Dean, the part-time close-up magician. Planning the shoot was the first thing I had to do. I needed to understand how he performed his magic and figure out what I needed, content-wise, to tell his story in a very short period of time. I also wanted to look around his house to work out where we could shoot the interview and B-roll and to figure out what lighting I might need.
The other question was where we could film Dean performing in public. He told me which bars he performs in, so I was able to check them out and have a look at how well they worked. It would have to be available light, because of the number of people there and not wanting to attract too much attention. Another key consideration was listening to how loud the sound was there. A big part of his performance is his verbal interaction with people, so I had to make sure I would be able to actually hear him!
The Storyboard
Armed with this information, I made the storyboard. It was a loose one, since this is a documentary, and things can change depending on how the shoot goes. What’s more, Dean could surprise me in the interview with something spontaneous that I’d want to capture. This frequently happens when doing things like this. That is why I really recommend doing the interview/ interviews early in the shoot, as you can get valuable clues about what other shots to get. There’s nothing worse than doing an interview right at the end, and learning something wonderful that you’ve got no more time to film.

The right tool for the right job
My main camera was the Sony FS700 as mentioned earlier. After all, my client was Sony and they wanted to promote it. I think they might have not been super happy had I shot with a RED! With my own FS700 and its Version 3 firmware, I had the ability to output 4K raw and 2K continuous slow motion, although you must have an external recorder for that.
There are two main options. The Sony R5 with interface unit, which I own as I have an F55 and it’s designed for that. I don’t think it’s the best option for the FS700 as it’s too bulky and makes the camera super long. You can see my review of that here.

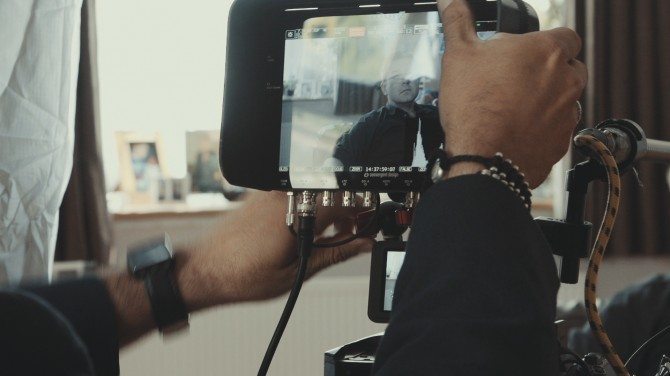
My 4K recorder of choice is the excellent Convergent Design Odyssey 7Q. I love this recorder as it also doubles as a superb OLED monitor. It’s got two SSDs for recording 4K and the 2K super slow motion. It’s relatively cheap for what it does, although the media costs do add up. Currently it only records in raw for 4K, but ProRes is coming which will save on media costs a lot!

Using the features
Internally, you’re limited to an 8 second buffer for super slow motion. But with the continuous 2K raw setting, that restriction is lifted. There’s no buffer limiting you anymore, but you do need to be careful not to overshoot, as it does use up a lot of data.
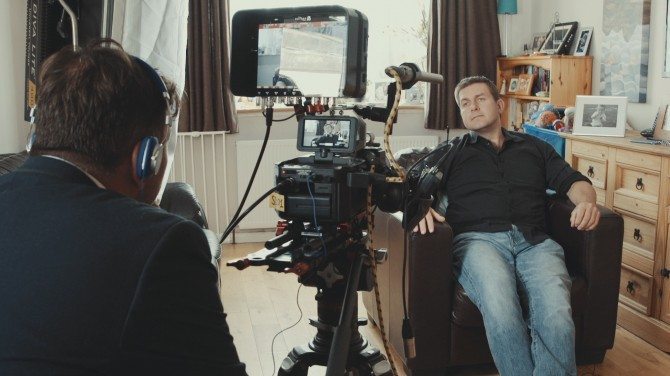
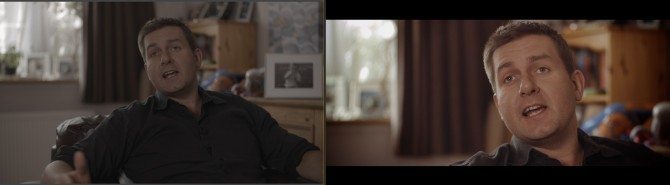
The interview with Dean was shot in 4K. I’m a big fan of doing this. Not because the finished film will be 4K – it will be delivered HD. But 4K gives me a huge image, with the wonderful ability to reframe from wide angle to various sizes of tighter shots. I don’t have to make the decision when to be wide or tight optically anymore, and this is a really freeing thing for me.
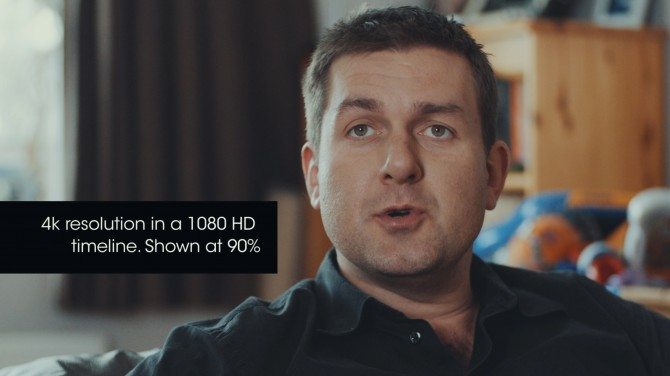
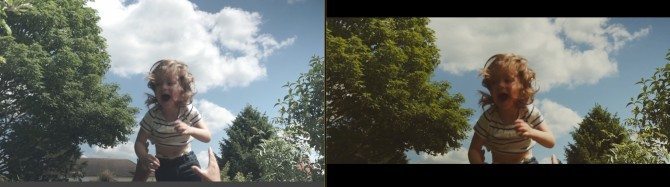
With a recorded image of 4096×2160 and an edit canvas of 1920×1080, if I shot my master as one shot, I could punch in for a close up with no loss in quality. Below you can see the main image (graded) at 54% of it’s original size and then at 90%. I could have shot a bit closer as the 90% was as close as I wanted my framing to be. Anymore and I would have lost the top of his head. I do that sometimes but I didn’t want it for this.
One thing to be aware of when doing this is make sure the image is clean. Keep that ISO down and light well. A noisy image when cropped looks even worse. Plus the noise is bigger. Keep it clean, and you will be fine.
What I often do when cropping interviews in 4K is put an adjustment layer above the video tracks and use FilmConvert to add a layer of grain to even it all out. This works a treat. I want the cuts to look seamless, like I had two cameras or changed focal length.
Another thing to remember: a crop of an image won’t change the depth of field. This will only happen when changing the frame optically.
One other perk of having the FS700 set to 4K raw is a feature in the Odyssey that converts that signal into a stunning looking HD ProRes HQ, which is better than if you set the camera to HD and just recorded that output. It’s because you are sending a 12-bit signal into the 7Q in 4K raw mode instead of the normal HD 8-bit which is then down-sampled and recorded as the 10 bit ProRes HQ. This extra information that is sent into the recorder give you drastically reduced banding and also an image that is more detailed and clean.

High sensitivity cameras doesn’t mean you don’t use lights!
Do be sure that light coming from a natural source like a window is continuous. Look to see if the sun is going to stay out or stay behind cloud, otherwise your shot will be drastically affected. The longer your interview, the more chance you have of the light changing. If you plan to do a long interview, I would block natural light sources and be in total control. It’s a shame to lose lovely natural light but essential at times.
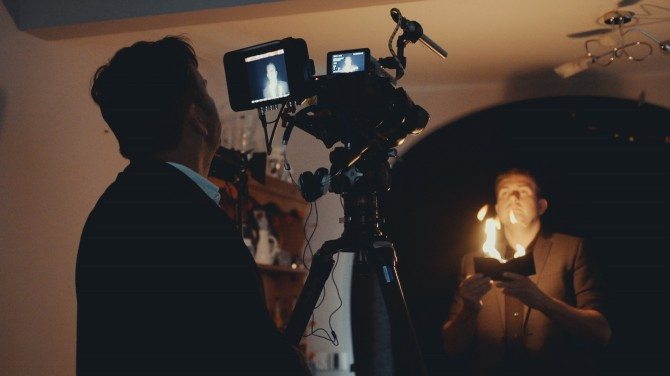
Super slow motion
Super slow motion was set to 200fps, the maximum in 25p mode. You need a lot more light than normal, as your shutter speed needs to be at least double your frame rate. The FS700 won’t go to the exact shutter speeds you want, but something like 1/400th or close to it is what you need. You won’t be able to go below 1/200th at 200fps as it’s technically impossible, but also at the speed of shutter you will get too much motion blur. Keep it at least double, well ideally double!
When these shutter speeds go high, domestic lights and low wattage incandescent light sources will interfere and cause nasty flicker. You can get this when shooting at normal speed (well you get strobing not flicker). 1/50th and 1/100th in 50hz countries means you will be fine under most domestic lights (beware of things like TVs which often run at 60hz) In 60hz countries you want to be at 1/60th to 1/120th. Other shutter speeds lower or higher will cause issues.
Professional light sources generally won’t give you these problems – LED Litepanels are great. But if you are using any incandescent lights, make sure they’re high wattage so the filament can heat up enough to stop the issues of flickering. I used a DEDO 150w. This is a low wattage light and risky. A full whack and left on for a few minutes I avoided the flicker. Dim down though and you will get it.

The B Camera
Initially, as I mentioned earlier, we were supposed to be using the A7s for the shots in the bar and other B camera shots. When it became clear this was not available, I decided to use my very cheap A6000. Why this over the A7r? I love my A7r especially for stills, but surprisingly the A6000 had a better looking HD image. Since this shoot I have of course picked up an A7S and it’s mind-blowingly good, both in HD image and low light ability. Still the A6000 performed admirably considering its super cheap cost.

When to use the B camera and when to use the A camera
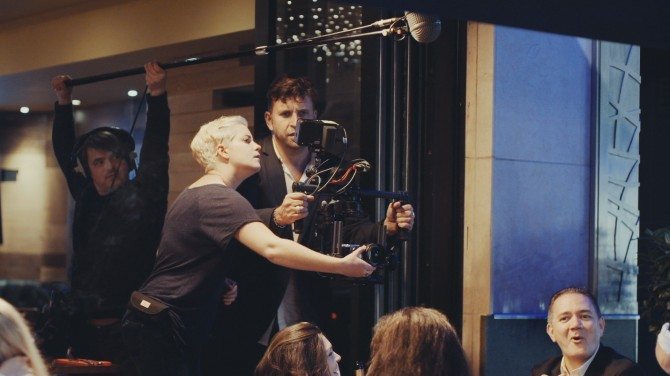
This comes down to many factors, which are different on every shoot. I made the very bold decision to use the B camera for all a large proportion of the filming. All the stuff with Dean’s children, the “apprentice” section too, plus everything at the bar. The FS700 was used for the interview and slow motion only. The reason being that I wanted to use my new Movi 5 🙂

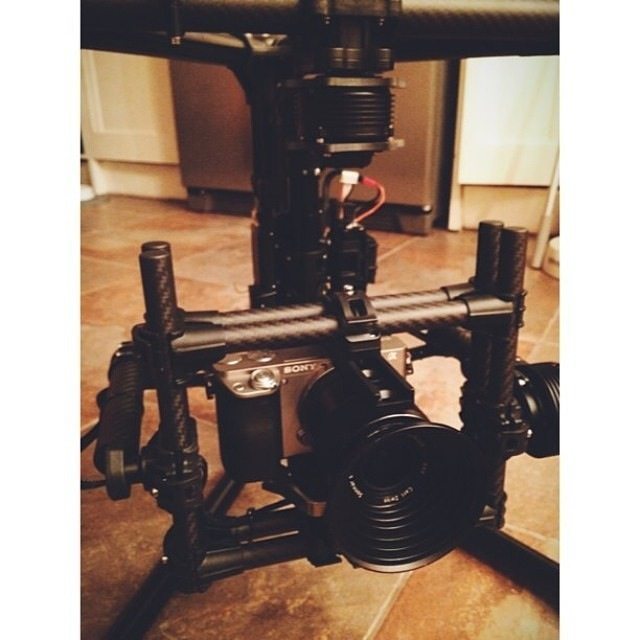
The Movi M5 is a wonderful piece of kit. Yes it’s not cheap, costing around £3000, but it’s just simply marvelous and can bring massive production value to your shoots. It’s not for everything, and it’s not for every camera. It’s designed for smaller cameras. Their M10 which is more than twice the price is for bigger cameras, but the FS700s, due to its shape, doesn’t go on either. Another reason I chose the B camera for a large chunk of the filming.
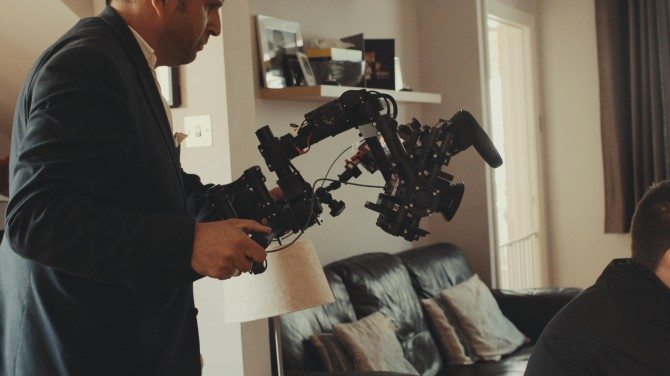
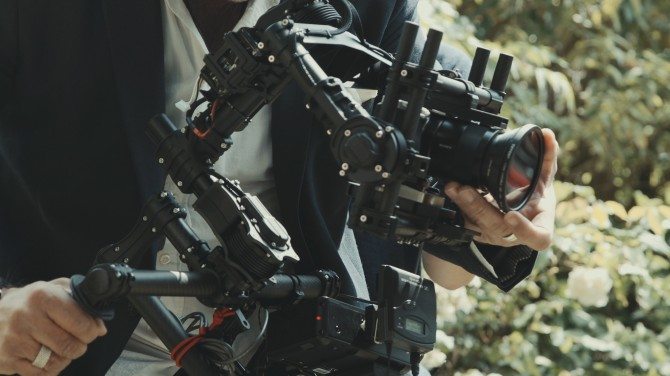
This 3 axis brushless gimbal system is a bit like a motorised steadicam in a way, but I find it a lot easier to use. Balancing takes practice, but when it’s set up it’s remarkably intuitive and performs brilliantly, even in the wind. Plus when used in inverted mode (like I did for the most part here) and with the lightweight A6000, I was able to go all night with it, as opposed to using heaving cameras and in normal mode, when I can’t last more than a few minutes!
The downside to this is focus. Yes, some cameras have fairly decent autofocus, especially the Canon C100 and C300 although they have limitations too. The A6000 does have autofocus, but I didn’t actually try it. What I did was set my focus and then move with the subject within my depth of field. Sometimes I kept it really shallow, which was harder. Other times deeper made more sense.
The sequence of Dean travelling on the train and tube was all the A6000 and the Movi. I did film without official permission, but I made sure I did it quickly and didn’t get in people’s way. The shots of Dean walking from the train to the bar added a lot to the production in my opinion. Very “cinematic.”
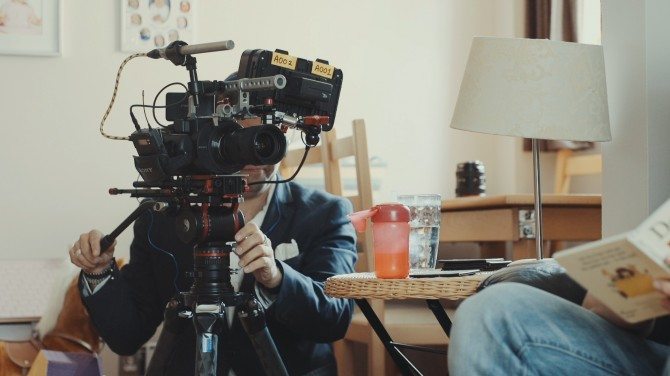
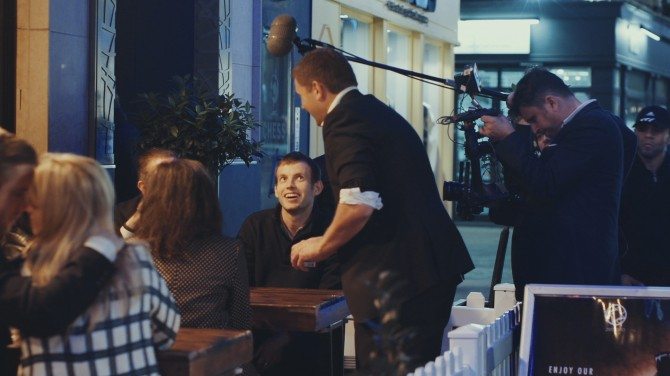
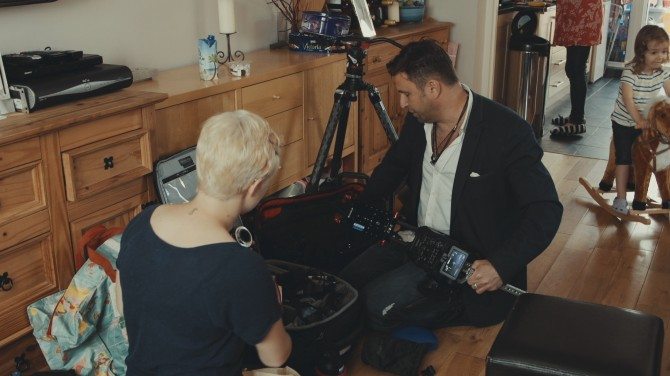
Really, you need a remote follow focus and a focus puller. James Miller was at the shoot doing BTS with a sound man, Andrew and assistant, Holly. Occasionally I borrowed both of them for a little bit of help. It’s quite hard reaching to change focus when holding the Movi, so Holly helped me sometimes. Have a good monitor on the Movi is also essential for composition, exposure and focus. I used the wonderful Atomos Ninja Blade, as it also doubled as an external recorder recording in ProRes 422. Much better than the internal recording of the A6000 which is AVCHD.

It was tough in the very dark bar. The camera was pushed to 3200 ISO which is a stretch for the A6000. The FS700 would have eaten it up – in fact it did, as James shot the BTS with that camera and he could see way more than me!
Audio
This is so important, I cannot stress it enough. Without great sound, this whole film would have failed. I needed to hear Dean performing and of course the interview had to have perfect sound and the same on the “Apprentice” scene.
I used Sony’s UWP D wireless mic for most of the audio, Dean wore it (hidden of course!) as did Zack. I actually recorded it dual system sound using my Roland R26 for when I shot with the B-camera. I used a Rode Video Mic Pro as reference plugged into the Ninja Blade, as the A6000 has no mic input or headphone jack. This was simply synced with Pluraleyes in post.
For the sit down interview, I used my Sanken Cos 11 wired mic. I don’t use wireless mics for sit downs unless they are so wide I can see the cable. Saves on batteries, and of course wireless mics occasionally get interference.
Andrew, James’ sound man, also did some of the recording in the bar as backup, but thankfully the wireless mic picked most of it up fine, even in the really noisy places. It’s worth recording a minute of atmosphere audio in each location to underlay and even out the audio in post.
How pre-production makes your life easier and the edit
The film was storyboarded, and I pretty much stuck to it. I had key sequences to shoot:
The interview
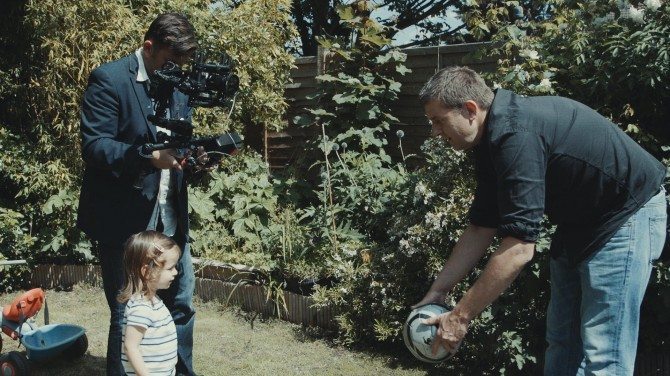
Dean playing with his daughter
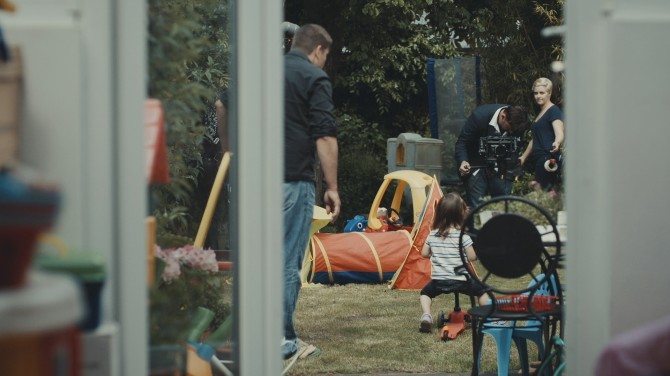
The scene with his son
Travelling to London
Performing magic

One of the key objectives that would make the film was the “apprentice” scene. Where Dean’s son Zack teaches him a trick. I wanted to intercut this with the actual performance of the trick in the bar. Knowing this was how it would play out in the edit, I had to make sure I got all the shots and sync I needed for this. I got Dean and Zack to repeat this sequence for me from 4 angles. They were patient, and it paid off. Shooting all from the same angle would have been visually dull, especially as I would be cutting fast back and forth between this and the corresponding moments in the bar.
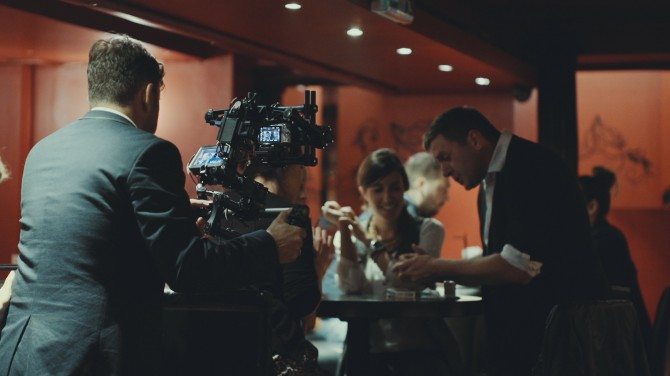
Getting the right shots in the bar both visually and with the audio was challenging, and I filmed about 6 or 7 performances of this. Shooting it all on the Movi made it ten times harder, but in the end it worked. Although frankly, I could easily have gotten away without using it, as I hate unmotivated movement and people sitting at table is pretty unmotivated. What I used it for was perfect stable handheld!
It took a while in the bar until I was happy, but I knew exactly how much I needed, as I was piecing it together in my head as we went along. Everyone in the bar signed releases by the way. For anything commercial like this, it’s essential.

The edit was pretty straightforward due to my planning. As you can see above, there were lots of layers both of audio and video. The audio of the travelling to the bar was all foley in post from freesound.org. It simply sounded better than the real thing!
The tricky part was the colour grade. I used my usual FilmConvert of course, and it really added to this. For the bar scenes, there was a fair bit of break up and banding in the image, as it was high ISO and probably not the most ideal picture profile. Try not to shoot too flat in low light conditions, as you will have the same issues with 8 bit video. What I did was use Super 16mm grain, which softened the image and hid the image issues. For the daytime and the rest I used Academy 35mm grain.
The sequence with Dean’s daughter Lois I made it look more nostalgic with some milky blacks and vibrant but over saturated colours. There is nothing wrong with mixing styles colour-wise, especially if it makes sense for the sequence.

I did use a fair amount of media as you can see below. The Odyssey 7Q, as it only does raw, currently eats up 500gb for 24 minutes of 25p in 4K. That’s a lot. The super slow motion in 2K also adds up (You can only do continuous slow motion in 2K mode)

That’s my biggest caveat with recording 4K with this camera. Once we get ProRes, it will be way more practical. Until then, be aware of how much data you will use. I kept the interview fairly brief because of this, which isn’t ideal, but I wanted the 4K for varying the frame.
Oh, one other thing. I am using the new Really Right Stuff sticks with FH350 head. Both pricey but very nice. Worth it over my usual Millers? They are different. I love the modularity, how parts break off to mount sliders etc.
All in all, I am happy with the end result. A lot is packed into 4 minutes. The film isn’t about magic really, it’s about Dean. Magic is the framing device. Dean is the content. Is it cinematic? I think so. You may disagree, but that is what opinions are for. Everything is subjective.
Check out the behind the scenes videos by James on the Sony site or below.