Check out this blog on how you set up the 7D or 5DmkII to actually take the stills. But if your camera has an interval function like the Nikon D300, D700 etc this tutorial works exactly the same for you. Some compacts let you take interval stills too I believe but not sure which ones.
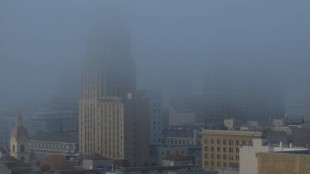
Normally I would recommend using RAW mode to take your stills with but I used JPEGs for this tutorial for speed and to be honest the subject wasn’t that interesting, just shot out of my window at the Clift hotel in San Francisco using my 5dmkII and my 35mm F1.4 lens taking one photo every 7 seconds and the shutter was set to 1/20th and the ISO was 100. Lens was at f8. Purely used as a demonstration for doing post.
 Doing timelapse with the stills function gives you enormous flexibility and the ability to get some truly mind blowing low light timelapse sequences. Much better than you can do with a video camera.
How to make video timelapse from DSLR stills from Philip Bloom on Vimeo.
Tutorial on how to take your stills taken with your DSLR and turn them into great timelapse HD video.
Dungeness timelapse experiment with Canon 7d from Philip Bloom on Vimeo.
Inspired by Tom @ Timescapes I went out to my favourite filming location in the UK, Dungeness on the south coast to see what I could get.


69 comments
Just something to note (I’m sure Phil already knows this)… linear pullouts are great, but sometimes for a more realistic look, logarithmic pullout… it’s a simple change that anyone can make using the points in the motion tab in Final Cut. In After Effects and Premier, you can even use a shortcut to generate a standard log curve! Sometimes this helps with big movements like this one that fill just did.
yes, i kept this tutorial very simple and very basic. It’s a starter tutorial for people just getting into it
Would you mind explaining briefly how you would do this log curve in premier CS 6 please? What is the shortcut? Thanks.
When you exported the 1080p version does quicktime scale and crop it? Because the original video wasn’t 16:9, or is there some weird squeezing going on?
it crops it
Hi Philip, I exported the 1080p version and it squeezed the images, rather than cropping. I’m shooting in the photographic format, which in video terms is closer to 4:3, and the 1080p export is 16:9, so hence my images are squeezed. Is there a way to crop in QT7, or even better, is there a way to take photographs in a 16:9 ratio?
yes, select export as full HD in codec you want and then select image size and then select maintain aspect ratio via crop.
best
p
Nice timing Phil, just got myself an Intervalometer yesterday
cool. you will love it. I adore DSLR timelapse
Thanks for keeping it easy for the beginners like me. 🙂
you are welcome. You can get a lot more complicated with RAW files and curves in the frame size change. I will cover that in a future one.
Is there a Timelapse Function on the Gh1 also? Cause I like the look of this timelapses very much and would really like to test some things out without buying just another DSLR again…
no timelapse. can it take a remote? not sure. will google it.
i think i´ll order this intervalometer for my gh1.
http://www.enjoyyourcamera.com/Fernausloeser/Kabel-Fernausloeser/Timer-Ausloeser-JJC-TM-D-fuer-Panasonic-FZ-50-FZ-30-LC-1-etc::2208.html
Oh! Would have loved to have seen this a week ago, Would have done better in my first attempts at timelapses, check it out: http://www.vimeo.com/7115014
Great tutorial as always. If you want to push the capture process even further, I wrote a short article on capturing the images in RAW (I used SRAW2 on my 5DMk2) and then post-processing them in Lightroom before importing them into Quicktime Pro as an image sequence. By shooting in RAW you have far more control over color balance and exposure. By using the “small raw” formats you can keep the file sizes reasonable with still plenty of resolution headroom for even 1080p files.
http://dmg-photography.com/blog/2009/10/lr-edited-tl-frames
hey dave, quick question. Can you open a raw image sequence in quicktime? or do you have to convert them to jpeg first?
Love it thanks!
I didn’t know quicktime could do that.
Never thought to use the extra resolution of the still images for doing digital zooms / pans.
Now I have to get an intervalometer for my GH1 so I can some of these!
Philip, if you could check my work at blizzarworks.blip.tv, you could see some timelapses done with a Canon 20D on the first video. First I suggest importing the frames into After effects – for those who have it – where it can accept Raw format and so make any colour correction within the 32bit range. And then render it into any format… What I still don’t know how to deal is the damn flickering… There’s a plugin within the Tinderbox collection that tries to correct it, but it’s never satisfactory…
Do you have a special way to deal with this? Thanks.
good stuff. even better was your super clean desktop, it got me searching how to make my desktop icons smaller. always an inspiration, thanks!
Philip,
So what did you do to the “Speed” in the motion tab? I saw at 100% but where does is the sped up lapse adjustment made?
I created a time lapse with my JVC HM100u and Canon 5DMkII (in video mode) side by side then adjusted the speed to 5000% – was not sure how else to do.
Thanks for any info.
-Randy
Dear Philip,
I found a big problem when opening files as image sequence with Quicktime player v. 10,0 -the one which comes with snow leopard- as it does not support image sequences.
Any idea on how to solve this?
Thanks,
Juan Mª
P.D. Like very much your videos and tutorials.
hi Juan, use quicktime player 7. It is still on your hard drive. p
I’m getting great deal of exposure flicker in my time lapses any way around this besides manual mode?
you really should do manual for timelapse unless you are doing epic ones like I did.
I found a fix for exposure flicker using aperture priority mode at the timescapes forum. http://www.timescapes.org/phpBB3/viewtopic.php?f=4&t=1292
did you have any flicker problems in your 36hr time lapse?
I use aperture priority mode for day to night otherwise I’ll be using manual.
no flicker issues somehow. i should have been in aperture priority mode
I found some freeware called VirtualDub that will assemble your photo time lapse and will de-flicker your images I was also able to save my time lapse as uncompressed HD (I think).
VirtualDub:
http://sourceforge.net/projects/virtualdub/
Tutorial:
http://timescapes.org/phpBB3/viewtopic.php?f=4&t=716&p=12083#p12083
cool. thanks for info John
Just returning the favor.
hi qtx doesn’t work with this…. as you say rightly say… There seems to be no way for using qt7 pro on my mac that has 10.6 and the rubbish qt x.
Do you have a work around please ?
The great thing is Apple allow you to buy qt 7 pro (as on my MBPro) Then doesn’t allow you access to it !! (£20 for nowt)
Thanks for this lovely easy tutorial…
Just wish that apple were as user friendly on this subject.
best JDL
PS I know this an old tutorial BUt if you are scanning this page would loooove to know
do you not have qt7 anymore?
yes BUT canna seem to get it to load… qtx overrides it (I am also asking apple about this)
this is since loaded 10.6
(sorry didn’t reply earlier)
Big Sorry… It is a case of RTFM… You can load qt7 on 10.6 it just doesn’t do it by itself…
you have to go back to the disk that come with 10.6 find qt7 and then reload from the install disk….
best jdl
yes, for some reason i didn’t need to reinstall it. It was still in my folder, hidden but there
use quicktime pro 7. on your install disc
Thanks for your inspirational work, Philip. Having trouble with this workflow in Snow Leopard – I am using QT 7, not the useless QT X, but when I create my image sequence, all I get is a black video. The images are fine – I am currently just processing the timelapse via After Effects instead, but I’d love to be able to use the (simpler) Quicktime 7 approach if you know of a workaround.
Any thoughts?
Nathan
This is weird. Something new for me. What the interval did you use to capture those images? Did you just purely use Quicktime to do the timelapse? What weird to me is how quicktime blend those images together to a smooth motion. It’s not choppy.
all just quicktime. depends on how frequently you take a photo that depends on the choppiness.
I figured it was the right time to say hello. Happy to be here! I’ve Been reading a lot of posts but am not so famaliar with how the boards operate just yet. If I dropped my helo line in the wrong part of the forum, I hope a mod will put it where it is supposed to go. I guess that since I read the posts here more often than not, it would be where I said hello to everyone for the first time. Well, thanks a lot and I hope to learn a lot more from someone of the already great information that I’ve found here.
__________________
[url=http://www.dvdstoragefurniture.net/DVDStorageRack.html]DVD Storage Rack[/url] journal
hey ! phil do i have to get the timer controller in order to do a time lapse on a canon 7d ? or the camera come with a especial mode for it >?
thank you !
yep. type in timelapse into search engine and you will get the info you need.
Hello Philip,
First let me say that I would indeed be interested in a meet-up in the keys, along with a couple of my canon wielding friends. Especially after the 16th of June!
I just completed my first timelapse using similar techniques described here, although I had to lug my old macbook around with me and was limited to its battery life since my 7d/17-55 2.8 combo put me in the poor house. Can’t wait till I have $60 for an intervalometer. Sad, sad days.
Anyway, my question is this: I shoot RAW for everything, and absolutely love the control. But I’ve been searching for a solution to automate RAW parameters. It would be amazing to be able to slowly change exposure and other tweaks slowly over time. After Effects seems like a prime candidate for this, but as far as I know it isn’t possible. It might even be a limitation of the intervals in some RAW settings. For instance, if I recall, exposure goes in steps of .05 EV or something like that.
Do you know if anything yet exists for something like that?
Cheers, great work as always.
am afraid no ide. key west meet up details up soon
Hi Philip,
What is the preset of your sequence in timeline before sliding in your timelapse video ?
Thanks.
Yep would like to know that too, came to the meetup and did some TL and whenever I start to change the motion of the clip I get a lovely red rendering bar.
Cheers,
Hi Philip,
If I don’t have FCP 7 and still using version 6, what should I export to, just plain Apple ProRes? The file I’m ending up with is pretty darn big for a 26 second time lapse. It came out at 373MB.
Or should I just stay with exporting to h264?
Muchas thank yous Philip!
go with prores 422
Philip,
Thanks for this tutorial. I am exporting the files on a project right now, but don’t see a pro res option. I am using Quick Time 7.6.6.
Pascal
P.S. See you in Miami for Canon Film Makers Live.
Do you final cut on your computer?
Hi Philip,
I think I’m asking the same question as Thomas above but here I go.
Could you tell me your presets for the sequence in the timeline since I think this is what’s giving me grief…
I’ve found that when I drop the ‘.mov’ into my timeline the footage is already scaled to fit within the 16:9 crop (nothing out of frame) where as your example shows the footage at 100% (spilling out of frame). If you could shed some light on this it would be much appreciated.
P.S. Thankyou for all your inspirational work, and I’m !@#$% that I missed your Australian seminars…
Hey great tutorial, thank you! Could you please tell me what you did to get your finder contents to show up as a list on your desktop? That is a very cool/space saving trick!
click list view…the middle option
Hi Phillip,
Quick question how do you work around only being able to take 99 shots with the Canon intervalmeter, without introducing a jump in the timelapse sequence?
Regards,
Jasiah
set it to 00 or —
Hiya Phillip
Thanks for getting me of the ground with your time lapse tutorial, much appreciated.
Is there a way of applying effects ( Artistic or similar) in Photoshop to my jpeg images without having to do each “frame” individually?
Yes. In the menu there is an automate option. You will need to record the actions you apply to the first image and then apply during batch process. (If you google batch process in photoshop, you will find clear instructions).
Thanks Preston. Will give it a try.
So, what is the workaround for qt 10? There is no “open image sequence” option under file. Do I need to purchase qt pro?
Unfortunately, you will need QT 7 Pro to process the timelapses if you are hoping to use QT.
If you have Snow Leopard or more recent you CAN get QuickTime 7 and use it. With Snow Leopard, you’ll need the OS install DVD. For Lion, You can just download it. For details, check below…
http://support.apple.com/kb/ht3678
Hi Philip and site members, I realise this is a really old topic but i just wanted to ask about something..
I’m making some timelapse clips for a client using stills from a GoPro Hero2. I’ve been following the steps in this tutorial and everything works really well! Except… the image quality in the quicktime movie file is noticeably grainier than the original stills. I’ve tried exporting in ProRes HQ, and using the Save command rather than Export (I read somewhere that this doesn’t apply any compression) but there’s no improvement.
Can anyone shed any light on this frustrating problem? Many thanks.
can you do me a frame grab vs the actual still?
Sure thing, will ping them across later today. Thanks!
So i have been doing the timelapses like you have explained, recently i did my first one in raw on a canon 5dmk2 (excited!) But after i shot it and went to import the image sequence into quicktime pro 7, it will not allow me to import raw images, only jpegs. Am i doing something wrong or do you have to convert your images to jpeg?
Excellent tutorial Philip, thank you very much for putting it together; it’ll definitely help me try out a few things with timelapse.
Best wishes,
David.