
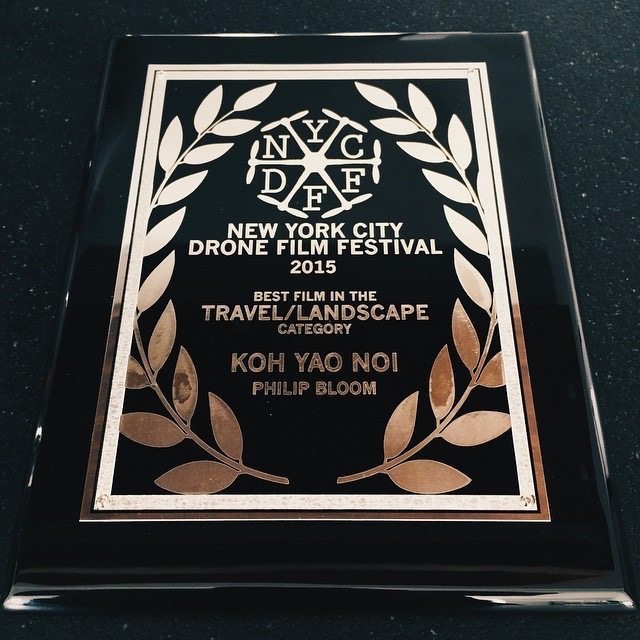
EDIT: Amazingly this film won best travel / landscape film at the 2015 New York City Drone Film Festival!


PLEASE READ MY ETHICS STATEMENT HERE


Koh Yao Noi from Philip Bloom on Vimeo.
So here we are…a delayed part 3 of my Phantom blog post series. Although this is listed as 3 of 3, I doubt it will be the last time I write about it.
Initially this was to be just a video review, and it is all shot, but then it felt out of date to me, and as it was all shot on location in the USA, it was hard to make it work without being messy. I may come back to it at some point…
So part 3 has become a long-ish term look/ look back to see if much has changed from my first post and also a look at my first proper aerial film since the two I did in Arizona/ Nevada and the first with a goal/ idea in mind rather than just the usual! After all I am incredibly new to this. I flew (and crashed) my first Phantom in February and didn’t film anything really until April.
I did a little talking thingy for Canon about the 1DC and C300 at a big expo in Seoul, Korea a fortnight ago.. It’s a long way to go for a day’s work, so I before I left I decided to make the most of being in South East Asia and take a “break” after the job. I have always wanted to go to Thailand, and despite still being 5 and a half hours away, it felt like the perfect opportunity to finally go.
Me being me, the main reason to go was not to sit on a beach soaking up the rays. I wanted to shoot! I love to film, whenever I can. It’s my passion as well as my job. It relaxes me, it makes me happy, it’s my protective blanket, my escape. It’s many things to me. When I haven’t filmed anything for a couple of days I get itchy and there only one way to scratch that itch! 🙂
Normally I bring my Canon 1DC to places like that, but I had recently picked up the GH4, and this was a perfect opportunity to shoot with the new little beast, see what it was capable of and give me lots of lovely footage for my upcoming video review (I will finish this one!) PLUS of course there was the Phantom. How could I not bring the Phantom?
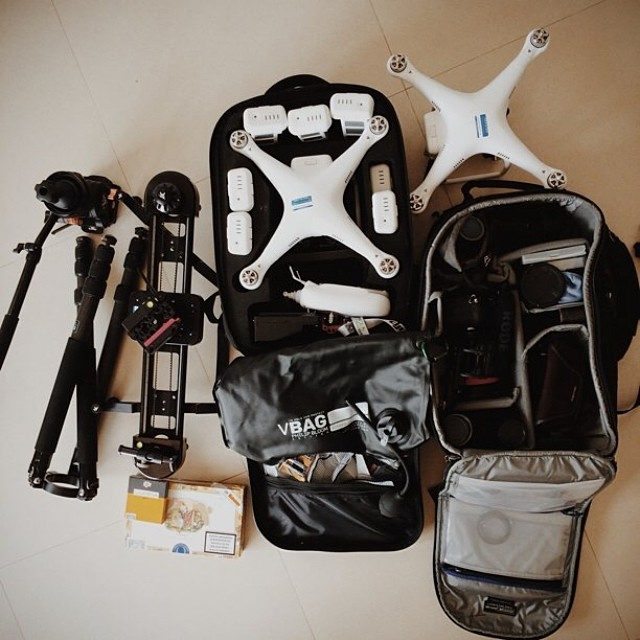
So alongside all my normal camera gear, I brought two Phantom 2 quadcopters with GoPro Hero 3+. No Vision 2+, just the normal Phantom 2.
I love a lot about the Vision 2+. It’s a brilliant quad to learn with, it’s what I used…but the camera is just a let down. I wish it had a camera to match the lovely, simple and solid FPV set up through the phone, but it doesn’t. We will have to wait until the next generation. In the meantime the GoPro 3 especially the Hero 3+ is a cracker of a little camera though. Especially in the 2.7k mode which shoots 24p or 25p which is only available on the 3+.
Whilst we are talking about the 2.7K mode, deciding which one to shoot in is up to you. Many like shooting 50p or 60p as it makes smoother footage I am told. Many of the modes are simply crops of the other ones, so you aren’t gaining much. When I shot the film in Thailand, I was mostly set to wide on the 2.7K, but I also had it at medium occasionally. You can also buy replacement lenses which aren’t quite as wide. I do have one but have never fitted it!
Other settings…for me I always shoot “Protune” flat, which is the professional recording mode for colour grading. It definitely gives you the best dynamic range, but the grading can be tricky as the btirate isn’t high and a flat image always needs work. I cover this more in the post section further down.
Personally I always set the camera to ISO 400 max, as the camera sucks when it goes higher. I turn off auto white balance and set it to what is appropriate where I am filming. Other stuff like exposure compensation is up to you and your shot. You can’t have the wifi on when flying the Phantom, as it can interfere with the radio, so you cannot change settings whilst in the air. A shame, but you can’t have it all!
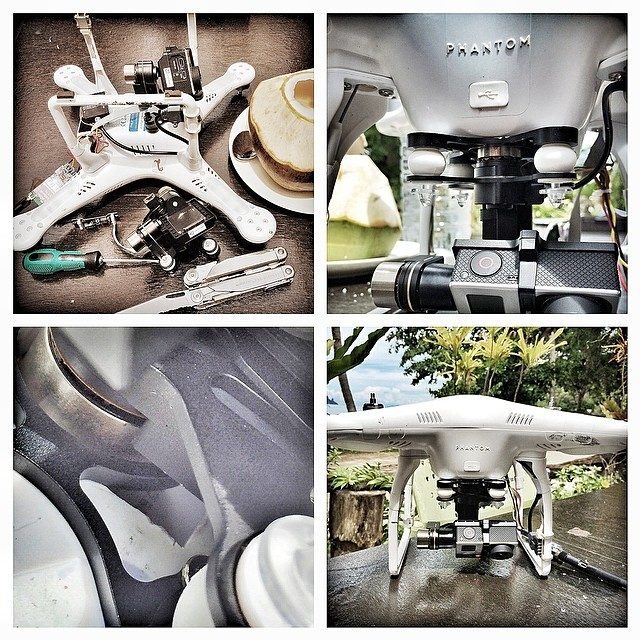
Of the Phantom’s I brought, one was new and has a 2 axis zenmuse gimbal on it with the FPV (first person view video downlink so you can see what the go pro is seeing) system comprising of a Boscam TX and a Black Pearl Monitor RX. It also has an iosd device for the telemetry which is essential!
As FPV systems go, this one is not bad. I have yet to find anything that matches the loveliness of the vision 2+ system. Lightbridge from DJI could be the solution, but that is expensive and I have yet to see one.
The other one is my original one which did have an FPV on it, but it wasn’t working so I took it off. You can use them without, just don’t go crazy and keep it pretty close AND keep an eye on that battery level on the Phantom…that is SO important!
Apart from knowing where you are, the biggest plus of an FPV system is that pretty essential ability to compose your shots properly, not just have those big wides!
Both Phantoms had the old 2 axis gimbal on them, but I brought the new Zen Muse H3-3D with me to swap it over. In fact a couple of days in, I did put the 3 axis on the Phantom that didn’t have the FPV set up. I chose that one, as the one with the FPV is such a professional build and neatly done. I didn’t want to mess it up. It’s not a big deal swapping gimbals but still, I just wanted to be super cautious.
The only problem with the Phantom I swapped gimbals on was that it was an older one and there isn’t a big enough hole for the 3rd axis. Newer Phantom 2 models have a larger hole to accommodate it. You can buy adaptor plates which also come with longer legs (which will make it a tight fit in some cases) but I didn’t have the adaptor. What I did have was a Leatherman! So I performed open heart surgery on it and made the hole bigger! Worked fine! Just be very careful as the USB port leads are exposed beneath where you need to cut!
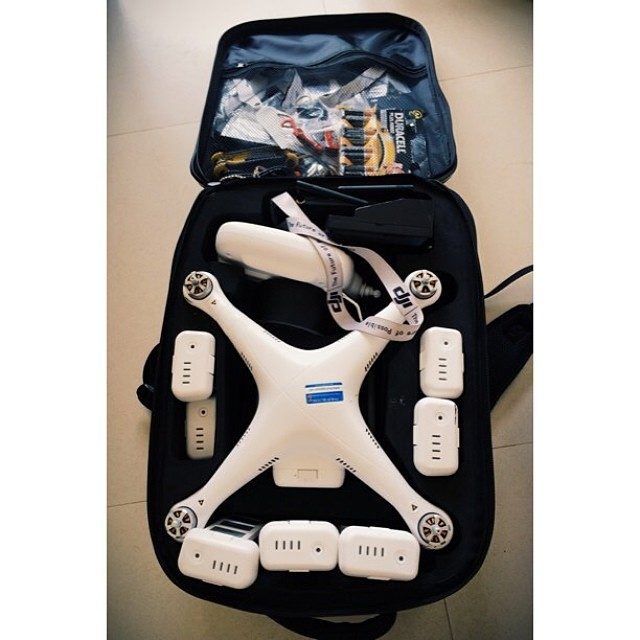
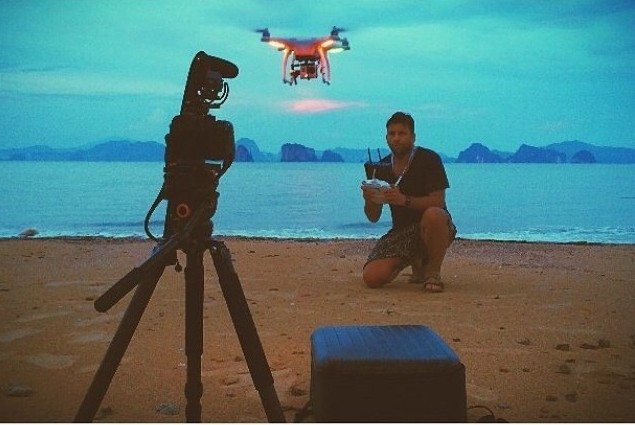
I carried the Phantoms, well I transported them to be more accurate, in two backpacks I picked up on from a UK company called “First Person View”….I then packed these two into a suitcase. I used to use a big Pelican style case, but that’s massive and can only take one. These backpacks are nice and compact and as you can see from the picture below, you can squeeze a lot in. Yes, that’s a lot of batteries, but if you want to film/ fly for most of the day and with each one lasting around 20 minutes, you need them!
You have to take the props off the Phantoms really when carrying them, but that’s not a big deal for such a neat solution.
I chose to stay on a very under developed island, one of the handful that are left in Thailand. I wanted to shoot real Thailand and that can be hard to find. Koh Yao Noi was the perfect place. Close to many other places to shoot (which I did with the GH4) but the island itself had lots of little places to discover, with about only 18km of roads (but lots of off road places) and only a handful of hotels.This was a place with a lot more locals than tourists. Much nicer for me filming wise!

I actually didn’t plan to shoot a whole piece with the Phantom. Instead I wanted to use it like I use any other filming tool, be it a slider, Movi, jib etc. The Phantom was to be used for key shots, well that was the plan anyway!
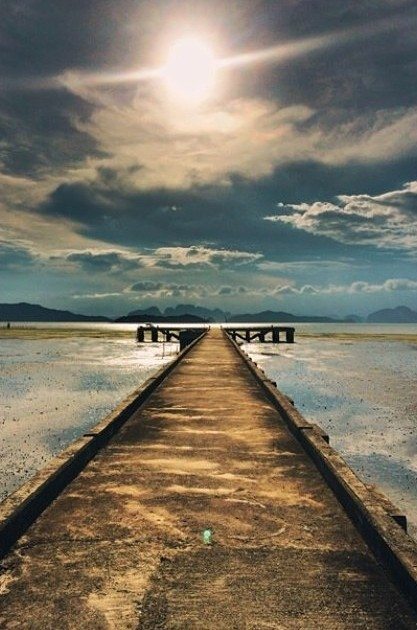
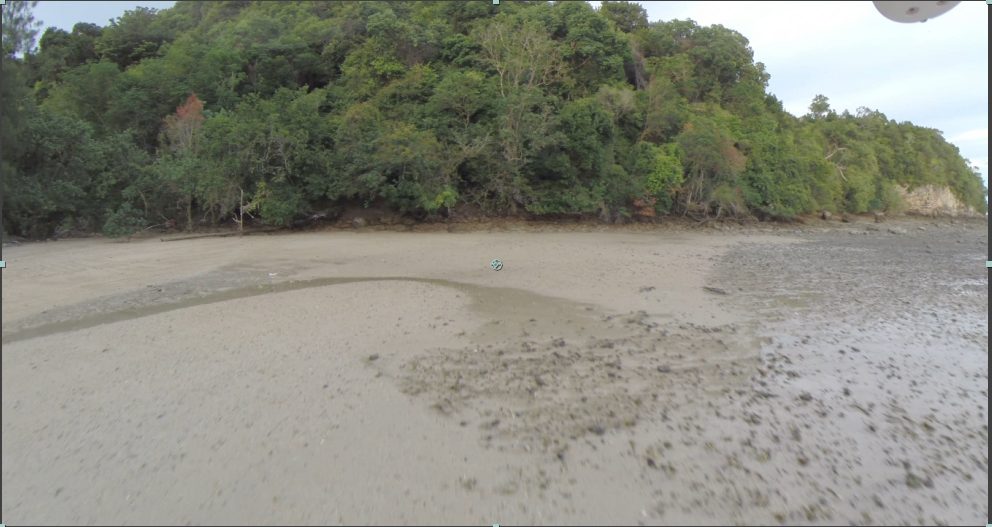
The reason I say this is because on the 4th day I visited, for the second time, a little village out on the water. I had been there a couple of days early, but I only shot with the GH4. I thought at the time that later in the day the pier would look amazing when I filmed it on the phantom. Below is the pier in all it’s subtle HDR iPhone glory!
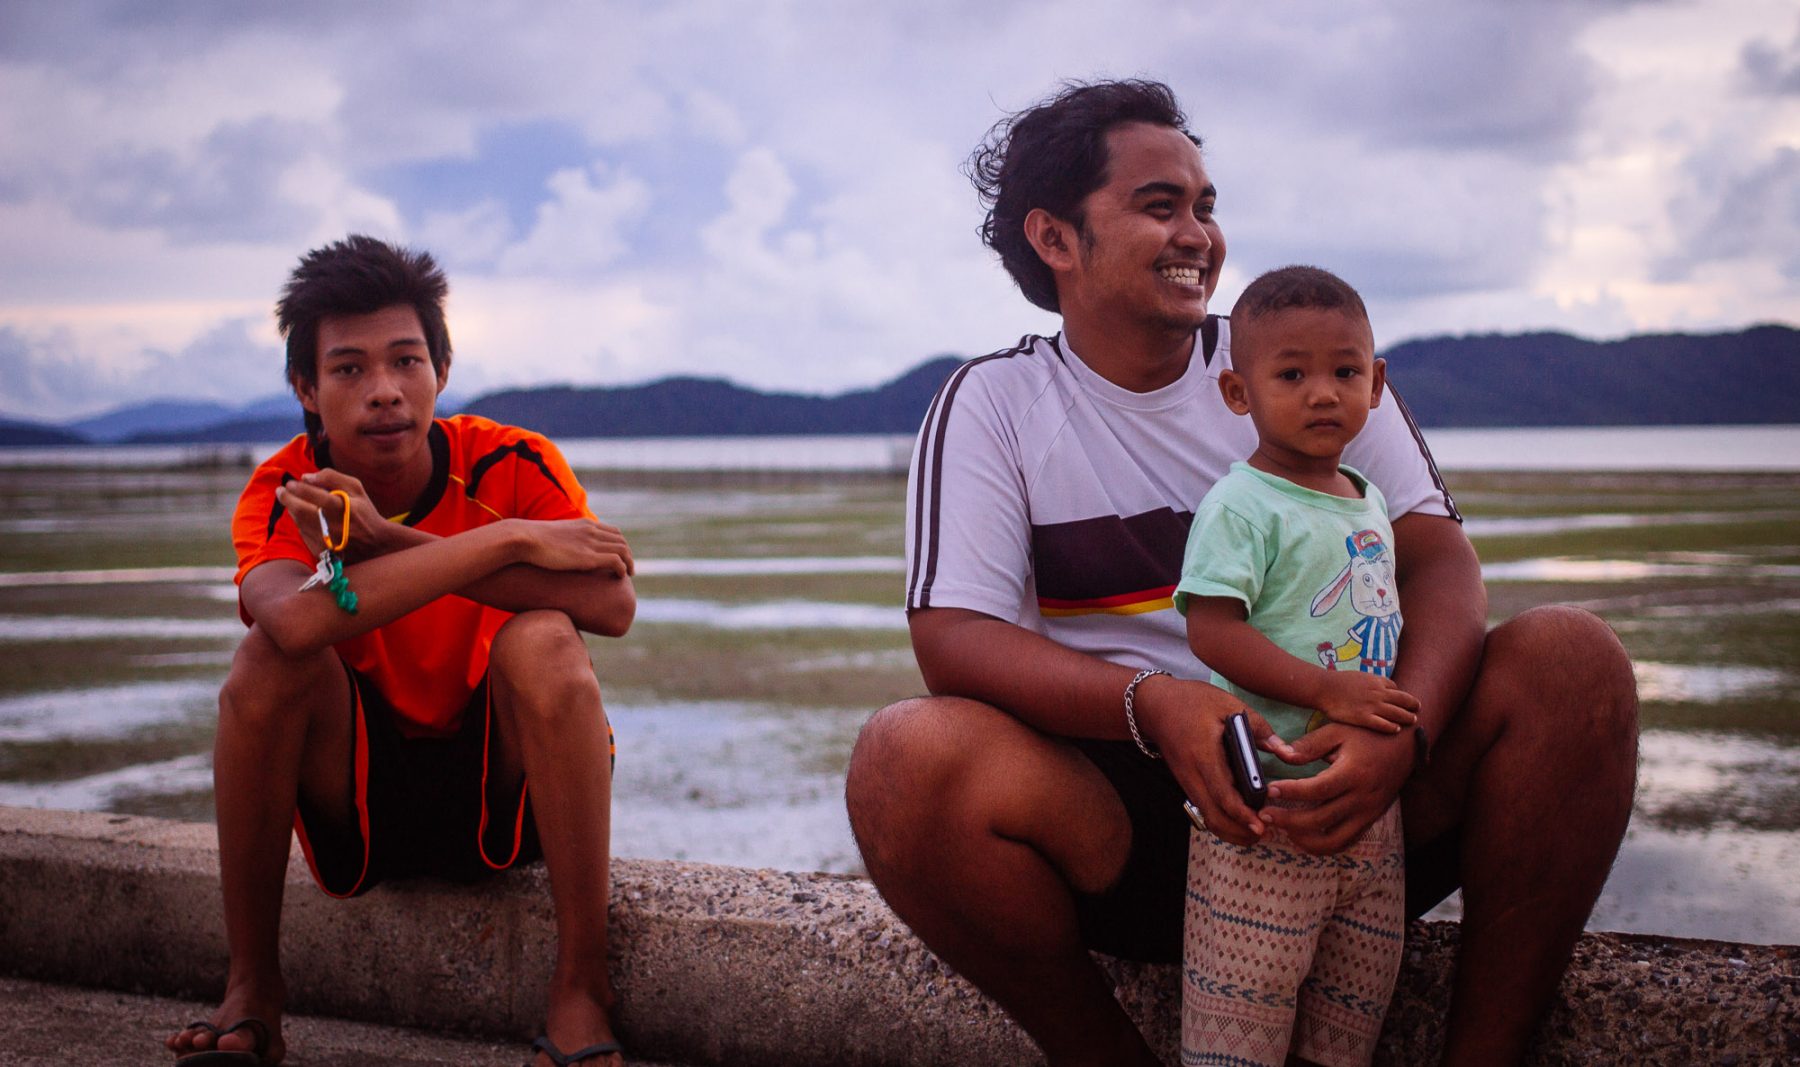
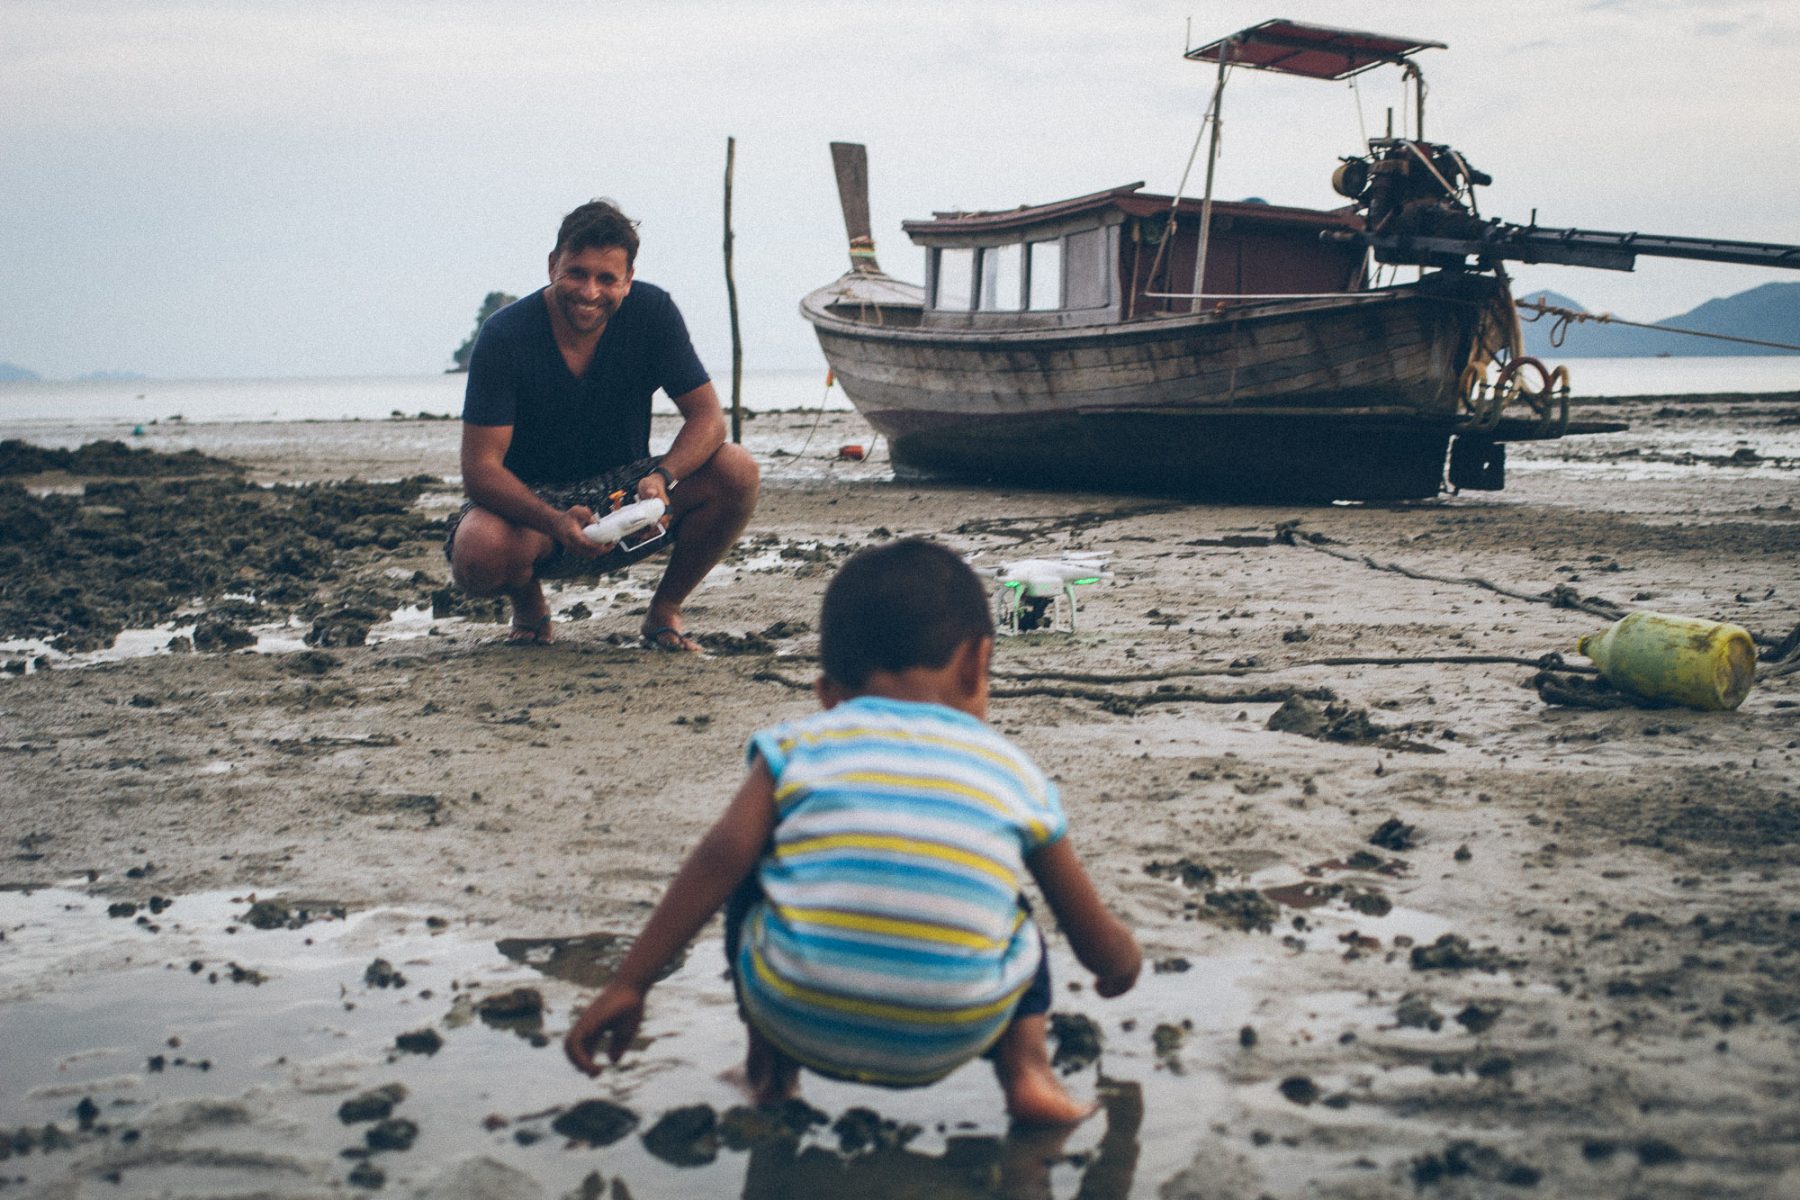
When I took my Phantom there on my second visit, it all just came together. Half an hour earlier a local on a moped saw me flying and came over to ask what it was. We talked for a bit, I filmed him driving down the road, he loved it. When I got to the village he was there too, it was where he lived. The locals were already really friendly, but this helped even more.
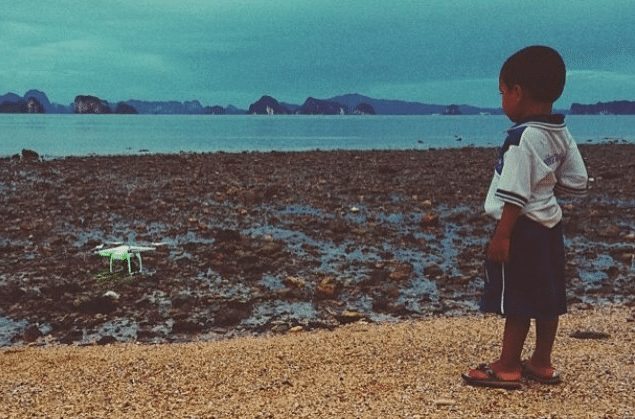
The first shot I did was a long sweep through the village skirting over where the water would be if the tide was in. I showed what I was doing to the locals and they were fascinated, even more so when I took the Phantom up high to do a top down shot!
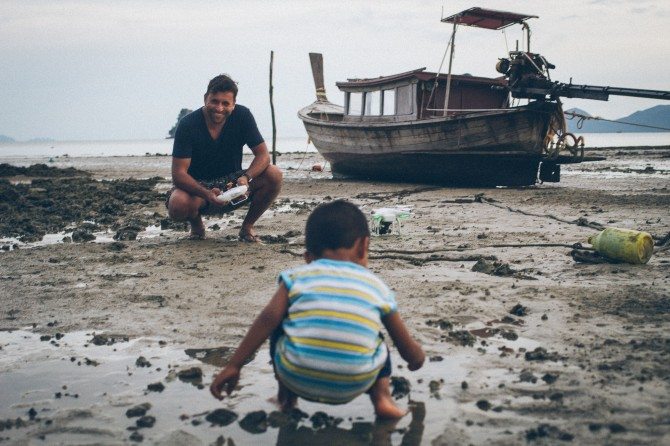
At this point the children of the village had swarmed around me. They were incredibly excited at this flying thing and I couldn’t go anywhere without them being stuck to me! I really wanted to capture them running up and down the pier in their excitement so I put on the prop guards onto the Phantom with the FPV to be extra cautious. Whilst I feel I am doing OK as a pilot, I am nowhere near perfect. Even then things can go wrong and whilst the blades are plastic they can still hurt, with the prop guards on you are much safer. The downside is they get into the shot…a lot!! At least I had my 3 axis Phantom without FPV ready to do shots which I needed to be wider!
The key thing was the children were not just random and doing what they want. They were under my direction, whilst their reactions and most of their actual movements were natural, with a local man from the village next to me I spoke to them and gave them instruction as to where to be and if they got to close to ask them to move back.
When I got all these lovely shots of the children, I knew I had a standalone film. I had shot a lot that day, but this was the stuff that took it from a montage to a film with a journey and I feel a heart!
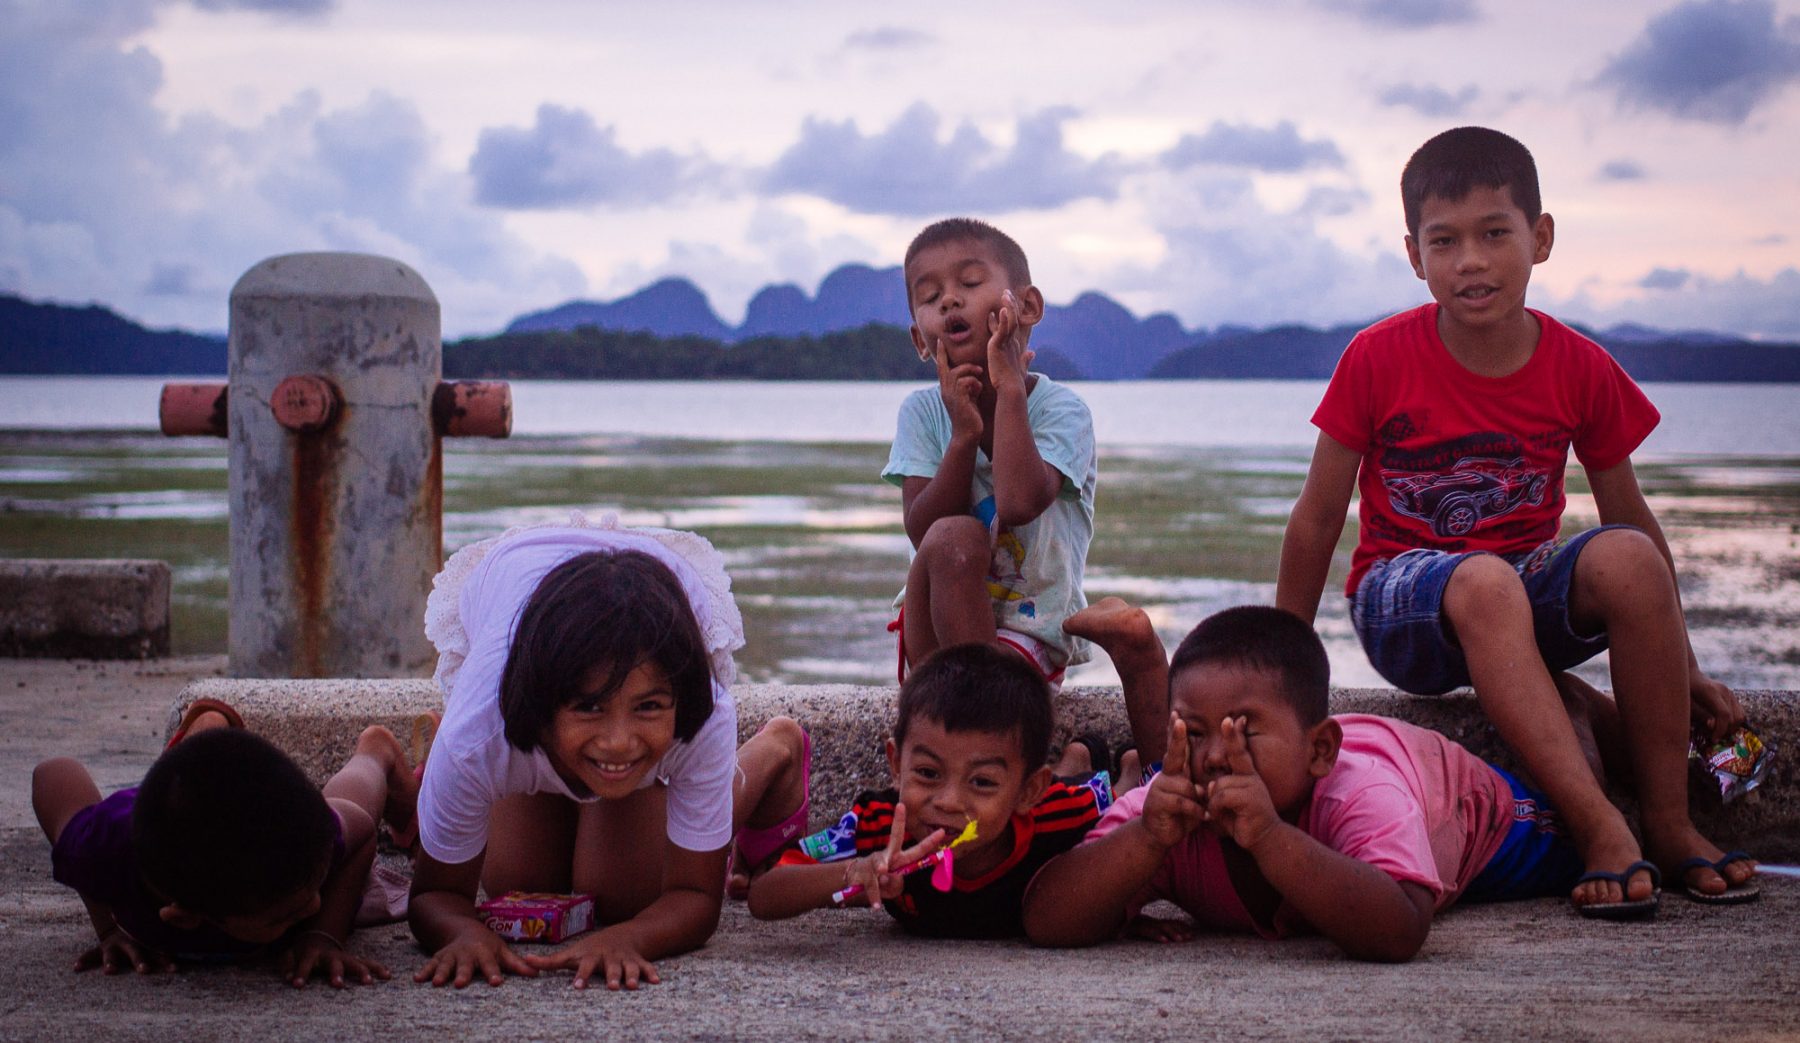
For me, films with a human element are by far my favourite type to make. That’s why I love making my mini docs. It was great to be able to film something entirely with the Phantom 2 and have a human element!
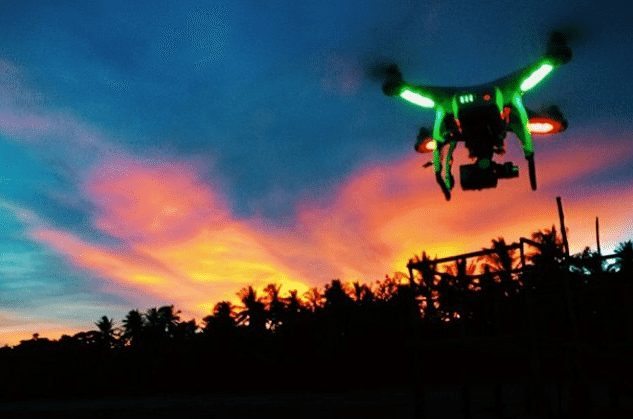
When you watch the film, near the bottom of this post you will see a variety of shots. Lots over water, which in itself is a testament to my increase in confidence flying it…but that’s not all, confidence-wise. There are a number of shots which go through things, skim under stuff, between trees. Lots of them! I loved the challenge of getting these, and with care, precise control and especially line of visual sight, I pulled them all off without crashing once! The line of sight really is key. It’s all very good looking at your monitor but aiming your phantom with the object you want it to go through like a target with your eye will give you a much better chance of pulling the shots off! I did a number of these backwards to. It’s essentially the same thing, and there is something really cool about revealing the obstacle rather than seeing it come towards you. A mixture of both works well really.
There are a couple of shots going down the road in the main village on the island. Don’t worry, I didn’t fly it down there. I simply turned the Phantom on BUT didn’t start the motor. I just held it and used it a bit like a Movi as I drove my ATV. It worked pretty well!


I did have some problems with the footage though. Not all of it, just occasionally. Jello. The dreaded rolling shutter jello. I hadn’t experienced this on the Phantom 2 before, so I was surprised. I hadn’t gone through much of my footage each day, as I didn’t really have time. I should have, as I would then have seen the problem. It was after the village and the children that I saw it, and going back through my previous footage, I saw it pop up in various shots too.
There are a number of reasons why. Motors set too strong in the software, blades slightly damaged, wrong rubber dampers. Lots of things to try and go through to eliminate it. Unfortunately, as I said it was only after the fact that I saw it. Not just on the 3 axis Phantom 2 but on the 2 axis one. The 2 axis one was new, and this was the first time I had flown it. Foolish not to check it first of course.
So with this problem, there was only one thing I could do. I couldn’t re-shoot, it was FIX IT IN POST time! 🙂
Before I go onto the post section of this er…post, I wanted to just say a little bit more about the whole experience of shooting/ flying. It really is incredibly fun and quite addictive, although kind of hard to use where I live in London!
It’s obvious, but if you put the hours in, the results are worth it. Anyone can grab a Phantom 2 and zip it up in the air, make it zoom along really fast and then bring it back down. The skill is control and getting the composition of your shots right. After all, how many of you when you get a camera, stick a wide angle on it, hit record and then run around for 20 minutes without looking at what you are shooting? EXACTLY!!
Learning fine control is key. Take it out into the middle of nowhere. Learn how to land exactly where you want to. Learn how to make it circle an object. Create subtle jib like shots. Not everything has to be a big sweeping motion, although they are very cool! What makes the Phantom 2 and other multi rotor systems amazing is the freedom they give you. You just need to be aware that there is a learning curve, and you must be aware of the safety aspects, and of course the legal aspects. There is a whole blog post about it here, but remember the legal stuff is different in every country. Some countries like Spain, Austria and South Africa for example, have banned the use of “drones” as they call them, both commercially and for fun.
I am flying just for fun and to create stuff like this for myself. I may well get certified at some point, but I really have no urge to fly anything bigger. I am just having fun, and with the GoPro 4 expected out soon and with 4K, I am pretty happy sticking with the little Phantom 2 (and future ones!). It’s possible this may change, but the thought of even putting my GH4 on a multi rotor scares the crap out of me. These things do crash, no matter how good you are and losing a GoPro sucks. Losing a GH4 and a nice lens would suck a lot more. In fact I know someone who crashed an Octocopter with an Epic on it into a salt lake. That would suck big time!
POST
I hate editing, and I love editing. I love seeing it come together. I hate how much time it can suck out of your life. When you have to fix something in post that requires a lot of work, it’s a massive pain in the arse. I would rather be out filming that inside!
On that note, I would rather be sitting on my sofa vegged out watching a film right now, as I have been editing all day. Hence this bit won’t be long. Just a few bits to help you along and to show what I did.
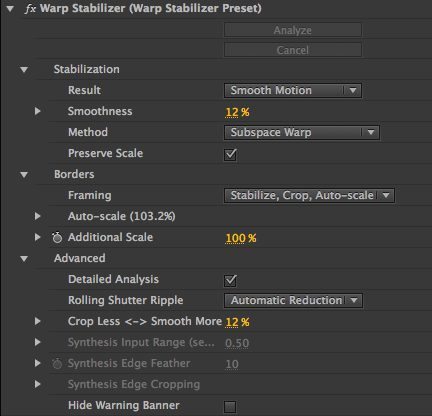
To fix the jello, I used Warp Stabilize in Adobe Premiere CC. It really was a case of trial and error to find the best settings. You can’t make it perfect, but you can do your best! I hate that warping effect that is so easy to get. For the most part, I used the “position” method. Below is an example of one of the settings.
I did transcode everything to ProRes LT out of the MP4, even though I am editing on a Mac Pro. It does make things easier, and Premiere still isn’t fully optimised for the MacPro.
The aspect ratio of the film is 2.35: 1, as is frequently used by me. I just like the look of it. There are a number of ways to edit this way. I normally just place a mask on the top video layer and shift the video within it up and down to adjust my headroom/ composition.
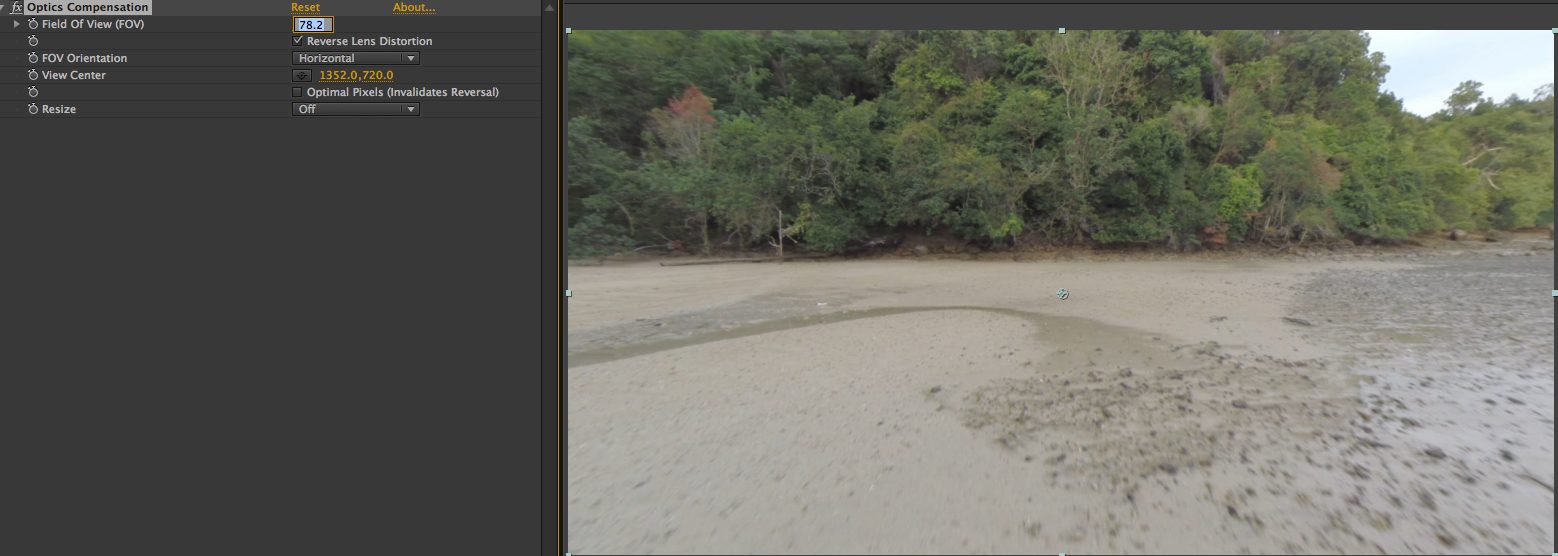
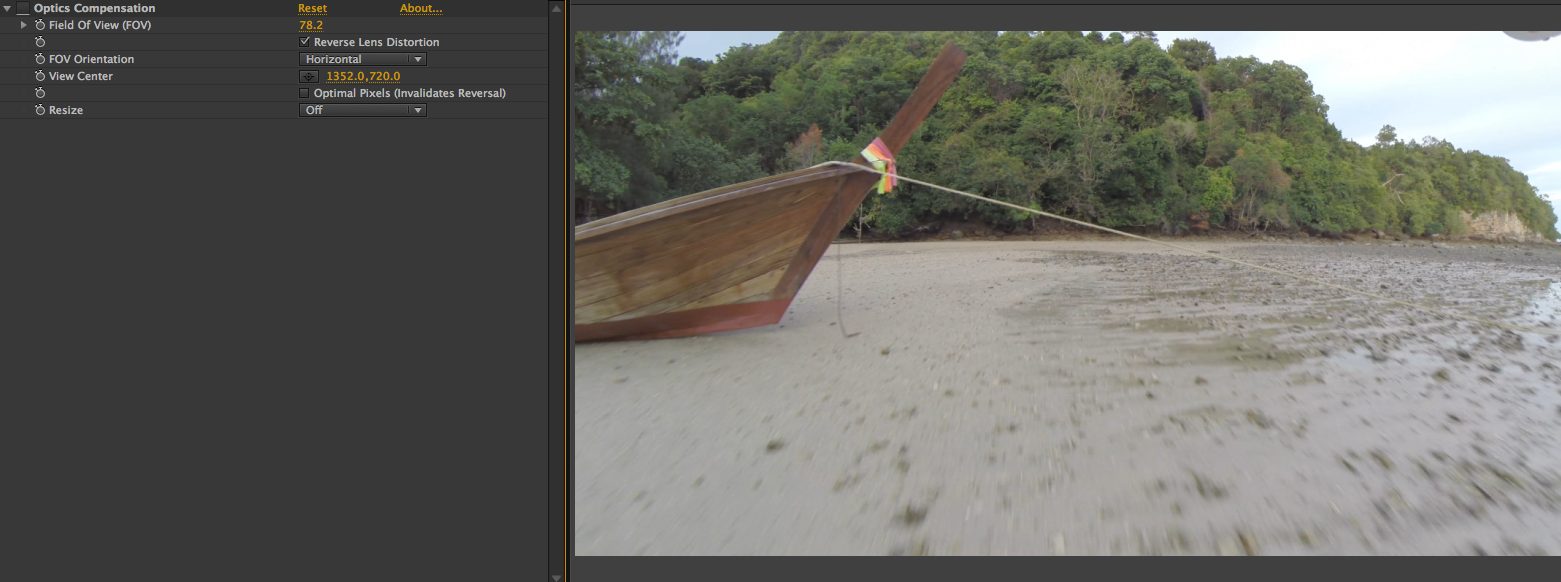
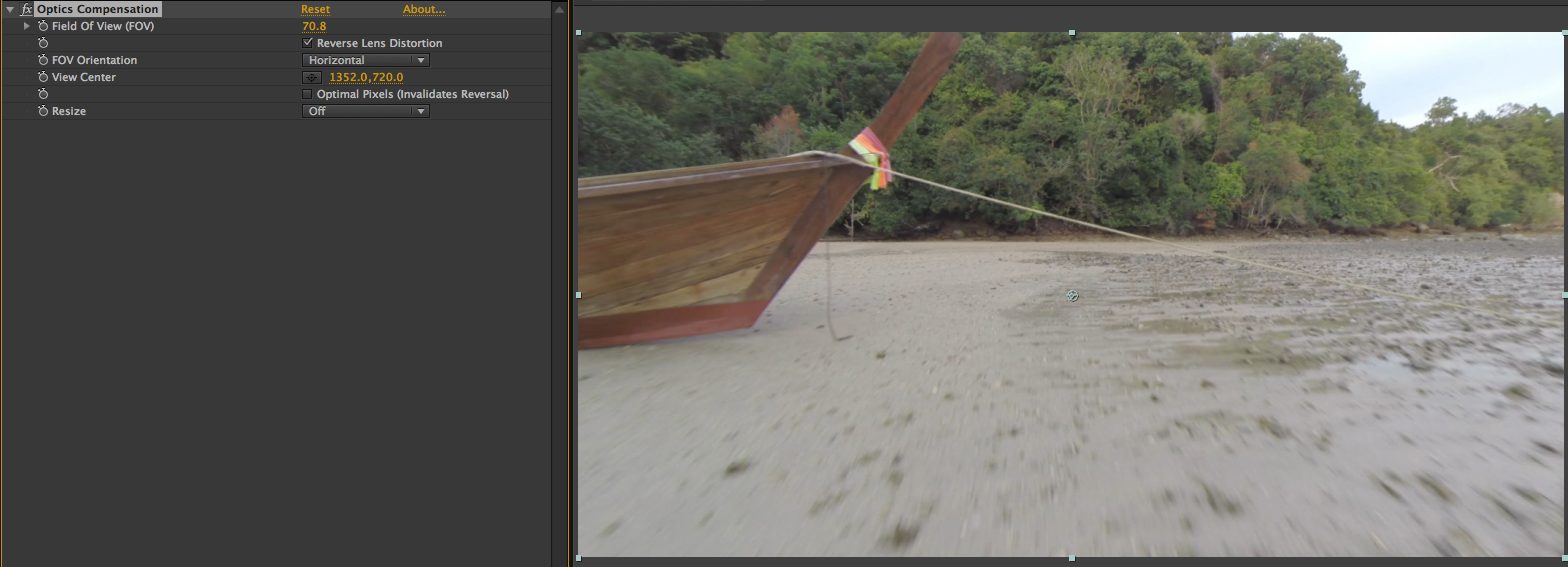
To remove the fish-eye/ wide angle of the GoPro, there are a few ways to do it. I have tried the GoPro software and Magic Bullet looks gives you a quick and simple fix. The one I use gives me the best results and that is “Optics Compensation” within After Effects, and it’s super easy to do.
Just right click the clip you want to fix in Premiere and select “replace with After Effects composition” you then drop the effect onto the clip, select “Reverse Lens Distortion” and adjust the “Field Of View” to a setting that works best for you. Depending on the severity of the barrel distortion, on average I set it to around 70.


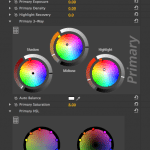
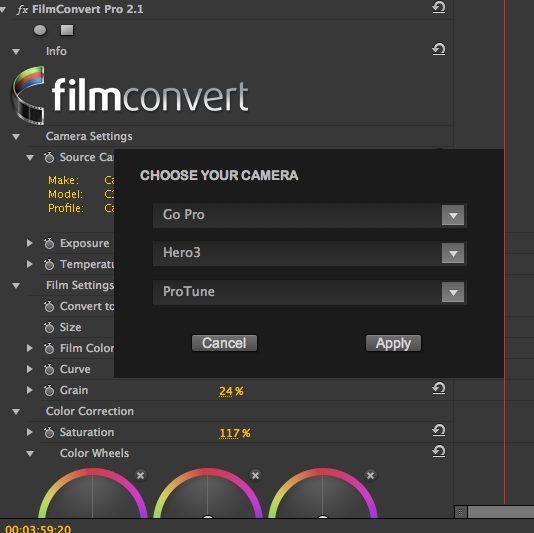
For the colour I used my usual two culprits. Magic Bullet Colorista II for colour correction and then FilmConvert for the grade.
Colorista II evens out my exposure and white balance between shots plus brings my highlights back or lifts my shadows. It’s very powerful, but I am using it just to make all the shots match. You can get it and other Red Giant products listed above for 10% off with the code bloom10. Click the banner above or here to zip over there. I love this plugin, and It’s been my main colour tool for many years now. I am not a pro colourist. I don’t really know how to use Davinci Resolve, nor is it really needed here. For me, working within my NLE makes a lot of sense for the way I work!
I truly love FilmConvert. If you follow my work you, will have noticed. It’s a gorgeous plug in (or standalone app) that really can make your footage look way more organic. We aren’t talking Instagram here. We are talking proper film stock emulation from 8mm to full frame 35mm. The stocks are very accurate, but what really makes this stand out, apart from the ease of use, is all the presets to make your life easier. Grading Blackmagic shot in film mode is a breeze with the presets, and they have just released loads more covering the GH4, Digital Bolex, F55 and more. There is a preset for the GoPro of course, and this is a very handy thing indeed!

I always tweak my settings though, never sticking to the preset. It’s there as a starting block. Use it that way. Experiment, and you can easily get some fantastic results.
For this edit, I did spend a long time grading it. As I mentioned earlier, the Protune setting, whilst flat, is delicate. With the skies being quite cloudy when I shot this film and sun peeping through, the dynamic range was challenging. I was able to pull a lot back but, the footage can so easily fall apart. Gentle massaging was needed.
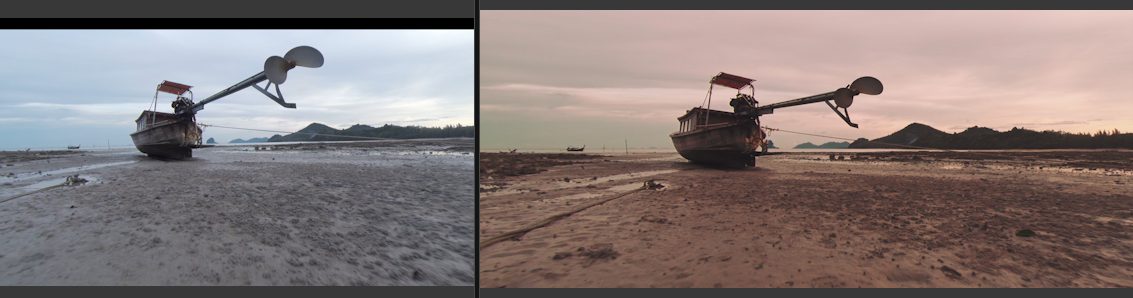
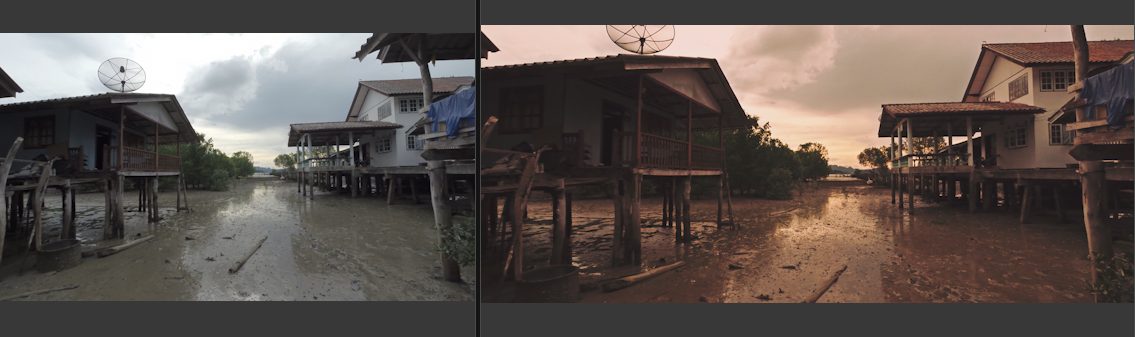
One thing that did help if stuff started to band too much was the grain setting in film convert. It effectively dithers the areas to hide it. Try to keep the grain percentage low though, as little goes a long way. Also, when it comes to exporting, it makes it much harder to compress. I always upload to Vimeo in ProRes Proxy now, to hold onto that grain. Even though Vimeo transcodes at 5 Mbps, if I upload in 30 Mbps or higher like ProRes Proxy’s 50 Mbps, the grain is held remarkably well online!
If you want to get FilmConvert, below is a discount code for you giving you 10% off!
I wanted to talk about one last thing before I went, and that is music. Music is SO important to me and to my films. It took me almost a day to find the perfect track for this film. I must have listened to almost the whole Music Bed library (the site I use most of the time). I knew what I wanted, I just didn’t know what it was! 🙂
The track needed to have a journey like the film, something that would match. I needed it to be around 5 minutes long, and for the change in tempo/ feel to occur roughly halfway through. When I found Gatlin Elms’ “For We Never Knew Your Beauty” I knew this was it. It’s a light bulb moment. You can spend hours even days at an edit and it simply doesn’t work. When the right track comes along it all clicks into place.
What I especially loved about this track was the interesting sounds within it that I could make use of. If you watch carefully, see how they fit the pictures. For example, when I skirt too close to comfort over a fishing boat’s rope, I timed it with the track as it sounded like a string instrument like a violin being scraped, or when i go under the wooden structure as each strut is revealed I time the edit to hit the reveal on each strong note within a particular part of the track.
It’s this sort of stuff that is worth making the effort over. Sound is so important. I would normally use natural sounds in things like this (not that were recorded at the time obviously as the Phantom is damn noisy) and although I did use a little at the beginning and end I made the music my sound.
The temptation to just use any track under the images can be tempting, but finding the right one and making it fit really can make a difference!

Anyway, that’s enough waffling from me. I need to go chill now. It’s much later than I had hoped to finished this. The post just became a bit of a monster. Hopefully there is stuff in here that can be of help. If you have any questions then you can ask them in the comments below!
Thanks and enjoy my film. I am really proud of it.
Koh Yao Noi from Philip Bloom on Vimeo.