


PLEASE READ MY ETHICS STATEMENT HERE

The Return Of Micro Machines from Philip Bloom on Vimeo.
Redrock & The Rookie from Philip Bloom on Vimeo.
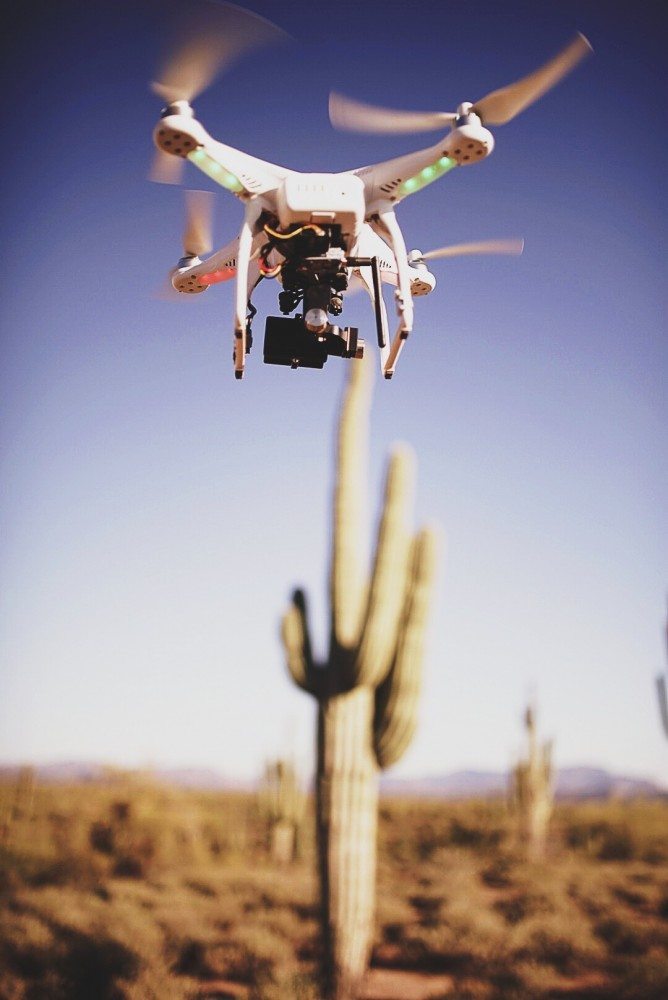
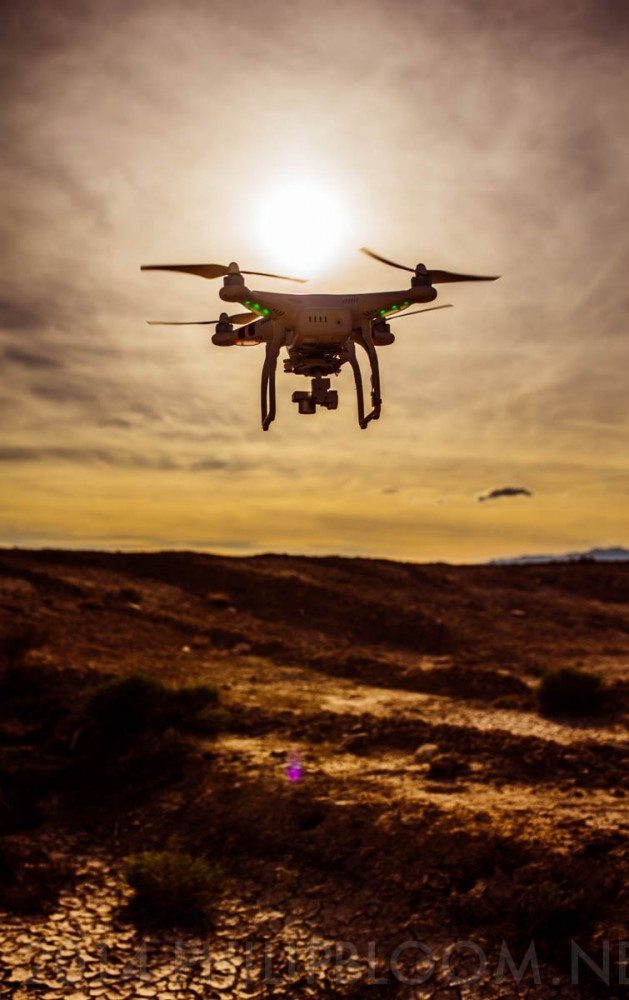
The Phantom In The Desert from Philip Bloom on Vimeo.
 A few words from me!
So for part two of the 3-part blog post series on shooting with Phantom type quadcopters and bigger. At the top of the post are 3 little edits of some fun that I have had learning to fly and shoot with these. It’s incredibly addictive, actually quite expensive if you suffer losses (which almost everyone I know has) and it also can be quite dangerous.
There are two parts to this post. Part 1 is from Simon Beer talking about his discovery of this type of filming, his journey and what you need to know about safety and legal aspects. REALLY IMPORTANT STUFF!!!
Part 3 will be my long term test…who knows when it will bring it out…most likely when I have shot a lot more! I also have filmed a review but it is kind of outdated now! I may or may not come back to it.


SIMON BEER

The beginning
Flying high above the Grand Canyon in a EC130 helicopter the immortal words of Bosco (B.A) Baracus of the A-Team resonated through my head – I ain’t getting on no plane. I’m not shy to say that I’m not a fan of flying, not in any respect. I recently got into trouble with my wife by describing how landing in a plane is nothing short of falling out of the sky, my son Thomas who is almost four years old took great delight in shouting out to the many passengers around us on that particular Ryanair flight that we were crashing. Big trouble.
Just like Baracus, I always seem to end up getting conned or coerced onto or into aircraft of a dubious nature. One of my finest moments was flying in a two seater microlight. This aircraft was nothing more than bucket seats on a scaffold pole frame. I was wearing a flight suit and a crash helmet, what the helmet would have helped me achieve in the event of a crash I have no idea.
My involvement with aerial video started almost two years ago to the day. Flying above the Grand Canyon in the EC130 I was caught up in the absolute beauty, solitude and majesty of one of the most spectacular sights I have witnessed. The sun was starting to set as we flew away over the barren desert and I knew, I just had to shoot video from this perspective.
With me on the helicopter was a friend who I consider to be an Alpha Geek, a man with skills and capabilities of a technical nature that leave me quite in the shade. Within the rapture of the moment I expressed my desire in quite a throw away fashion that I wished I could get more shots like this without the budget for a helicopter.
Unknowingly to me I had just thrown down a gauntlet, my adventure which has encompassed me since had truly started. I wasn’t to know however until some time later…
Unremarkable becomes remarkable
As filmmakers we strive to tell our story, we evoke emotions through our medium – pictures, words and music. We must captivate and hold on to our viewers so as that we may share our story in its entirety. To do so we must produce content that demands attention, we work hard by varying shot sizes, angles and blurring the normality that we all live in a day to day basis in order to provide our viewers with an escape.
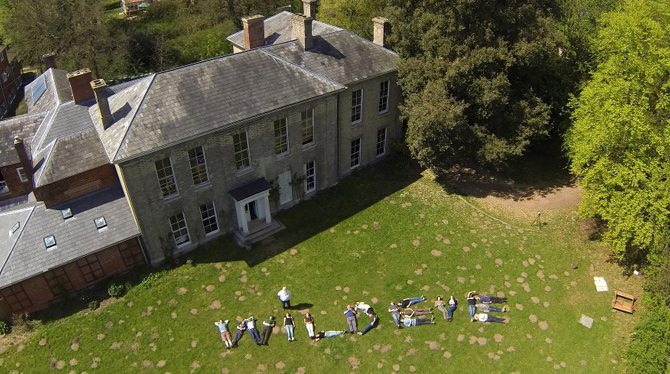
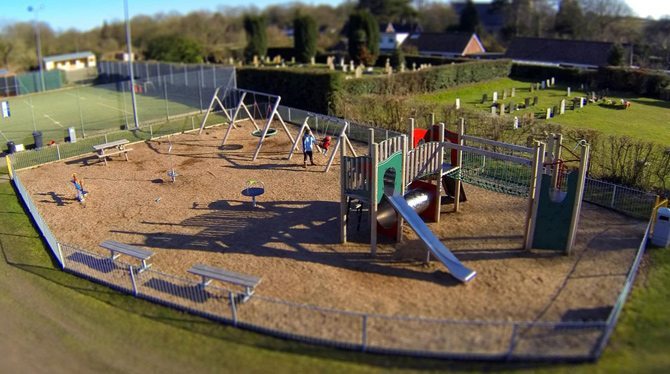
To me aerial video can utterly transform a view that you may have seen hundreds of times. You may have walked past a building or an open space and you certainly wouldn’t have seen the full picture. It’s not for every shot but if you use aerial video subtly and as part of telling a story it can be very effective and sometimes even spectacular.
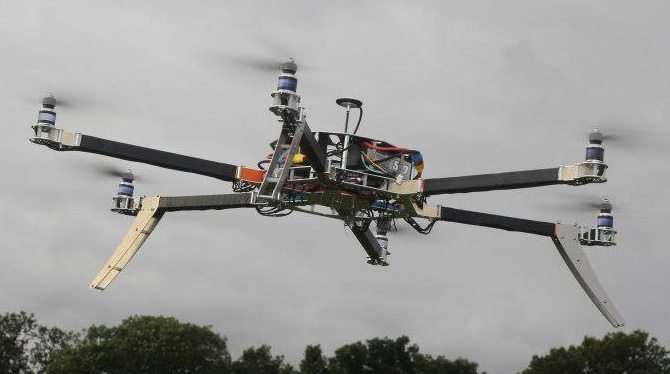
A month or two after arriving back to a late Spring in the UK and out of the blue I started to receive a number of technical drawings, then 3D renders of what can now retrospectively be described as a lumbering great beast of a multi-rotor. Peter, my Alpha Geek had designed and was in the process of building a hexacopter from laser cut sheet aluminium.
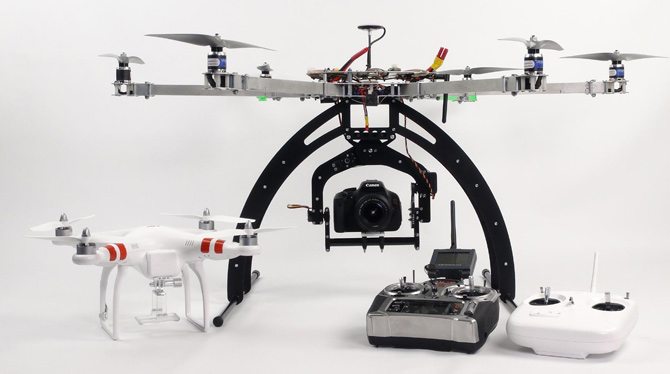
At this stage I need to explain just what we were building, in construction was a multi-rotor. Not a helicopter but a flying machine with multiple rotors. A quadcopter as the name suggests has 4 propellers, a hexa 6 and an octo has 8 props.
I was green, I had no idea whatsoever about this technology and quickly embarked on a very steep learning curve. My priority was to learn how to fly and to produce steady high definition footage. At this point the legality and safety considerations of putting many kilos of metal, DSLR and lithium polymer battery into the air hadn’t even crossed my mind.
We flew the hexacopter for first time in a large empty field, grass as far as we could see, in the distance trees were blowing in the wind, the occasional dog walker and quite some distance behind us a circus were setting up. Tents were being erected, generators running and somewhere in my imagination lions were being fed and watered before their 15 minutes in the big top. Despite my abject fear of making the ten o’clock news by crashing what I now affectionately think of as my metal angel of death we continued flying and captured some truly great video of nothing much.
The very fact that we could steer, ascend, descend and manoeuvre this lump of metal amazed and sucked me in deeper. Over the next few months we continued to develop and add extra functionality to our first airframe. At this stage I must add that I use the term we liberally as Peter was having the ideas, we reduced the span of the craft by cutting the arms down so they could then fit into the back of our pick up trucks and changed certain bolts from steel to aluminium. Thinking back I’m not sure this had a great impact but it aluminium bolts are just amazingly light!
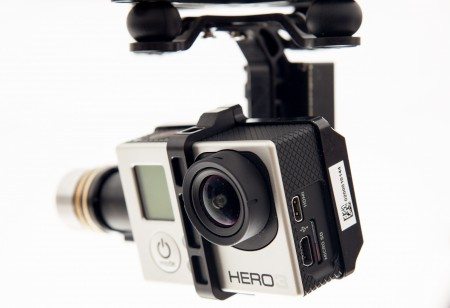
Around this time I remember laying in bed early in the morning with my wife and then two year old son. DJI had announced the Phantom quadcopter and we lay watching a promotional video shot with a Phantom and a GoPro camera attached by a basic plastic frame. My son loved it and kept asking me to play it over again. I knew then I needed one.
The video was on a par with what we were recording but the aircraft was much smaller and lighter. Manufactured from plastic not metal the Phantom was a much safer alternative, just as our hexacopter was taking off it was retired and I bought into DJI and the Phantom.
Operating
My Phantom arrived and I started to get more confident, I quickly learned the Phantom bounced easily and experienced a few crashes. I should stress now that if you intend to get involved with flying multi-rotors the question isn’t will I crash but when and how hard.
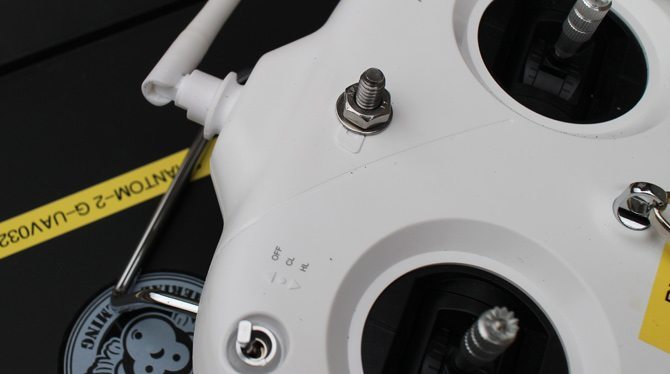
Flying multi-rotors isn’t overly difficult in the grand scheme of things. With the Phantom ships a simple matt white transmitter with two sticks and two switches. Under your left thumb is a stick that controls your throttle (up and down) and yaw (pan), with your right thumb you control pitch (forward and back) and roll (left and right). The most important switch and the one the makes your life easy is top right of the control and this is your mode switch. On the Phantom series aircraft this switch is labelled as GPS and ATTI, you can program a failsafe position as well.
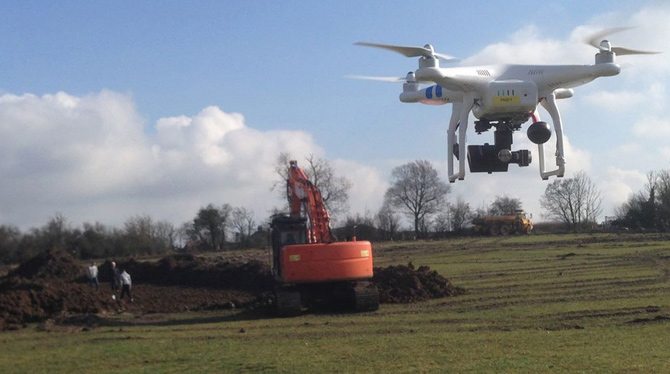
The Phantom comprises a GPS receiver that cleverly means your 1.2kg multi-rotor knows where it is. Even in winds up to 16mph the Phantom will obediently sit relatively still and fly where you steer it.
The GPS is also vital for the return to home function to operate. When you first take off the Phantom will record a home-point. Should you trigger the failsafe or if you fly out of range the aircraft will fly back and land from where you first took off.
Some time after I bought my Phantom DJI released their two axis gimbal, this was a massive improvement over the plastic mount and transformed the video this device was capable of. The Zenmuse H3-2D gimbal is a mount that is balanced exactly to the weight of a GoPro. Two brushless motors work relentlessly to keep you camera perfectly level in the roll and pitch axis whilst in flight. The results are spectacular, I only wished that they had produced a three axis gimbal which would deal with the slight yaw (pan) movement that affects the Phantom in mid to high wind (THIS IS NOW AVAILABLE)
About the time of my Phantom I met a rather jolly chap on twitter who shared my passion, we would often send tweets back and forth until one day we both realised that we lived one village apart. Being sensible adults we decided to meet and talk about propellers and such. We chose to meet on neutral ground halfway between our houses which entertainingly saw us meeting in one of Norfolks finest tourist destinations – Dinosaur Adventure. As Dippy the Dinosaur high-fived our children we shook hands and started a friendship that sees now us working together as directors on the committee of ARPAS, the Association of Remotely Piloted Aircraft Systems.
Safety and Legal Considerations
A multi-rotor is to be blunt a flying food blender, they have great potential to cause serious injury. As much as the Phantom is affordable and looks like a model or a toy be under no illusions that this lump of technology would cause havoc to manned aircraft if you were irresponsible or unfortunate enough to fly in the wrong place or at the wrong time.
It’s not a toy, so what is it, well let me tell you what everybody else thinks it is first. If you are a tabloid newspaper then it’s a drone, it’s spying on you, capable of killing you and is generally pretty evil, sad but they have to sell newspapers. The CAA (UK Civil Aviation Authority) refer to aircraft such as the Phantom as an Unmanned Aircraft System. Once you add a GoPro the CAA tell you that you are flying a Small Unmanned Surveillance Aircraft System. Within the industry we are leaning more towards the term Remotely Piloted Aircraft System, it doesn’t conjure up any negative views and accurately describes what we are doing.
We are very lucky that in the UK we can fly commercially with what is known as a Permission For Aerial Work (PFAW) from the CAA. To obtain PFAW you must go through an organisation such as EuroUSC – the European Unmanned System Centre and complete the BNUC-S test. I might add that in my opinion the UK is leading the way in civilian operated commercial aerial systems.
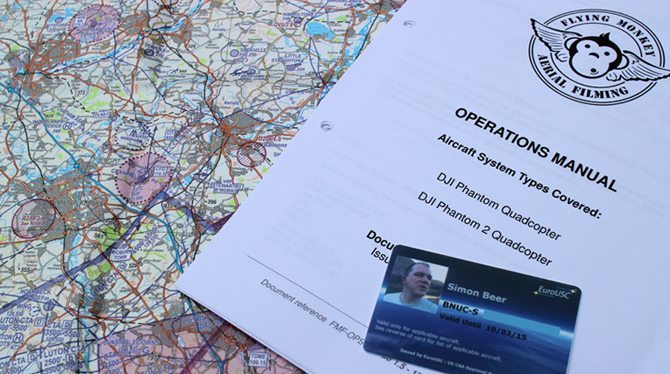
The first part of your journey to becoming legal is to attend a two day ground school. This culminates in a 60 question, 90 minute test. Before you attend you are issued with a manual which you really want to take the time to read. The course covers safety, regulations and the groundings of manned aviation, after all you may find yourself flying relatively near to manned aircraft. You will leave full of information and able to read aeronautical maps and understand different types of airspace, restrictions and regulations.
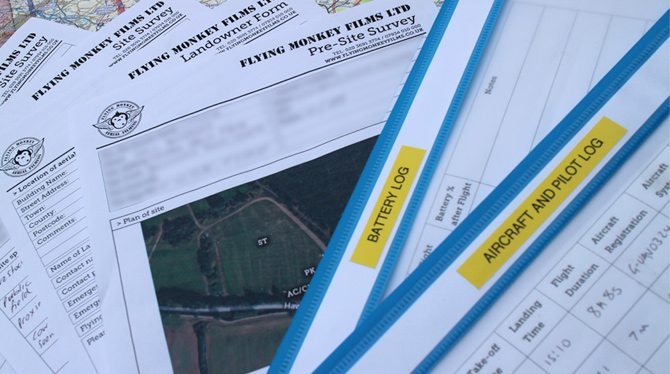
After you have passed the ground school and with your newly found knowledge you are on your own and will write an operations manual. Your ops manual dictates how and where you fly. Before you even leave for a job you would have completed a pre-site survey. Once you arrive on location you need to complete a risk assessment and a site survey. Your ops manual contains examples of the logs that you keep, these includes records of your batteries use. Pilot and aircraft hours flown and maintenance and incident records. Your operations manual contains checklists and is the standard to which you operate as well as listing your emergency procedures.
Finally is your flight test, this test is carried out to demonstrate to EuroUSC who will ultimately recommend you to the CAA that you can operate as you have said you would do in your operations manual. I hate tests and get illogically nervous and spend far too long going through what if scenarios in my head. I have to say that I found the flight test to be the easiest stage in the whole process. I’m not saying its easy, you need to know how to fly, you need to demonstrate that you have researched the flight test site and you need to complete a risk assessment and a site survey before you fly.
On completion of the flight test EuroUSC will send you more paperwork which you complete, return to them and they send the forms off to the CAA who within 28 days send you your permission for aerial work. You then are legal – but still must work to the current regulations, in short whether you are flying for fun or commercially you must (PLEASE RESEARCH THE LAW IN YOUR COUNTRY AS EVERY COUNTRY HAS DIFFERENT LAWS!)
Not fly over or within 150M of a congested area
Not fly over or within 150M of a organised open-air assembly of more than 1000 persons
Not fly within 50M of any person, vessel, vehicle or structure which is not under the control of the person in charge of the aircraft.
During take off or landing a small unmanned surveillance aircraft must not be flown within 30M of any person (not under the control of the person in charge of the aircraft).
You must not fly over 400ft and no further than 500M away from you.
You must retain direct, unaided visual contact with the aircraft.
If your multirotor weighs over 7kg than additionally:
You must not fly in class A, C, D or E airspace unless the permission of the appropriate air traffic control has been obtained first.
You must not fly within an aerodrome traffic zone during the notified hours of watch of the air traffic unit at that aerodrome unless the permission of any such air traffic control unit has been obtained.
And the key to this all for any of us wanting to film from a multi-rotor is:
The person in charge of a small unmanned aircraft must not fly the aircraft for the purposes of aerial work except in accordance with a permission granted by the CAA.
Different countries have different rules and across the globe people have started to be prosecuted for flying without permissions. I know of a few cases in America and two in France. The CAA in the UK have also allegedly launched a number of investigations. These authorities aren’t looking to pick on you, they are regulating and protecting the airspace that is in use by passenger jets, emergency services, helicopters and light aircrafts.
Do I think the process is overly complicated, no. Should we have to go through it all for the sake of flying a DJI Phantom? Yes, absolutely. The key to this process is safety, yours, mine my families. Just the other day my wife came back from our local park where a boy was flying what she described to me as a DJI Flamewheel multi-rotor next to a play area whilst his grandmother watched him. I hate to think but sadly expect within the next year a civilian UAV system will cause an accident or incident that will be news worthy and splashed across the tabloid press. This will affect all of us who are flying safely and professionally. We need to demonstrate there are people operating professionally and safely!
Airframes and components
So far I’ve really only written about small ready to fly systems such as the Phantom. The Phantom series of multi-rotors are in my opinion brilliant. The Phantom 2 I feel is an improvement over the original Phantom in the respect that it I find it more stable, the battery lasts much longer and has the advantage that you can install an OSD (on screen display). The OSD will overlay vital flight data on your video downlink, this information includes your battery status, height, distance from home, heading and other information that will aid your flight.
My experience with the Phantom and my knowledge gained from the initial build of our home made flying machines has lead me to build other systems. The next I attempted was the DJI F550, larger than the Phantom the F550 is a hexacopter that can also take a GoPro on a gimbal, the maximum take off weight is 2.5kg and with a large battery will remain airbourne for approximately 12 minutes. Seeing that the Phantom 2 does all the above and flies for 20 minutes the F550 now lives in my garage.
The other aircraft that I have built is a DJI S800. The S800 is a large hexacopter with a maximum take off mass of 7kg. My S800 has been through various configurations but is currently awaiting retractable legs and a three axis gimbal for my Blackmagic Design Pocket Cinema Camera. This larger aircraft is operated from two radio control handsets one is used to fly and the other is to control the camera system.
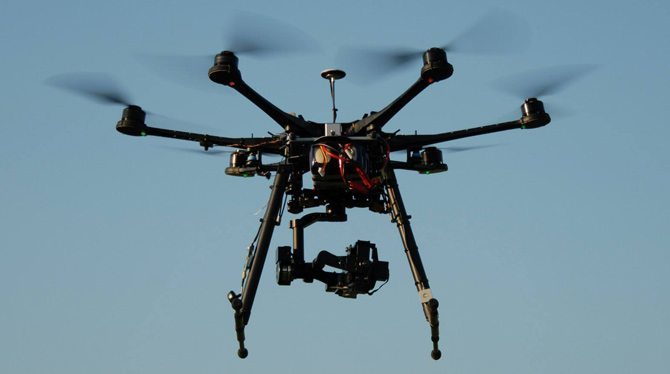
Typically with this kind of larger rig you will be looking to operate with a pilot, a camera operator and a spotter – whose job it is to keep an eye on the safety of the crew and the aircraft and to alert the pilot should any other aircraft enter your airspace, as well as ensuring that no people or animals affect the pilot or his flight.
My experience so far is with DJI multi-rotors and components, there are lots of other makes and models out there. Generally to heavy the camera the bigger and more expensive the rig becomes.
Just like cameras the world of multi-rotor aircraft is quite techy, you may want to skip this short section. If you do read on you’ll learn about some of the components that make up multi-rotor aircraft and have a grounding of how to speak the language.
ESC – Electronic speed controls, drive the motors
FC / MC – Flight controller / Master controller. The brains of the aircraft, connects to the receiver, GPS and the speed controllers. Popular DJI models include the Naza, the Wookong and the A2
Motors – Drive the propellers
Props – Propellers / Pushers, gets it all airbourne
Downlink – Video downlink, a transmitter that sends a live video feed from the aircraft to the operator on the ground. UK Legal limit is 25mW, this is regulated by Ofcom
OSD – On Screen Display, overlays vital data over your video downlink signal
Gimbal – Holds and stabilises a camera attached to a multi-rotor
LiPo – Lithium Polymer, battery to power a multi-rotor
RTF – Ready to fly, a system that will work out of the box
RTH – Return to home, a failsafe system which sees you multi-rotor land at your home point in the event of a problem
Retractable legs – Found on larger systems, the legs found up and out of the way allowing full 360 degree panning of the camera without the legs getting into shot
Receiver – Receives the signal from your handheld transmitter
What to look for in a system / essential kit
If you are a first time buyer it can be difficult to know where to start, don’t buy blind over the internet. Find an authorised dealer and start a relationship, they will advise you of your options, tailor your system to suit and be there when things go wrong.
Don’t jump into the deep end, start small, learn to fly, learn the technicalities and get good before you invest in an large expensive aircraft system.
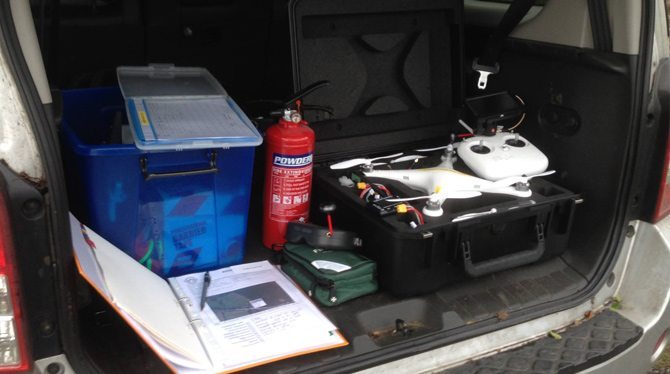
Don’t forget the extras. You’ll need plenty of batteries, chargers, battery testers and spares. I always carry an anemometer to check windspeed before I fly to ensure I’m not getting myself into something that I can’t get out of. I also carry a full complement of safety gear including a first aid kit, fire extinguisher, high-vis vests, hard hats, traffic cones, hazard tape and ground spikes to create cordons. I’ve also had a sign made similar to the ones you see at road works, it states that we’re operating small unmanned aircraft and that the area is restricted, it also has a link to my website which saves a million and one questions. It’s also a good idea to always have a few flyers to handout.
The Key Points to remember
Fly responsibly and safely.
Fly within the legal regulations.
If you are working get permission from the CAA through EuroUSC.
Get specialist public liability insurance.
Don’t let clients push you into something you are uncomfortable with.
If you are a producer check credentials, ask to see CAA permission or EuroUSC ID card.
If you are an operator join ARPAS-UK and have your say on the industry.
Enjoy the great outdoors and share your aerial views with others.
About me.
Simon is one of the founders of Production Gear Ltd, a DJI reseller specialising in Phantom systems. Simon also runs Flying Monkey Films Ltd, a provider of aerial video and stills images.
Follow Simon on twitter @sbeertv or visit his website at www.flyingmonkeyfilms.co.uk
Links:
Production Gear specialising in DJI Phantoms: www.productiongear.co.uk
Flying Monkey Films for Aerial video and stills: www.flyingmonkeyfilms.co.uk
ARPAS – Association or Remotely Piloted Aircraft Systems: www.arpas.co.uk
EuroUSC for qualification for Permission For Aerial Work: www.eurousc.com
ADAM LORETZ
The first thing I want to mention is that safety always comes first when either I fly or somebody else is piloting on one of my shoots. It’s also important to note that laws of flying vary from country to country so you should always check before your shoot!
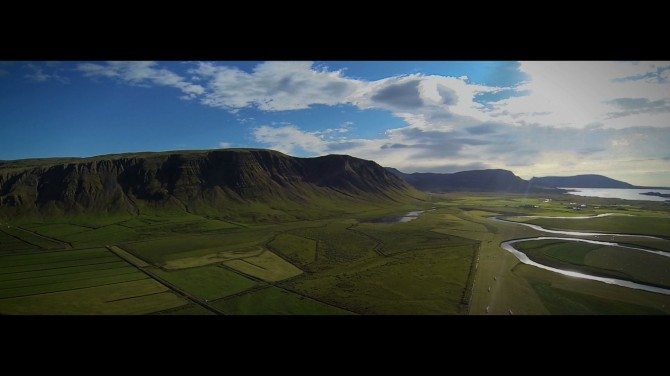
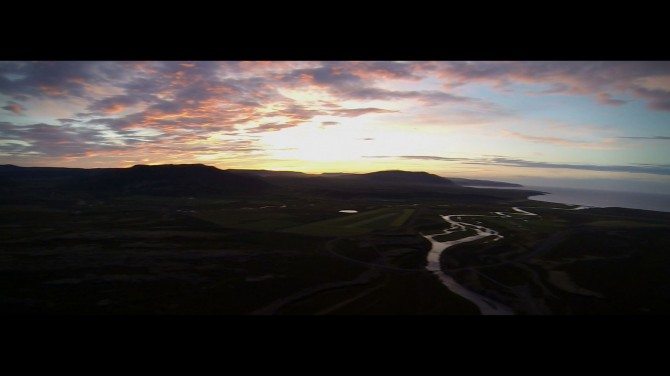
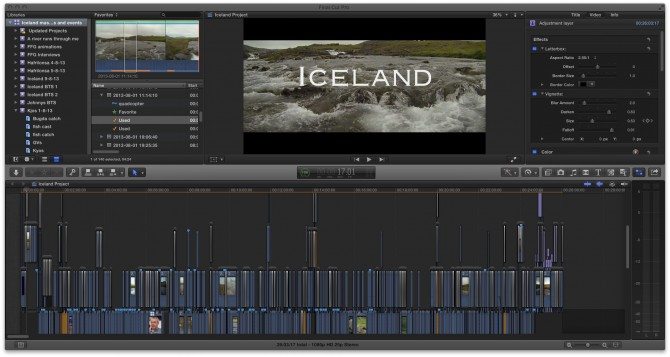
Here’s a little rundown of a significant project shot in Iceland in which I and my collaborator John Rippin certainly learned a thing or three about DJI flying in some extreme conditions.!
Last year a client decided it was finally time for us to make a prestige film for their sports travel company about fly fishing in Iceland. Three problems. One, a two man crew. Two, a fairly static subject matter. Three, epic landscapes that need height to truly show them off. The solution? A DJI Phantom quadcopter.
Wait, did I say three problems, I meant four – the weather had been appalling in Iceland, so our solution, relied upon good weather.
Not holding on to the chance of sunshine, my talented and persuasive collaborator and cousin, John Rippin who opted to fly the quadcopter also decided in the four weeks prior to departure to design and build a unique mobile jib with 3m reach, just in case the rain did not stop. As a commercial filmmaker I know how important it is to have at least a plan B!
Anyways, back to that DJI quadcopter. A month before our 12 day shoot I bought a Version 1 DJI Phantom, an AeroXcraft gimbal and whilst I also bought an FPV system, John did n’t get around to rigging it up before we left as he was familiarising himself with the flight characteristics and capabilities of the DJI Phantom as well as building the jib.
For my part, I would be the second pair of eyes and be timing John, to keep the copter in the air and keep both John or the copter out of the river. Our batteries are good for 6 minutes mixed flying with margin for auto return to land. Phantoms are pretty noisy and with the amount of concentration it takes to manoeuvre them and get useable shots, it is handy to have an assistant to shout out the flight time. Particularly for us shooting miles from the nearest power outlet, we needed to make every flight count!
My first impressions were that the AeroXcraft gimbal and the Phantom, paired with a GoPro Hero 3 was that it gave some super stable footage!
After some tests in 2.7K at 25fps, which whilst very good, we decided we should film predominantly with the Go Pro set to 1080P 50fps on a medium view, as this would give us the best overall choices in post for slow motion and least horizontal lens correction. Our main issue when testing We did however notice the rotor shift effect whilst filming in sunshine when the sun was at 2 or 10 o’clock. Because the rotors are variable speed not pitch, the shadow of them on the lens synchronised or harmonised with the frame rate giving variable banding on the footage. Needless to say, just like with all film tools, the operator has to be aware of potential issues, in this case, particularly sun and wind and assess locations accordingly.
Now if only it would stop raining in Iceland!
Arriving in Iceland, it was dark and overcast but I kid you not, as we picked up our Jeep from the airport car park, the sun began to peep out from behind the clouds. To keep the DJI Phantom in one piece whilst travelling, we chose my faithful Doskocil case, which I have had over ten years – it’s super tough and completely waterproof.
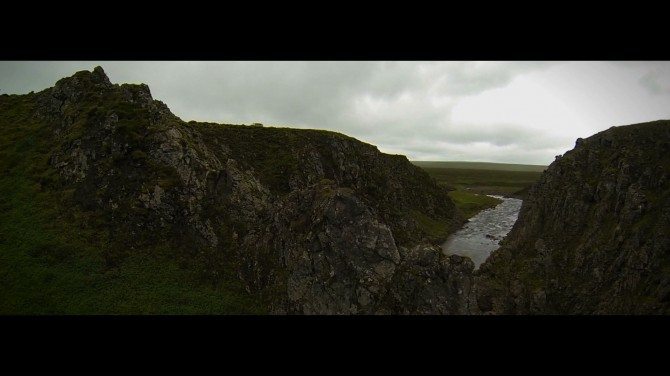
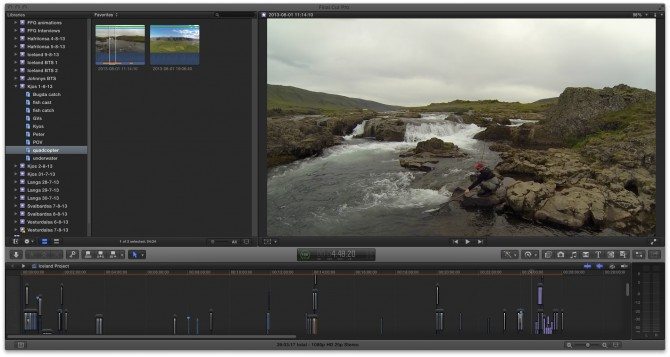
Day One, we filmed the Langa River, a beautiful river which flows down from a lake through steep gorges and staggeringly impressive manmade fish ladder literally carved out of the enormous rocks.
Sun out and conditions possibly perfect, we let the DJI off in to the sky. From high up on the gorge Johns first passes of Halli, the talent/our fisherman were good.
Flying line of sight takes some practice to line up shots, truly testing the flyers sense of perspective and perception. I thought it was going well. From up high on the gorge I could not see everything, but from what you can see on our BTS video below at 5m 30seconds in you can see what happens when your DJI flies out of sight behind a 40 ft rock and you flick the ‘Return to home switch’. Yes, the DJI has GPS built in and on level ground it can return to the spot where it took off all by itself. However, the 40 ft rock won both the DJIs attempts at flying through it and it landed on its back, legs akimbo on a rocky out crop, just inches form the fast flowing river.
FlyFisherGroup – Iceland Film – Behind the Scenes from Adam Loretz on Vimeo.
To our amazement, the DJI appeared from its first knock out, fine – only the GoPro sustaining a tiny ding. Lesson learned – in these conditions, we would curb complex moves and stick with making short runs, straight at the talent or point of action. Line up the Phantom and nail it. In the edit 4 seconds of footage at half speed gives you 8 and that was all we needed – moments. Shooting to edit.
On another wider section of the Langa river, the Phantom really showed its unique capabilities to go where mere Filmmakers cannot – capturing a catch from the middle and opposite sides of the bank – grabbing two angles in a matter of seconds. Capturing a moment is one thing, from the air is another and add the complexity of timing everything on hooking and reeling in a salmon, that’s just epic. In terms of flying next to rivers we did of course have to work together to make sure the pilot, John, could follow the Phantom over the often uneven or slippery ground to asses the shot framing, while keeping near enough the take off site to monitor a return to home emergency. For the most part, John was comfortable in these surroundings being a professional flyfishing fishing guide.!
Arriving at Thorufoss waterfall just after The Game of Thrones crew had left we encountered yet more issues. We wanted to show the epicness of the falls which are about 120 ft high. Fly forward off the edge, or fly backwards?
We’d do both and decide later in post. The DJI flew about two feet from the water and I thought it wouldn’t catch the sunlight and cause issues. No such luck, checking the footage later was a mistake. Having no FPV we didn’t expect the rotor shift on some of the flights facing away from the waterfall. However, shots flying over the edge were great and so again we were bagging material and learning along the way. We also knew we would be coming back via Thorofoss on the way back to the airport in a week or so, so could try some more takes then!
Before the shoot, John pre visualised several shots. Having guided fly fishermen for 10 years in Iceland, together we created a tick list of shots, planning several sequences before we even received the Phantom. In particular, we were keen to shoot the ends of the
Langa and Kjos rivers where they meet the sea. Technically this was more challenging with coastal winds. At the mouth of Kjos especially, we knew we had a great opportunity to fly the DJI and create the signature shot for our prestige film. No pressure then. Having an assistant shooting B cam, me on A cam and John on the underwater polecam, we just needed to hook a fish and it would be time for take off. After 25 minutes, we hooked a Salmon. Swapping the polecam for the DJI, John flew the drone as we had planned, very low over the very end of the river, directly to the fisherman. From about 20 metres, John gave the DJI just enough thrust to clear the upright rod and reveal the netting of the fish and the rest of Kjos valley. Later, in post, I decided we could do more with the shot. As we didn’t have a tilt function, we added some movement as our film was presented in 2.39.1 we had black bars allowing some vertical movement to the shot. By sliding the image up to show just water and then sliding the image down over time to reveal the fisherman I got to add that extra dynamic, unfold the action a little better.
As the shoot progressed so did the number of obstacles we faced. As we headed north the rain came back- sideways. Neither the quad copter or our gimbal was going to take this kind of punishment – good job John had engineered our 3m jib. After several days of not flying we got a small break in the torrential weather.
The weather at Kvierkow was gusty and spitting with rain and we were on the fence about the flight. Flying the DJI beneath us around a 280 degree horseshoe in these borderline treacherous conditions would be the biggest test for John and the DJI to date. Seeing a break in the weather, we prepared for take off. The quadcopter and the exposed microchip controller board of the gimbal being no fan of the rain, we had a quick fix solution- gaffer
tape. With the electronics covered in a waterproof jacket of tape we took to the skies. Any flight involves an element of risk, whether that be a force of nature or technical failure – at this point we felt we could fly safely, albeit in poor weather conditions. This flight was very taxing for John as both the change in perception, flying beneath us around the horseshoe whilst clambering over the uneven ground made the flight way more challenging than we could possibly imagined.
Several times in the course of our shoot we took some panoramas from several hundred feet up. It’s important to remember that on the wide setting a Go Pro seriously bends the image and distorts the horizon. If you use FCPX I can thoroughly recommend Alex4Ds free plugin to remove such bent horizons.
After a number of challenging flights, we stopped back at Thorufoss on our way back to the airport. Overcast and with a misty drizzle, John went to fly the Phantom over the waterfall and capture something special. John had to overcome an up draft on the falls that stopped the Phantom from descending the face of the falls….it just sat on a cushion of air..so for in a ‘who dares wins’ type gig he positioned himself at the top of the falls. Getting line of sight on the water below John flew the Phantom off the top diagonally, killing the throttle input to push through the updraft. As it fell down the face of the falls he then brought in a burst of full throttle to catch it before turning it into a submarine in the foaming pool at the base of the falls. The effect was great and really gives a new perspective on shots that an indie film maker can now achieve!
In conclusion, I’d certainly recommend an FPV system and tilt functionality. As yet John is not convinced that the tree axis gimbals add to a small operations and using the yaw axis in follow mode if the multirotor yaw is not smooth enough. From this experience and further tests and shoots where you have canopies of trees or obstacles I’d also consider other options to the DJI, such as a polecam or jib.!
I say this, because you need to consider the effect you are trying to achieve and as with many visual techniques there are often several ways to achieve the same ends. Some though are just way quicker and easier!
We have definitely got the bug for flying and are currently bringing several larger aerial drones in to service. Happy flying !
Adam & Justin Loretz & John Rippin run the production company www.vertigopros.co.uk
Fly Fish Iceland teaser from Adam Loretz on Vimeo.
DJI Phantom flight over Vesturdalsa River Iceland from Adam Loretz on Vimeo.
Fly FisherGroup Presents Iceland from Adam Loretz on Vimeo.