
 David Kong here, with my fourth post in this video/article series that is all about working with less gear, for less money, and making it look good.
This article/video is all about Postproduction. I’ll be talking about editing and color correction workflow, Premiere and After Effects, touching up shots with “Visual FX,” and my techniques for handling files. I’ll also be taking a look at a bunch of shots from my Portrait of Macerata video and explaining what finishing work I did on them.
You’ll find the video below, along with a summary of the topics covered.
Part One: The Gear
The first video/article was all about the gear (lenses, filters, tripods, etc). If you haven’t seen it yet, check it out here:
Part Two: All about the Camera
The second video goes very in-depth with the DSLR – I cover everything you need to know about formats, codecs, and dynamic range in order to get the most cinematic images.

Part Three: Magic Lantern
The third video was an in-depth explanation of how to use Magic Lantern and why I love it.
Part Four: Postproduction
The Proof of Concept:
I’m using one of my films as an illustration for all of these concepts, so if you haven’t seen the Portrait of Macerata, check it out here. I’ll be talking about that film all through this series.

Postproduction
The first thing I want to say is that, just like everything else in this series, postproduction works best when you’re flexible. Every project is different, and while there definitely are advantages to having a set process, you’ll work better and faster if you understand all of the details and can tweak the process when necessary. I’m going to present the process that I usually use, and the one which I used on the Portrait of Macerata video, but this is not set in stone. I change it up all the time depending on the camera I’m using, the computer I’m editing on, the turnaround time, the complexity of work required, and the final delivery format.
The video starts with some responses to viewer questions about how I approach shutter speed and white balance.
![ins_PRORelaunch_announcement3[2]](https://staging.philipbloom.net/wp-content/uploads/2013/12/ins_PRORelaunch_announcement32.jpg)
File Renaming
The very first thing to do with new files when you get them into your computer (assuming you’ve already backed them up) is to rename them. Most of these cameras will give you a generic “MVI_1228” or similar for the filename, and eventually you’ll end up with duplicate filenames. NOT GOOD. That can really mess up your system and give you lots of problems.
I always add a prefix to all files that I shoot with a short tag to represent the project, or if there’s no project (stock footage, or something) I’ll prefix the date it was shot.
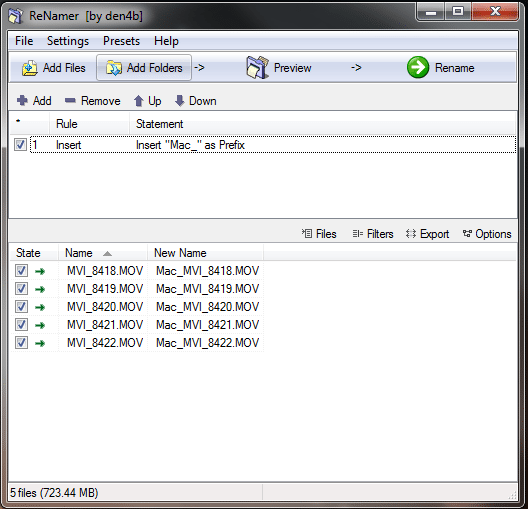
I use Renamer from Den4b.com but there are plenty of other options, just do a Google search.
Adobe Bridge is a good option.
Transcoding
Generally speaking, I’ll transcode into an intermediate codec like ProRes or DNxHD before working with my files, because that speeds things up the computing and allows me to render previews more quickly. The downsides are that it takes some time to create those intermediate files in the first place, and that they also take up a bit more space. On this particular project, I decided not to transcode because I was in a big hurry and didn’t want to wait for the transcode. (I also have a computer that can handle editing the native h.264 files pretty smoothly unless I’ve got a lot of FX)
A more complex cleaning-up process
If you’re going to be doing severe color correction, if you’re brightening the image up significantly or changing the color significantly, there is another process that can help you lessen the nasty artifacts you’ll get. I personally very rarely use it, because it takes a lot of extra time and space, and it doesn’t make a perceivable different on most shots. It can be very useful sometimes, though, if you’ve made a serious mistake on set and need to recover from a severe color or exposure problem. Here’s one workflow: http://vimeo.com/19908622
Premiere and After Effects
I actually prefer Avid’s Media Composer over Premiere Pro as a video editor, but my workflow is centered around Premiere Pro these days because it works so smoothly with After Effects and Audition. I generally will do all of my editing in Premiere, and then open that timeline up in After Effects to carry on with the color correction and VFX process (what we used to call the “online”).
Working with Cinestyle
With a free piece of software from Red Giant called LUT Buddy, you can load in a preset color-correction that will take your Cinestyle-shot footage and make it look more like the standard preset would have looked like with increased contrast and saturation.
UPDATE: It looks like you can’t get LUT Buddy for free anymore 🙁 Oh well. There are other tools for loading LUTs into Premiere and After Effects, but they all cost money. If you’re using Premiere CC, you can load in the LUT with the Lumetri effect.
But I actually rarely use the Technicolor LUT. I prefer to set my own contrast and saturation manually, on a per-project basis. I will generally make a custom contrast curve using the curves tool instead (or you can use the simpler levels tool if you prefer) and then add a simple saturation increase separately.
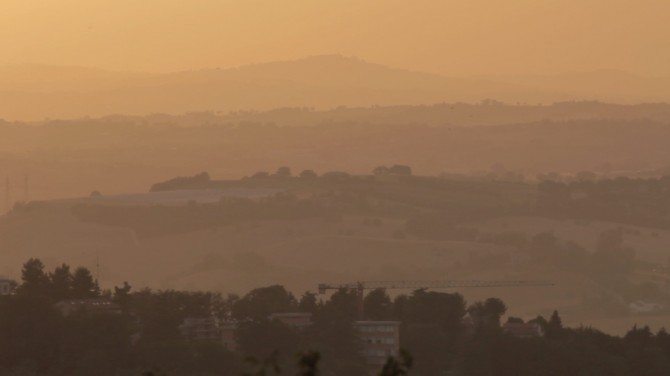
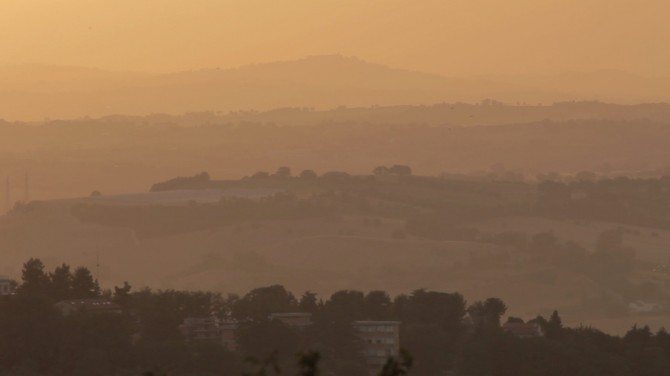
For this film, I ended up deciding to go with a contrast curve that was much less contrasty than the Technicolor LUT would have made it. The blacks very rarely hit full black in this film and the highlights very rarely hit full white. I wanted to go with a look that felt more like film than like video. I also added less contrast than the Technicolor LUT would have added, for the same reason.
Sound
I ended up not recording on-location sound for this film, so, with one or two exceptions, everything you hear in the film came from pre-recorded sound libraries. Some are available online for free or for license, and if you own a copy of Audition, you get free access to a lot of prerecorded sounds through that. Even though most of the sounds in this film are pretty subtle, they add a subconscious feeling of realism that’s quite powerful. One of my old film professors used to say that the foley and cloth track were the “glue” between the picture and the music.
Music
In this case, I made arrangements with the artist personally, but most of the time I’ll end up using music from a library or licensing music through a website like Vimeo or TheMusicBed.
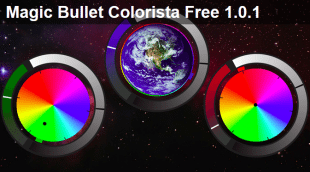
Color Correction
Premiere and After Effects have some good color correction tools built in for free, but my weapon of choice is Colorista II. It has just about all I ever need to do as far as color correction in one simple place, and it’s very quick and intuitive to use. Red Giant has a simplified trial version for free available here.
VFX
A good understanding of After Effects can come in really handy for a filmmaker or video producer. I spent several years teaching myself advanced visual effects techniques, and they come in very handy doing little touch-ups in normal film and video work. I go over several shots in this film that required a little touching-up.
Can you spot the difference? ^
Blow-ups and Stabilization
I know that a lot of you reading this will probably disagree with me, but I actually don’t think that resolution is all THAT important.
Mind you, I will take all the resolution I can get, if I don’t have to sacrifice the artistic quality of my work. I definitely would rather have higher resolution, all other things being equal. But for instance, I would rather have a great composition at 720p resolution than an average composition at 1080p. So, there are times when I’ll blow up a shot if I think that it enhances the image from an artistic point of view. I also ran a little bit of stabilization on some of these shots when I made little mistakes on location, and that involves blowing the image up slightly.
I shot the film in 1080p on my T2i, but even at the original size, the T2i doesn’t resolve nearly 1080p of actual resolution. And on top of that, I blew up a bunch of my shots fairly significantly in post, so I’m rarely resolving more than 720p of actual resolution on this film. But that doesn’t bother me very much. I can still watch Road to Perdition (one of the most beautifully-shot films I’ve ever seen) at 720 by 480 resolution and think it’s spectacular. Is it better in HD? Sure. But Road to Perdition at 310 by 240 is still better than anything I’ve shot at 1920 by 1080.
High resolution and detail is important to me. It’s just comparatively much less important than artistic quality.
Sharpening
Generally speaking, I shoot all my footage at 0 sharpening in camera, and then I add a bit back in post-production before I export.
In this case, I accidentally (no idea how it happened) shot the entire film with sharpness at 2, so I decided not to add any more sharpening in post.
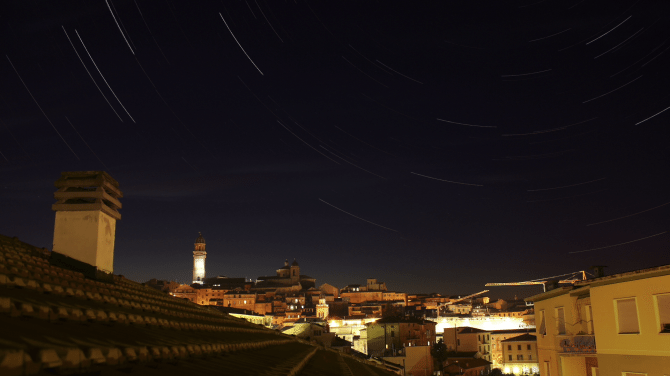
Moving Star Trails
I didn’t cover this in the video because it was already getting pretty long, but if you guys are interested, I might make a tutorial on how to make the moving star trails that you see at the very end of the film. Let me know if you’d be interested in that.
Lastly, I know that a ton of you guys have been anxious to see a tutorial on how I made the motorized slider that I showed in my first video. I’ve already finished shooting it, and I’ll have it out in a week or so!
As always, feel free to ask questions below!
19 comments
Another great one David!
Yes, I’d love to see a tutorial on the star trails too, if it’s not too much to ask. 😀
Great post, David. This is good stuff. And sure, I would be interested in a moving star tutorial!
Hi David, i really like your posts, and i’m really dying to see how to build the motorized slider! 😀
I think it would be cool to see even the star trail video too…
I just wanted to tell you that, for what concerns Lut Buddy…. It is not avaliable as single download anymore….but if you download the trial of Suite that contains it (i think it’s the Shooter’s one) …you can still install it and it is fully functional…
Or at least i did that way 1 month ago, but i think it’s still that way?
And to finish, a thanks to Philip for hosting/publishing always interesting articles!
Cheers! 😉
Great, thanks for that note!
Nice Part 4
I want to add some more informations about “cleanup”, sharpening …
and add final grain to h264 shots.
There is a very good video on vimeo:
https://vimeo.com/39979623
After that i almost clean upm, sharoeing, regeain every shoot.
Looks so much better.
after the cleanup its very important to dither the image a little bit.
And change the color depth from 8 to 10bit.
Also. I like the cinestyle picutre style a lot. BUT… in my opinion its very hard to focus
and, more important, its not very good at skin colors. so if you shooting people.. you
should use another picture style.
I testet alot (really a lot) pictury styles) and one of the best was “Ive Lotus”.
Onmy Canon 60D all other picture styles are very noisy in the dark shaddows.
But “Ive Lotus” ist perfect. AND… i got the best results for skin colors.
There is a very nice Vimeo Video, too:
https://vimeo.com/61739303
A comparison between “Ive Lotus, Neutral, and Marvel” Watch in in HD.
YOu can get Ive Lotus for 10 Dollars. I still use the Cinestyle Picturestyle if i shoot building, streets, etc.
Shoots with i high contrast. so i have to shoot cinestyle to get all the details.
but sometimes its better to shoot “neutral” oder use a different Picture style like “Ive Lotus”.
Installing is very essy. as i said before. don’t trust vimeo comparison videos. Donwload
the picture styles on your own. create your own test footage. There are so many pro and cons about
cinetyle… please test it yourself.
Thank alot, David Kong, for Part 4. Very informative. I like your presentation a lot.
That’s for the info about pictures styles! I’ve never used Ive Lose, I’ll take a look.
Actual, Premiere CC can load LUTs via the lumetri effect. Also, for color correction, the new direct link to speedgrade is awesome. I never bothered with it before, but you can use one click to jump back and forth between speedgrade and premiere during the project and all your speedgrade tweaks just work as one GPU accelerated lumetri effect.
Great, thanks for noting that – I edited the post to mention the Lumetri effect.
And yes, Speedgrade is great, but I decided not to get into any dedicated color correction applications with this video. I was covering so much that I didn’t have time to get super in-depth with high-end color correction. I may end up doing a video later on that goes very in-depth with color correction, we’ll see.
Super helpful, this was the tutorial I needed the most.
I currently colour correct in Premiere and have so far found good results with the RGB curves. I’ve been told After Effects is just a step up though, and something I’d need to edit out a light in a forest scene I recently shot that’s not supposed to be there.
Any opinion on what particular features are a good starting point to learn in After Effects? I’ve looked up tutorials but most assume some knowledge is there, which it really isn’t!
Yes, I really recommend learning After Effects, though as you point out, a lot of the tutorials assume at least some basic familiarity with it
For an introduction, I’d recommend taking a look at Lynda.com’s tutorials. A one-month subscription is pretty cheap, and that would get you familiar with all the tools and concepts, and then start following along with some tutorials. I learned a lot from videocopilot.net. I would put the video on one monitor and have AE running on my other monitor and follow along with the tutorial. You learn a lot of really practical tips that way.
Huge thanks for the tip, had a look and this looks perfect.
Nice! I’ve waited eagerly for this! Thanks a lot for these tutorials, David:D They’re very appreciated.
You’re welcome, I’m glad you’re finding them useful!
Great tut david!
I was also bummed when I saw LUT buddy wasn’t being offered for free anymore, but then I found this link
that still had the free version up: http://magic-bullet-lut-buddy-32-bit.software.informer.com/1.0/
Thanks for the tip, Eli, but I would not recommend that anyone install from that website. It’s not verified and could contain a virus.
Great tutorials! I too would be interested in how you did the moving star trails.