


**NOTE: All opinions & perspectives shared come from my experience as a shooter and may not be the best way of doing things. I am simply sharing MY WORKFLOW when both capturing and processing time-lapses***.
INTRODUCTION
By Preston Kanak
I am happy to announce the release of the latest installment of the raw time-lapse tutorial. I want to first off apologize for the delay since the last posting. When first announcing the project, I was not expecting to go as in depth as I am in the videos/posts. As a result, I will be somewhat restructuring the way in which the series will be released. This content will now be released in two stages.
- Stage 1: Scripting
- Stage 2: Extensive Video
My plan is to release the scripts every two weeks and the videos once a month. Because of the nature of the content, I want to make sure I provide an extensive look at producing these videos and want to make sure they are not rushed. To solve the delay between videos, I will make the scripts available online for viewing. Any comments or concerns would be greatly appreciated.
Story, Scheduling & Scouting
Pre-production is by far the most important part of the process for not only time-lapse photography but film-making as a whole. By being prepared from the beginning and by having a well laid out plan, production & post-production will ALWAYS go way smoother. There are a few specific areas that I will be investigating as part of the pre-production phase. I will be covering story, scheduling & scouting.
What I want to do with this post is give you a few tips that will hopefully help your shooting experience go smoother. To help with this process, I will be producing a new short at the same time and use it as a real world example showcasing my workflow.
STORY
The first thing I want to look at is the story. It is extremely important that you de-construct your story and determine how you are going to use time-lapses to help tell this story. If you are a new filmmaker, this is most important.
In this section, I will be looking at a few things you will need to consider when attempting to tell a visual story.
For the short I am going to produce with this tutorial, I want to tell the story of home and how, no matter how old you are, you are able connect to the idea of home.
There are many ways you can use a time-lapse to help tell your story. In order to understand how you can use it, it is important to first understand how to tell a story from a single image. When analyzing works of art, there are a few categories to consider – form, content & context. This includes all it’s encompassing elements.
FORM can be broken down into three sections:
- The Primary Features (Colour, line, shape, size, — which are basically the elements that are used to construct the image).
- The Secondary Features (Balance, composition, contrast, dominance, movement, rhythm, unity, — basically how the primary features were used).
- The Tertiary Concerns, (How form interacts with the content and context).
As for CONTENT, this is essentially the message you are trying to rely. Ask yourself, what are the denotations and connotations which are essentially the literal, figurative, and metaphorical meanings. The content applies to the subject matter — and what the subjects represent.
The last of the three is CONTEXT. Context encompasses a few elements and is probably the hardest of the three to decipher. The primary context is the artist’s intentions and the secondary context is the functions the work of art plays in currency at the time — including the religious, philosophical convictions, socio-political, economic structures and even climate and geography.
Now what does this all mean? In relation to the single image, what elements are you going to use to tell your story? What single image expresses the message you desire? What elements as a cinematographer are you using the construct your image? Are you going to use a cluttered frame? How are you going to use negative space? If you are shooting a landscape, it is key to think of why and how you are going to do it. Is it a visual exploration of space and time or more? The more part is what you should aim for.
In relation to the idea of home, there are many options. The literal image could be an actual image of this space. You could also choose to have a shot of something that symbolizes home — such as a turkey coming out of the oven, a smile, or anything you are able to connect to personally — however ambiguous it is. For the short, I am going to use the shot of the turkey coming out of the oven as one of the shots at the end to reinforce the concept.
Juxtaposing Images
Once you have understood how a single image can tell a story, you then need to think how to juxtapose images to help tell a story as well. — similar to how collections of artwork together. Each piece of art tells a unique story of it’s own but when combined in a collection of work, tells a totally new story.

When producing a film of any kind, it is important to think of how a film is constructed. I am not going to go in depth about this now as I will be covering this more extensively when I launch a new education series I am doing on filmmaking. However, there are a few things you need to be aware of.
Films are constructed in three acts. The first is exposition which is used to establish the main characters, their relationships and the world they live in. The first act establishes the inciting incident, or the catalyst. The second act is the rising action which typically depicts the protagonist’s attempt to resolve the problem initiated by the first turning point. The second turning point is in most cases the climax. Lastly, The third act features the resolution of the story.
For the short film on ‘home’, the exposition / rising action is the decision to finally go back home since the sale of the childhood home that the lead character grew up in. The lead character has not seen his parent’s new home since they moved. The rising action is the struggle to deal with the end of this chapter in his life. The climax is when the character finally accepts the new chapter in both his parents life as well as his own.
The last section I want to talk about in regards to the story is the importance of writing about what you know. One of the biggest mistakes you can make as a new filmmaker is taking a concept you cannot relate to and write about it. The emotion that you hope to convey in the piece will not be genuine. Does this mean you shouldn’t write about subjects you are not familiar with? Definitely not. Research is imperative in these situations.
For me, my parents still live in my childhood home but my grandmother has moved out of her house. I have yet to visit her since she has moved and I know the experience will be different. I also interviewed the entire family before she moved and hope to cut some of this content into the final film — as well as some interviews from family members that have already experienced the transition.
When I approach a film, I first think of words and phrases that relate to the message. I try filter out the main concepts and think of ways to express these ideas on screen. These images can be developed from literal, figurative or metaphorical ideas.
For this film, what differentiates the place you happen to live and a place you think of as home? Is it a history? Is it the people? What is the relationship between home and family? Is home defined by an internal feeling or by external conditions?
All these ideas need to be considered before you start shooting.
SHOT BREAKDOWN / SHOT LISTS
Once you a clear idea of the story you want to tell, the next thing you need to do is breakdown your shots. From a traditional short film/feature film standpoint, the Producer and Production Manager would break down the budget, the 1st AD would break down the schedule, and the Director & Director of Photography create a shot list. Whether it is one person or many people, the more specific you are, the smoother the production will go.
For the case of the short on home, I will be the only person breaking down the script. The principal photography will take place across the US & Canada — using the broad concept of place as the backbone of the story. I will be showcasing many literal forms of home through montage as well as use time-lapse to help tell a visual story using travel as a way to express the journey the lead character experiences in order to accept this change.
BTS From ‘Home’ Shoot

SCOUTING
There are a few tools you can use to help with location scouting. If possible, I usually try and scout the location before even heading out to shoot. Not only does it help eliminate certain variables that may come up, it also helps with efficiency on the day of shooting. There are three different tools that I use to help with scouting:
- Google Maps
- Local Film Agency
- Location Managers
The first is Google Maps. When you launch google maps, you will notice a photos feature built in. By selecting this, you will see first hand shots of what certain locations will look like. This is a great way to mark specific locations that may have the conditions you desire. Although a great option, it is only as powerful as what other people have explored.
Another source are the Local Scouting Libraries / Agencies. Most countries / states / provinces have local scouting guides that you can reference. Although a little tougher to get, it is a great way to find hard-to-access locations.
The last resource you can use are Location Managers — people who deal with locations for a living. Not only do they have an extensive knowledge of locations, they will also usually know if a location has been burned.
Although all are extremely effective, there are a few elements to keep in mind. The first is that the actual location may be a little skewed so you will want to assume a margin for error – and the second is that you don’t want to replicate a shot that has already been accomplished. You simply want to use it as a point of reference for the location that exists.
Before heading out to any location, you will want to gain access to paper copies of maps for each area you hope to explore. There are a few apps that exist that allow you to access your markers offline but the best way to ensure you are prepared is to use paper copies. Mark out regions that you think may be film worthy and note the times in which you want to explore the areas. In all cases, mark out two maps — one you will keep and one you will give to a friend or family member — with checkup points mark at various points on the map. If you are going deep into the wilderness, it is key you have a back-up plan.
There are a few other things you will need to consider about your location such as it’s accessibility, whether you will have access to power or if there is cell reception. These are just a few of the things you will want to consider. There is no such thing as being over-prepared.
HOW TO GET PERMISSION TO SHOOT IN LOCATIONS
I have had a few questions in regards to gaining access to locations and there are a few different ways you can approach this. The best method is being open and transparent with anyone you are working with — from location owners to collaborators. Have a few clips prepared to show — similar to the ones you will be shooting. Let them know what you need and what you can offer in return. Like any negotiation, the better you are at dealing with people, they more chance you will be able to get access to these locations.
Note: Once you have gained access to the location, treat it as if it was your house. You are not only representing yourself but also other filmmakers to follow. I don’t know how many times I have been turned away because of a burnt location.
Still Frame From Time-lapse In The Upcoming Film, ‘Home’

SCHEDULING
When scheduling for a traditional narrative short or feature, you need to first break down your script. One question you may be asking is if you need to break the script down when shooting a time-lapse film and the answer is yes. No matter how ambiguous your story is, it is key to determine the message you are trying to create. For example, Baraka or Samsara are both extremely visual films but both also have very evident messages. By breaking down your script, not only does it result in a stronger final film, it also helps avoid missing things that you might have overlooked.
Scheduling a film is the art of determining what scenes will be shot when and in what order. There are many factors to consider that will affect your budget. Getting good at scheduling takes some time, and although the process may be frustrating, it is also rewarding when everything comes together.
There are a few factors to consider when you are scheduling:
• Weather
• Access to locations
• Access to Equipment
• Crew / Cast
• Budget
Weather is by far the most limiting factor when shooting. It is the one thing that could keep you from getting your shot time and time again because it is unpredictable. Ensure you have a block of days you can select between and hope at least one of those days have ideal shooting conditions :).
For most time-lapse setups (unless hiking long distances with lots of gear or shots requiring talent), you will not have to worry about the Cast/Crew element. However, if you do, you will want to determine which shots require cast or crew and schedule all the shots into blocks of shooting days.
In regards to Equipment, one of my biggest words of advice is building up strong relationships with other filmmakers and support them with their creative endeavours. Not only will this help you become a better filmmaker, it will also be another resource for equipment for your projects. Relationship building is an extremely important part of filmmaking.
Budget is also a limiting factor. This will not only dictate the amount of days you can put into a project, it also limits the types of shots you can accomplish in some situations. Be creative and resourceful to find ways to accomplish shots you desire.
PREPPING GEAR
The last thing I want to touch on in this video is gear prepping. Once you have broken down your script and shooting schedule, you will have a good idea of what gear you will need for what shoot. Before I go out for any shoot, I will configure the rig I will be using in studio to ensure I have all the pieces I need with me. Once I have determined what gear I will be using, I will then determine how to pack it based on how I am getting to the location. Lastly, I will make sure both my lenses and cameras are in perfect working condition.
For my sample video, I have a few extensive setups so it is extremely key that I plan out the shots in advance. I will talk more in depth about the kits in the next video.
Resources
Click to Download Shot List for Tutorial
Click to Download ‘Home’ Script
Tutorial Technical Specs
For this tutorial, my gear selection was a little different from my other projects because of the location in which I was shooting. Due to the fact that I hiked in to film this, I had to condense my kit. In regards to cameras, I shot on 2xCanon 5D Mark II’s using the 24-105mm 4.0L, 14mm 2.8L, 50mm 1.2L, and the 70-200mm 2.8L II. In regards to sound, I used the RØDE Lavalier for the on camera content and the RØDE NTG3 for the SFX / Ambient audio.
In regards to support gear, I used the Manfrotto 055 Carbon Fiber Tripod – 3 Section tripods with Kessler Low Profile Ball Heads & Kwik Release plates to attach the cameras. For the drive lapse shots, I used the Kessler Shuttle Pod Mini, Kessler Stealth & the Shape Mountains.
20 comments
great info and lovely shots, thank you
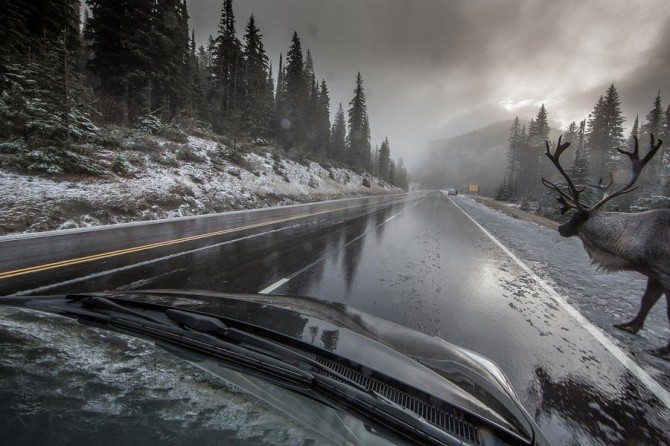
What’s the camera suction mount on the car?
http://www.shapewlb.com/en/product/products/shape-support/mountain/mountain_50.aspx?id_page_parent=208
Preston – I was wondering about the pack you were using? Looks pretty bomb proof – Is that one Jon Minihan’s?
Yeah, developing one with him right now.
This is amazing, thankyou for this! I’m in the middle of prepping for my first ever shoot with a crew and time is getting alarmingly short. Although I don’t have a time lapse sequence planned (maybe on a b roll) I have found this invaluable!
Cheers!
Great content! Curious, what profile do you shoot with on your Canon 5D2? Do you keep it consistent, or change it depending on scenario?
What you are writing, Preston, will be of great help for beginning filmmakers. Your advice is based on real life experience and is very recognisable.
I would like to share my personal experience about preparing and scouting an making contacts. I have made quite some mistakes and I share this here so others may learn from it.
I’m working on a passion project about World War I monuments where I live (Flanders, Ypres, Passchendaele etc.).
The “Flanders Field American Cemetery” is the only one WWI American military cemetery in Belgium. I want to document it, And I also wanted to document how the Americans crossed the river Scheldt, an important strategic event.
I postponed a movie for a while, because I thought it was a good idea to shoot the film on the exact date when the military campaign took place (from the 31st of October till 11th November 1918). Two weeks before that time window, the weather was really nice and sunny, so I decide hastily to go out and shoot. I had explored the site with Google Maps, so I thought I was well prepared.
So I drove to the location, took my gear and tripot, and started setting up. As I wanted put the camera on the tripod, I realised I had left the quick release plate at home… First bummer… This made filming impossible. So then I decided to do some scouting instead and shoot still images. Second bummer: the central monument was in scaffolding for restoration.
Well, I then further explored the site, and got a good feel of it. Of course, all this bad luck meant I would have to come back another time. As I left, I noticed there was an information centre, but I didn’t even think of taking a look inside.
So two weeks later, I returned, and yes, I was much better prepared. I started filming, and only within 30 seconds, a military looking person came out of the information centre and kindly requested what my business was. He wanted to know if I was a commercial filmer. If so, I needed accreditation. I showed him my international, amateur filmer card, and he was ‘cool’ with it. So I could continue filming. I then asked him if he knew how long the scaffolding would be there. He told me it would be taken away within a few days. DAMN! If only I had asked him this on my first trip, I could have postponed one week, still be in the time window and the monument would have been open and without scaffolding.!
Anyhow, I learned a lot from this trip. Here are the movies I shot that day. I decided to keep the shot with the person from the information centre in it.
Flanders Field American Cemetery:
http://vimeo.com/52845355
Ohio Bridge:
http://vimeo.com/52804368
What you are writing, Preston, will be of great help for beginning filmmakers. Your advice is based on real life experience and is very recognisable.
I would like to share my personal experience about preparing and scouting an making contacts. I have made quite some mistakes and I share this here so others may learn from it.
I’m working on a passion project about World War I monuments where I live (Flanders, Ypres, Passchendaele etc.): On Holy Ground.
The “Flanders Field American Cemetery” is the only one WWI American military cemetery in Belgium. I wanted to document it and I also wanted to document how the Americans crossed the river Scheldt, an important strategic event.
I postponed the movie for a while, because I thought it was a good idea to shoot the film on the exact date when the military campaign took place (from the 31st of October till 11th November 1918). Two weeks before that time window, the weather was really nice and sunny, so I decide hastily to go out and shoot. I had explored the site with Google Maps, so I thought I was well prepared.
So I drove to the location, took my gear and tripod, and started setting up. As I wanted put the camera on the tripod, I realised I had left the quick release plate at home… First bummer… This made filming impossible. So then I decided to do some scouting instead and shoot still images. Second bummer: the central monument was in scaffolding for restoration.
Well, I then further explored the site, and got a good feel of it. Of course, all this bad luck meant I would have to come back another time. As I left, I noticed there was an information centre, but I didn’t even think of taking a look inside.
So two weeks later, I returned, and yes, I was much better prepared. I started filming, and only within 30 seconds, a military looking person came out of the information centre and kindly requested what my business was. He wanted to know if I was a commercial filmer. If so, I needed accreditation. I showed him my international, amateur filmer card, and he was ‘cool’ with it. So I could continue filming. I then asked him if he knew how long the scaffolding would be there. He told me it would be taken away within a few days. DAMN! If only I had asked him this on my first trip, I could have postponed one week, still be in the time window and the monument would have been open and without scaffolding!
Anyhow, I learned a lot from this trip. Here are the movies I shot that day. I decided to keep the shot with the person from the information centre in it.
Flanders Field American Cemetery:
http://vimeo.com/52845355
Ohio Bridge:
http://vimeo.com/52804368
Dear Admin,
In the past two days, I’ve been trying to post a message here, but after a warning that my message was a bit too long, nothing seems to happen now. Can you please look into this?
No idea sorry. Not much I can do. Do you mind posting it in two parts?
Thanks
Philip
I have succeeded to post the first part: I get the message “Your comment is awaiting moderation”, which is the default thing. But next, when I post the second part, ‘nothing’ happens except a re-load of the page. Could the reason be, perhaps, because there are two links in it toward two of my videos on vimeo? I don’t want to nag too much about this, Philip. Keep up the good work!
sorry ivan i don’t know…there are no rules set to stop links i don’t think…i can try and check and see
you can post no more than 3 links…just checked
What you are writing, Preston, will be of great help for beginning filmmakers. Your advice is based on real life experience and is very recognisable.
I would like to share my personal experience about preparing and scouting an making contacts. I have made quite some mistakes and I share this here so others may learn from it.
Part I
I’m working on a passion project about World War I monuments where I live (Flanders, Ypres, Passchendaele etc.): On Holy Ground.
The “Flanders Field American Cemetery” is the only one WWI American military cemetery in Belgium. I wanted to document it and I also wanted to document how the Americans crossed the river Scheldt, an important strategic event.
I postponed the movie for a while, because I thought it was a good idea to shoot the film on the exact date when the military campaign took place (from the 31st of October till 11th November 1918). Two weeks before that time window, the weather was really nice and sunny, so I decide hastily to go out and shoot. I had explored the site with Google Maps, so I thought I was well prepared.
So I drove to the location, took my gear and tripod, and started setting up. As I wanted put the camera on the tripod, I realised I had left the quick release plate at home… First bummer… This made filming impossible. So then I decided to do some scouting instead and shoot still images. Second bummer: the central monument was in scaffolding for restoration.
Well, I then further explored the site, and got a good feel of it. Of course, all this bad luck meant I would have to come back another time. As I left, I noticed there was an information centre, but I didn’t even think of taking a look inside
Part II:
So two weeks later, I returned, and yes, I was much better prepared. I started filming, and only within 30 seconds, a military looking person came out of the information centre and kindly requested what my business was. He wanted to know if I was a commercial filmer. If so, I needed accreditation. I showed him my international, amateur filmer card, and he was ‘cool’ with it. So I could continue filming. I then asked him if he knew how long the scaffolding would be there. He told me it would be taken away within a few days. DAMN! If only I had asked him this on my first trip, I could have postponed one week, still be in the time window and the monument would have been open and without scaffolding!
Anyhow, I learned a lot from this trip. Here are the movies I shot that day. I decided to keep the shot with the person from the information centre in it.
Flanders Field American Cemetery:
http://vimeo.com/52845355
Ohio Bridge:
http://vimeo.com/52804368
(Ivan’s comment continued):
So two weeks later, I returned, and yes, I was much better prepared. I started filming, and only within 30 seconds, a military looking person came out of the information centre and kindly requested what my business was. He wanted to know if I was a commercial filmer. If so, I needed accreditation. I showed him my international, amateur filmer card, and he was ‘cool’ with it. So I could continue filming. I then asked him if he knew how long the scaffolding would be there. He told me it would be taken away within a few days. DAMN! If only I had asked him this on my first trip, I could have postponed one week, still be in the time window and the monument would have been open and without scaffolding!
Anyhow, I learned a lot from this trip. Here are the movies I shot that day. I decided to keep the shot with the person from the information centre in it.
Flanders Field American Cemetery:
http://vimeo.com/52845355
Ohio Bridge:
http://vimeo.com/52804368
they just went into spam….dont know why. sorry!!
Really great stuff, I think a lot of us can do all the technical things but telling a story is the most important part. Thanks for teaching us that. Also what kind of device would I need to shoot a timelapse like you did with the camera on the hood facing the driver, with the lights flashing by on the sides?