
Ethics statement: I was hired by Sony Europe to make a film for their “No Limits” campaign to promote the PXW-FS5 and also to host a webinar based around the new camera. Whilst I am mostly talking about the making of the film, I am also covering my thoughts and the pros and cons I feel the camera has….but please note this is not a review due to the conflict of interest. I will be as honest as always about my thoughts, but because I was hired by Sony for that promotion, the cynical won’t believe any of the good things I say etc etc. So take this post however you want to. It’s me as honest as I have always been, but it is important to flag my connection with Sony on this project. As I always say in my posts, never listen to one opinion about a camera or product – always seek out as many as you can before purchasing. Never base a purchased based solely on one opinion, even mine!
You can read more about my ethics here.
You can see the whole 1 hour webinar by clicking the image below or here. Make sure you come back for this blog post though!


OVERVIEW
Sony bring out a lot of cameras, don’t they? Some owners might find this irritating, as new cameras with better features could come not that long after buying a camera (yes, it has happened to me, and I admit I was a bit irritated!), but generally I think it is great that they are bringing out better and better cameras with this frequency. This drives technology forward, pushes the competition, and brings prices down, making fantastic tools more affordable.
When it comes to their A7 stills-camera line, we are talking around a year before a replacement is released, and their mark II versions of cameras were a big improvement. I haven’t talked much about the A7SII or A7RII on my blog, on social media yes, just not here. I will correct that soon, as I own both and love them for very specific reasons over each other.
So what exactly is the FS5 replacing? Officially it sits in between the A7SII and the FS7, so reading between the lines, it is effectively a replacement for the FS700, which is around two and a half years old now. I used to own the FS700 but sold it a while ago when I bought an F55.
As cameras go, the FS700 was pretty great with lots of things that were not so great. The image, features, cached high frame rate, super 35mm sensor, e-mount and the ability via a firmware update (paid) to output 4k raw and continuous high frame rate were all terrific features, but it was hampered by awful ergonomics, terrible EVF loop, too many buttons in confusing places and a weak in-camera codec.

Four Corners: Postcard from Miami Beach from Philip Bloom: Four Corners on Vimeo.
The image really was lovely though, and having that upgrade to 4K gave it new life, especially when paired with the Odyssey 7Q which converted the huge and unworkable raw DNG recording to a much more practical ProRes (although it took a while before that happened, and now the Atomos Shogun does that too). The above video was shot with the FS700 and 7Q, and you can see just how lovely that image is.
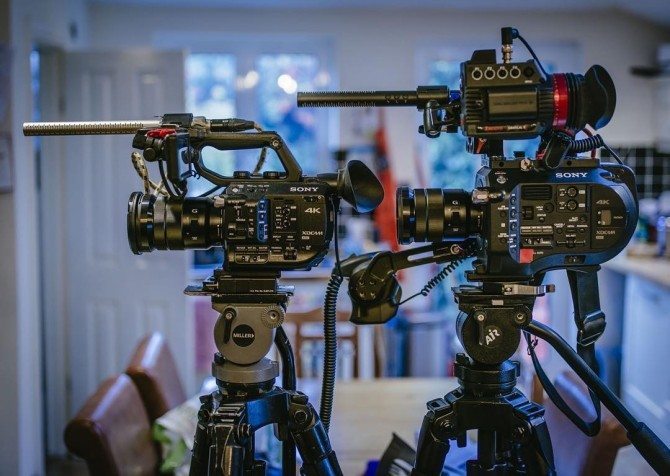
The PXW-FS7 is a stunning camera. Many, including me, considered it the natural successor to the FS700 with lots more features. It’s a camera I have been using on “The Wonder List” for CNN for about 13 months now, replacing my F55 as the main camera for the show. I think the FS7 is the most powerful, versatile, affordable broadcast documentary camera on the market. With its 10-bit I frame codec, up to 180 FPS continuous high frame rate recording in HD, internal 4K recording up to 60fps, coupled with really nice ergonomics with some terrific additions like the extendable hand grip, it still is my favourite video camera. You can see the last review that I made from back in May below.
Video Review of the Sony PXW-FS7 from Philip Bloom Reviews & Tutorials on Vimeo.
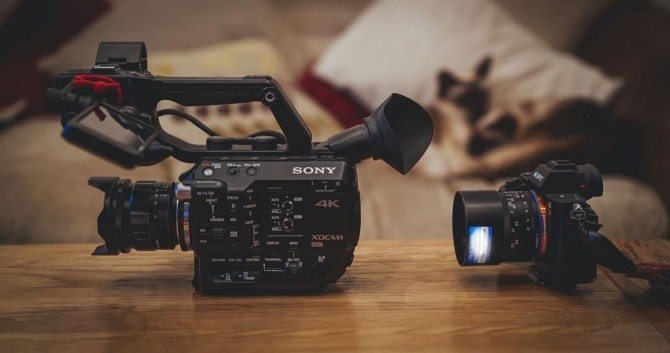
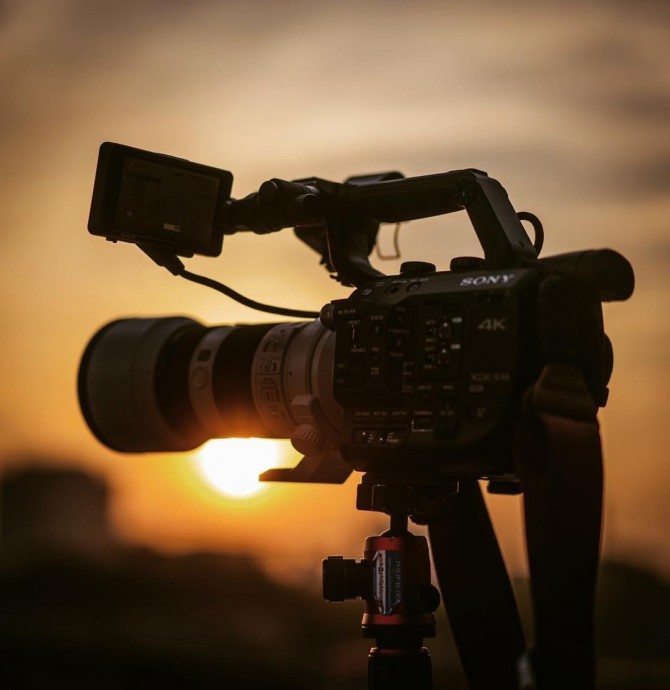
But the PXW-FS5 is a much more natural successor to the FS700 than the FS7 as it turns out, especially if you compare this paragraph to the one I wrote about the FS700! The FS5 has a terrific image, cached high frame rate recording, super 35mm sensor, e-mount, and it will have the ability to do raw recording via a (paid) future firmware upgrade. What is also has is a TINY body that weights practically nothing, internal 4K recording to a fairly decent 8-bit codec, HD internal recording to the same fairly decent codec (but this time it’s 10-bit), an amazing variable ND filter built-in. It also has an average built-in EVF and no loop for its “OK” LCD screen.

As you can see the FS5 is tiny…when you take the lens and handle off it’s ridiculously small and light. Perfect for gimbals and even drones; something they are absolutely pitching this camera for. Personally, if I owned an FS5, I wouldn’t fly it…I would be way too nervous. I can handle losing a GoPro but not an FS5! But for many it could be ideal!
COMPARISON WITH FS7
So the camera is clearly, in its stylings, a mini version of the FS7. Below I will try to go over the main differences other than the size. This is not in order of importance.
- They have the same sensor.
- Base sensitivity in SLOG3 mode is 3200 ISO on the FS5 and 2000 on the FS7. This doesn’t make the FS5 better in low light, it is just where Sony believe the sensor performs at its best.
- The FS5 has an amazing electronic variable ND over the sensor, which is super smooth to adjust. This is way better than an ND on the front of the lens and there is zero colour shift. You can also program two of the stages on the ND wheel to any point of the variable ND, giving it 3 stages. Two presets and one clear. This is an absolutely FANTASTIC feature!
- The FS7 has a traditional 4 stage optical ND wheel. 3 ND settings 1/4, 1/16, 1/64 and clear.
- The FS5 can record 50p/ 60p in HD as well as over crank up to 60fps in continuous recording. 60 is only available when using an NTSC base frame rate. You cannot record different frame base rates on the same card. In 4K mode there is no slow motion mode at all.
- FS5 high frame rate mode is also tied to 50 and 60hz. Like the FS700, it records about 8 seconds to a buffer at 200fps in 50hz mode and 240fps in 60hz mode. It takes about 20 seconds or so to then write that to the card. It has end trigger, start trigger and end trigger half mode like the FS700 and also the Sony RX100 IV and RX10 II. There are higher frame rates, but the resolution drops considerably like the FS700 did. 400/ 480 is usable, just, try to use with shallow depth of field and limited hard lines to avoid aliasing.
- The FS7 can record 4K 60p/ 60fps continuous in 60hz mode and 50p/50fps in 50hz mode. It also records continuously at this rate in HD.
- The high frame rate mode of the FS7 only goes up to 150/ 180fps in 50hz or 60hz but it is continuous.
- Both cameras are noisier in HFR mode than normal recording up 60fps. This is the case with every Sony camera I can think of with high frame rate recording. If shooting log, be very careful not to underexpose in HFR mode as it will show noise much more.
- The FS5 records on widely available SDXC cards. I use the below cards on my A7S, A7SII, A7RII and with the FS5 with no problems. They are cheap and reliable.
- The FS7 records on the more expensive but more robust XQD cards. The ones I own are discontinued, they have been replaced with the ones below, LEXAR cards which are more affordable than the Sony ones and I have had zero issues with them.
- The FS5 records in the XAVC-L codec whereas the FS7 records can record in XAVC-I or L (ProRes requires the extension unit) XAVC-I is an intra-frame codec and superior to the L codec but requires more space as less compression is used. L is a B frame coded and is more compressed but generally taxes edit systems more because of this.
- The FS5 in XAVC-L 4K mode is 8-bit 4:2:0 recording internally. In HD it is 10-bit 4:2:2. The FS7 XAVC-I is 10-bit 4:2:2 in both modes.
- With the recently released 1.1 firmware for the FS5, you can now output uncompressed 4:2:2 8 bit for external recording. No 10-bit though. HD is 10-bit output. The FS7 outputs 10-bit 4:2:2 in all modes.
- The FS5 has a built-in EVF, the FS7 does not. It uses a LCD screen with a loop. Very FS700 really. The FS5 EVF is OK. I wish it was as good as the A7s ones, seems odd that it isn’t. It does have an LCD screen which is of OK quality. It seems very comparable to the FS7 one, but you cannot add a loop to it.
- The FS7 has an extendable hand grip, the FS5 does not, although it will accept the one from the FS7. The Handgrip is quite nice still and can easily be rotated.
Those are the key differences that I can think of. I am sure I have missed quite a few. Anyway, this is mostly just spec talk. What is way more interesting is “What is it like to shoot with?” Well normally I hate giving opinions on limited time with a camera, but I don’t own an FS5 (although I would very much like one!) and I have spent a total of about 10 days with it over two different time periods. The first one was the key one, the time when I made the film for Sony.
THE FILM
Sony approached me with the idea about me making a film for them with the camera (I have made 4 films for them over the past 3 or 4 years). They wanted me to make something that would highlight its features and also something that I might potentially make if I owned one. Well, most of the past 5 months of this year has been taken up with shooting season 2 of “The Wonder List” for CNN. This camera isn’t really aimed at broadcast because of the codec, but really it is only the 4K codec that is a bit on the weak side (it’s pretty comparable to XAVC-S 4K in the A7SII and A7RII cameras, bit rate and compression wise.) The HD is pretty robust, plus it is 4:2:2 10-bit, so I wouldn’t rule out this camera for broadcast TV work at all if shooting HD.
The features that I wanted to make the most of in the video were the high frame rate cache recording, 4K, and making the most of its small size. What I certainly did not want to make was a generic montage: it needed to have a story.
I used to make quite a lot of mini docs for myself, but “The Wonder List” has taken so much out of me that in the very limited free time I have between episodes, I almost never shoot anything for myself (although I do take a lot of photos, that never stops!). There have been a few low-key montage uploads recently, but that is it. This would not be good enough for this video. I wanted to make something properly! After all, Sony were hiring me to make a film and when you are making something for a client you should always give it your all, and that is exactly what I did!
The budget for the project really only allowed me to do one full day of filming for the mini documentary part, and that included travel, so I needed to find a subject in the South-East of England (I live in London), but I did not know exactly what I was looking for. Something that was crafted, an artisan of some sort perhaps. Someone who made something interesting but also that was visual. An artist who paints on a canvas does not really lend itself that well to super slow motion. So I put out a Facebook post asking if anyone knew of a place/ person who fitted the bill! Within a few minutes, I had a few options and in the end I went with the first person to reply to me as it sounded the best option.
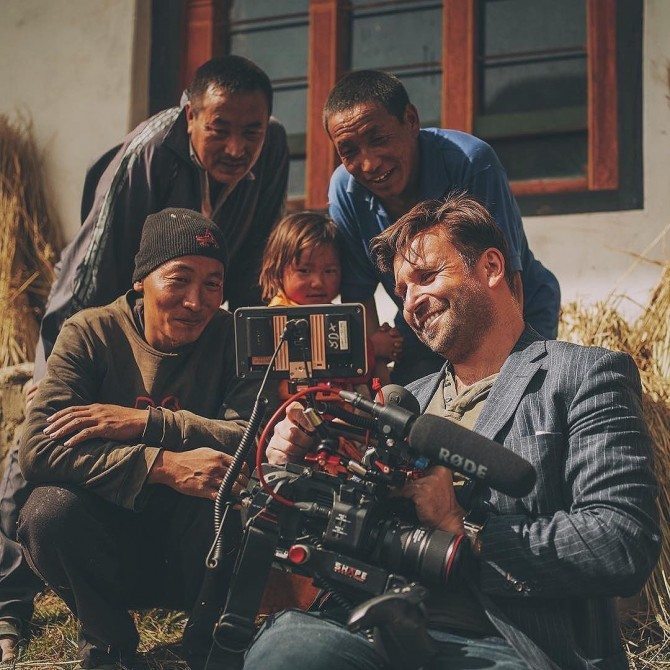
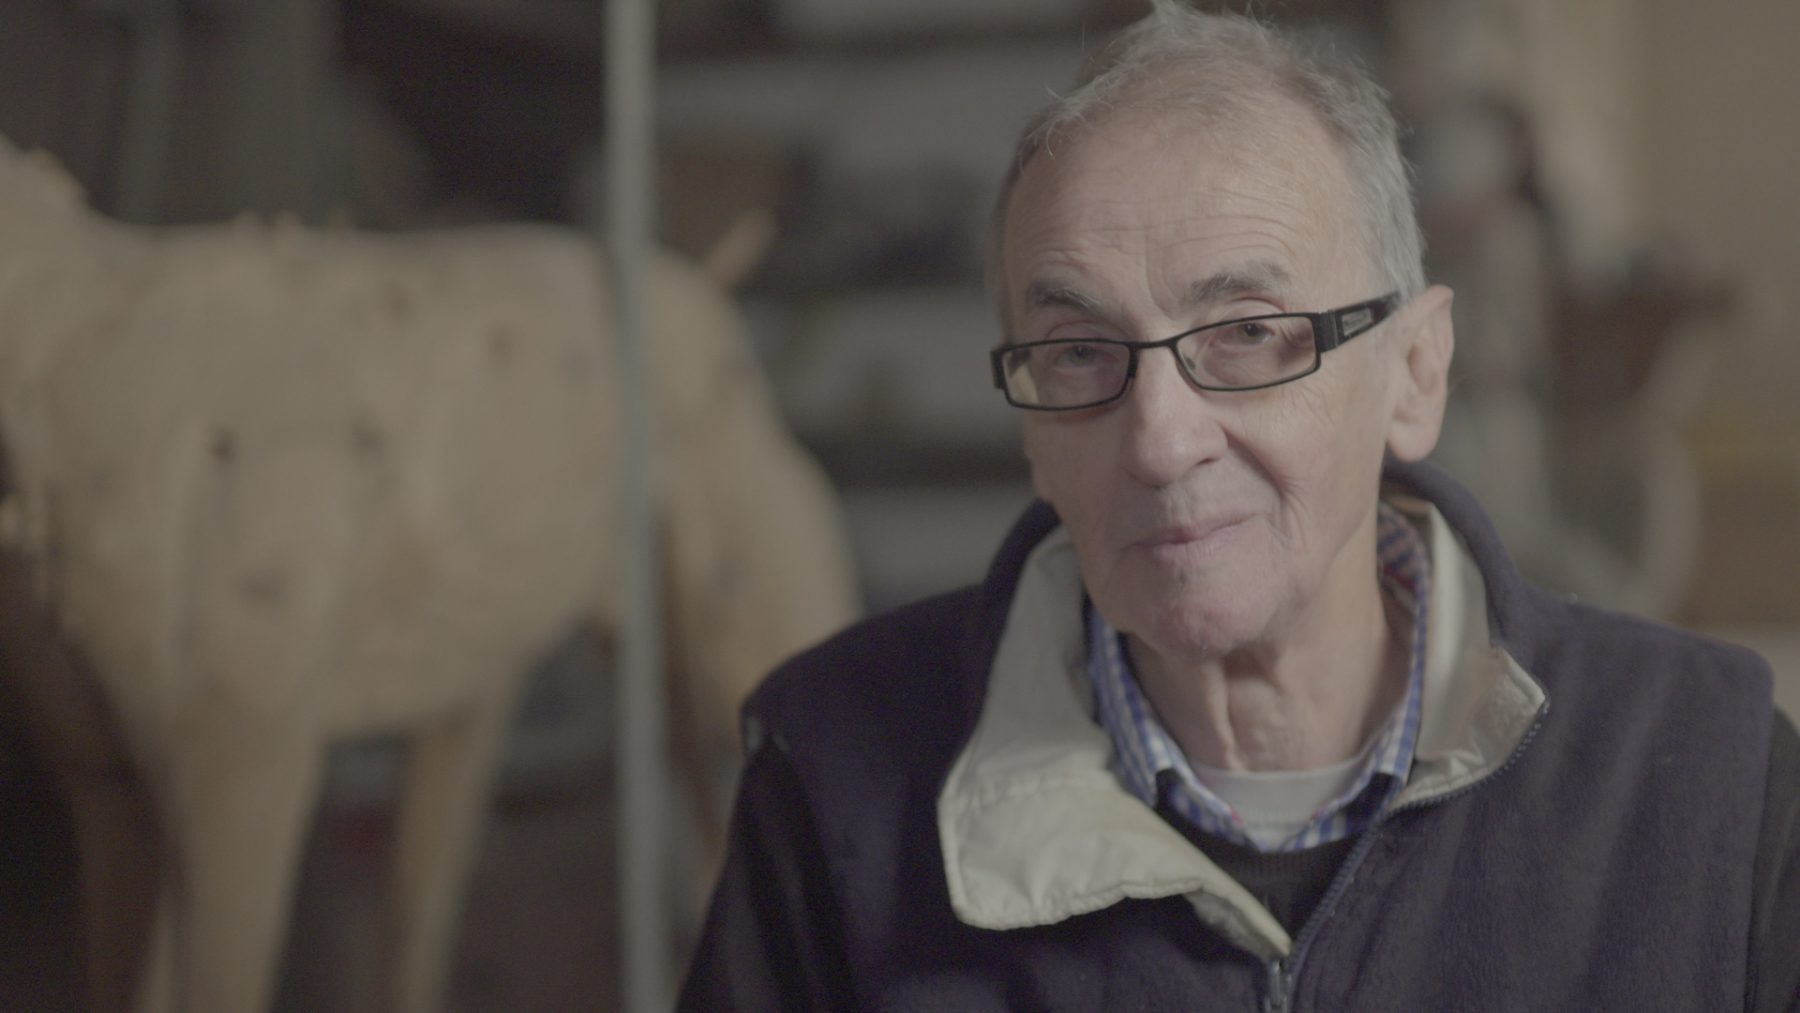
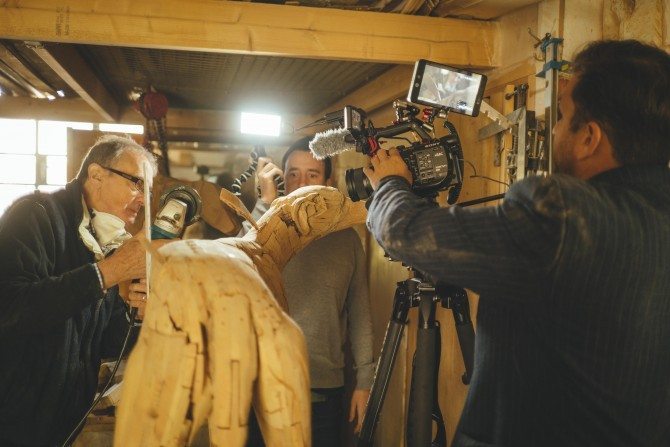
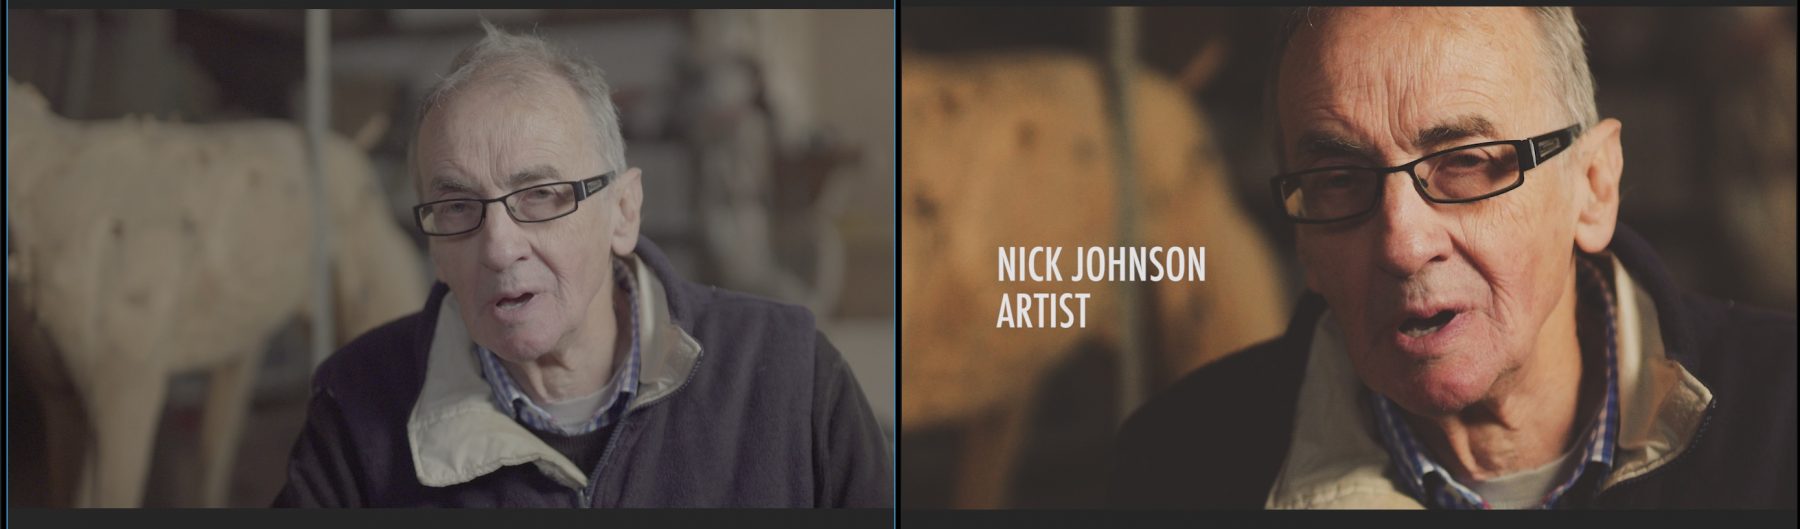
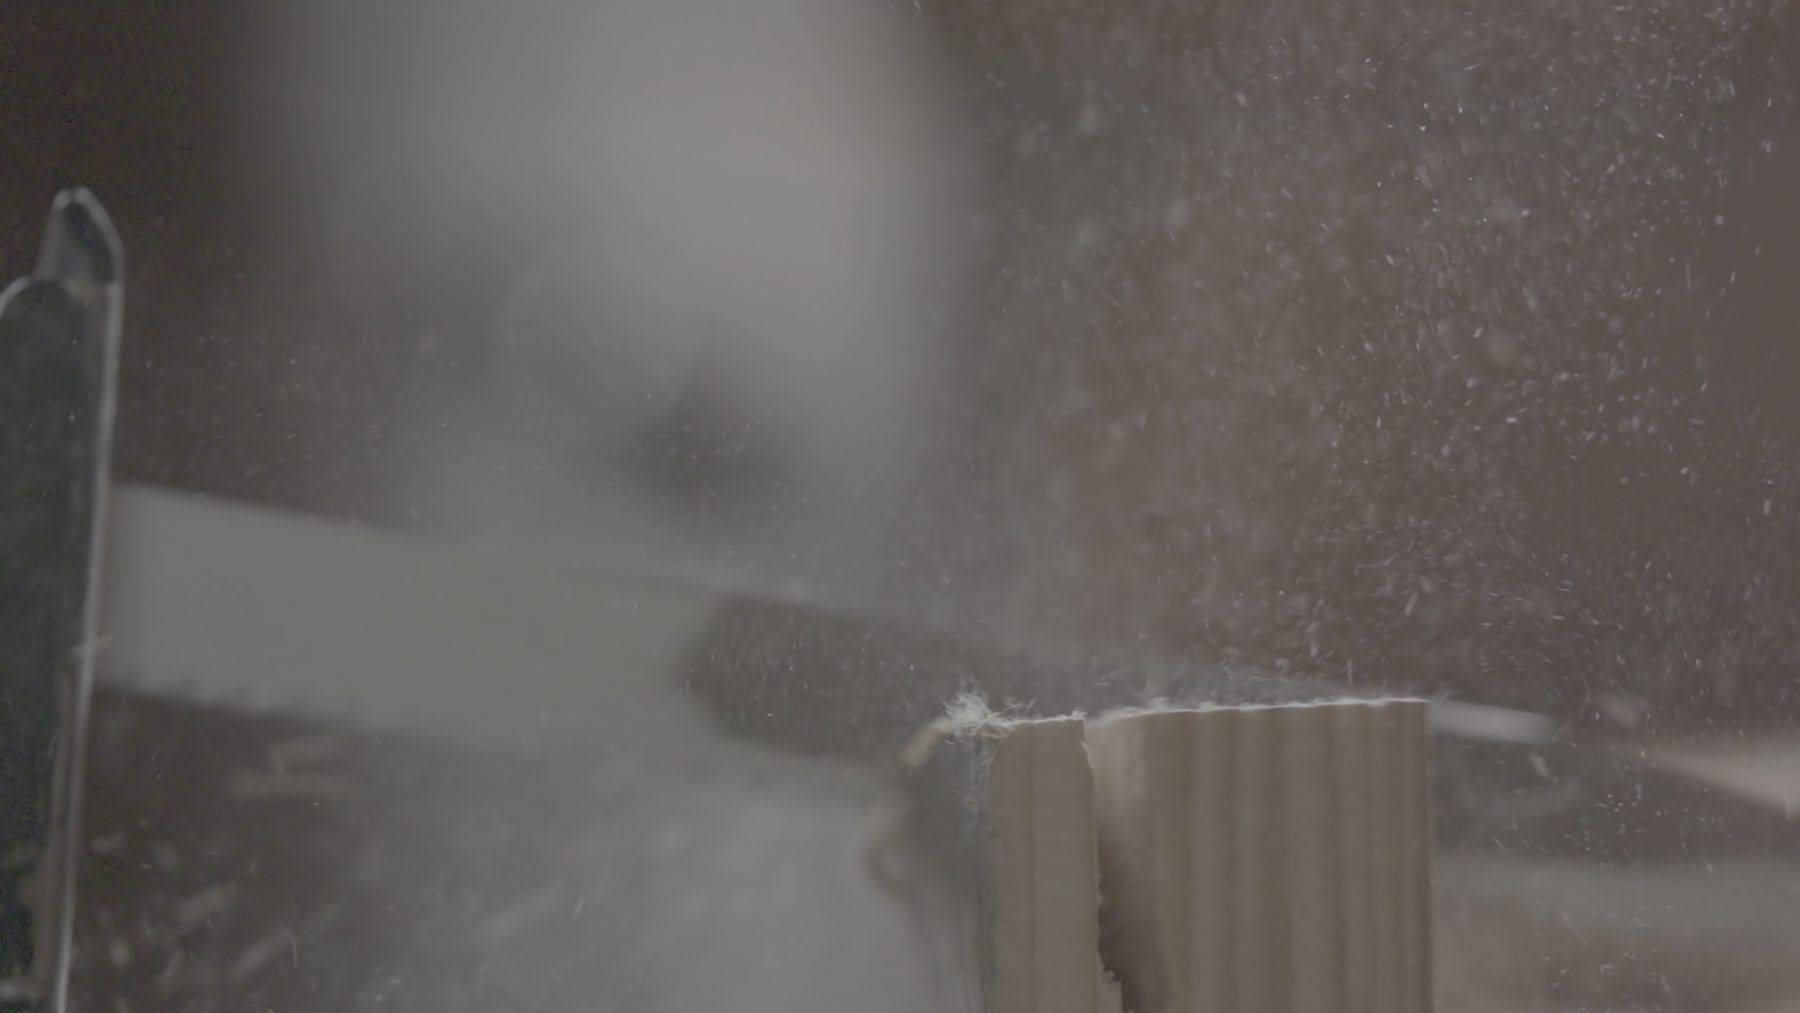
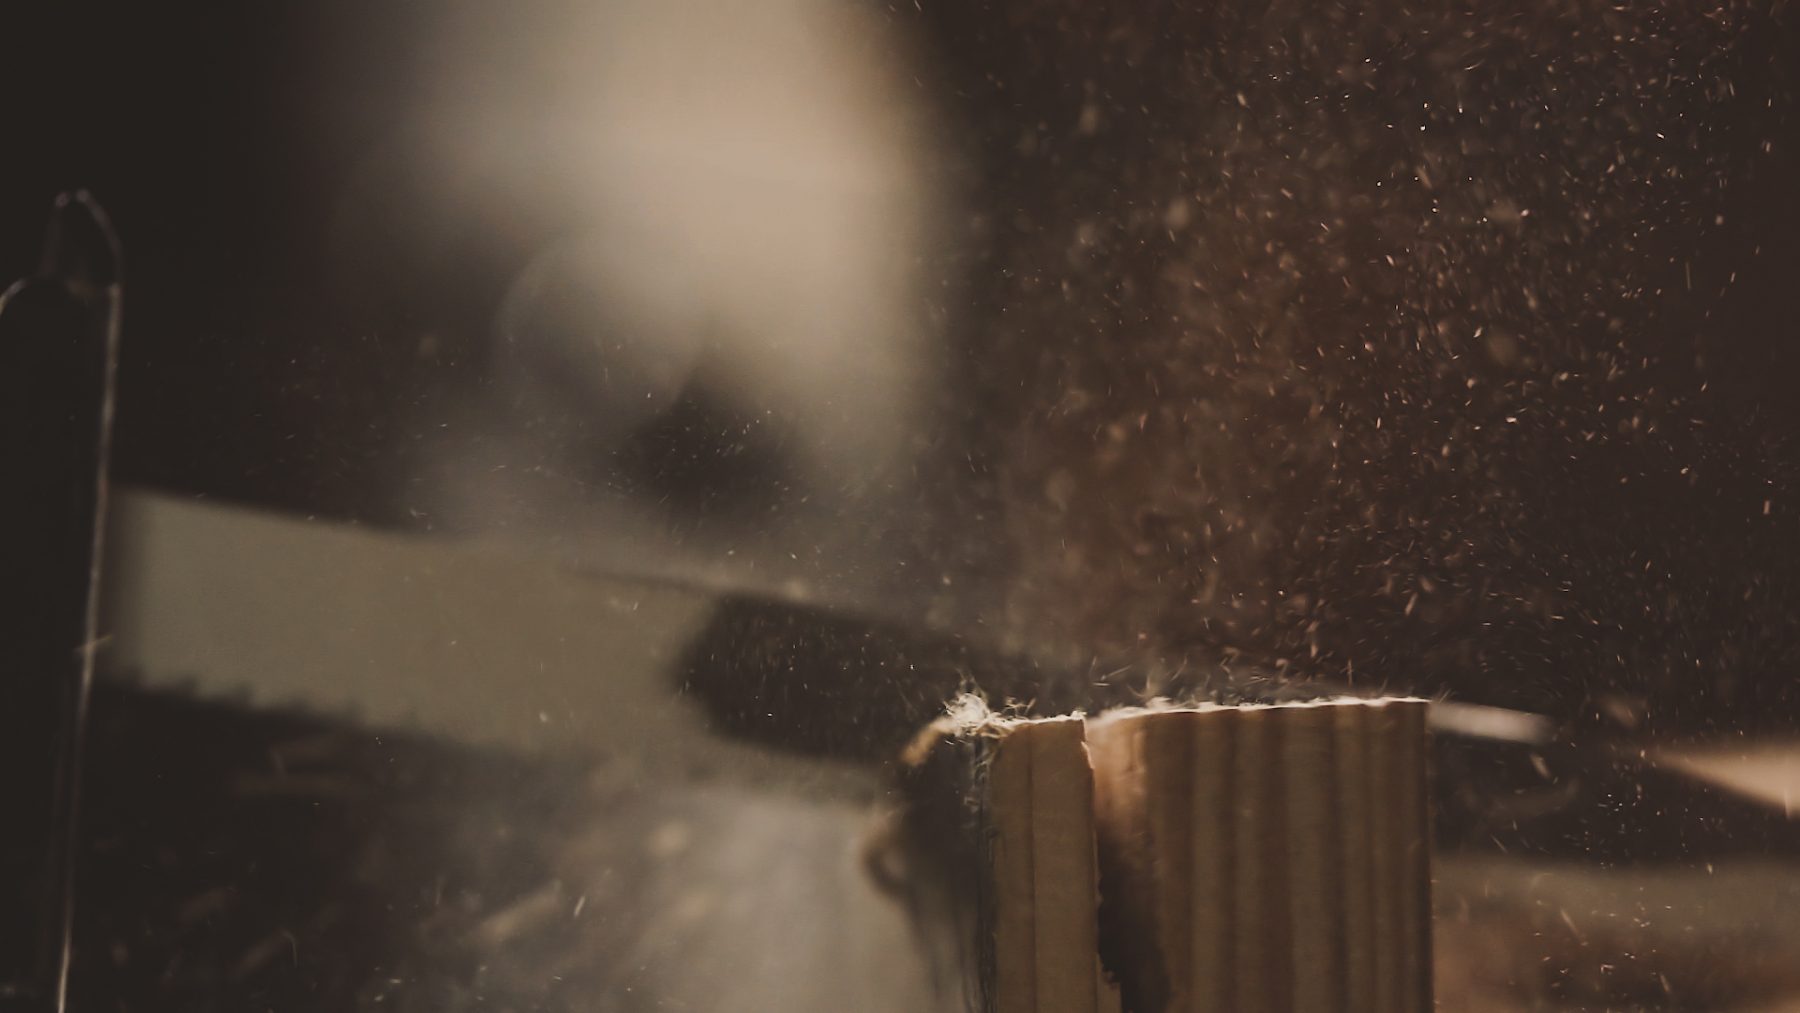
Nick Johnson was put forward by his son Milo. He is an artist whose speciality is making different animals and birds with wood that he finds and recycles. Milo sent me some photos and some old video clips of his dad so that I could get a general idea of what I would need, and then we arranged for a mutually convenient day to do the filming.
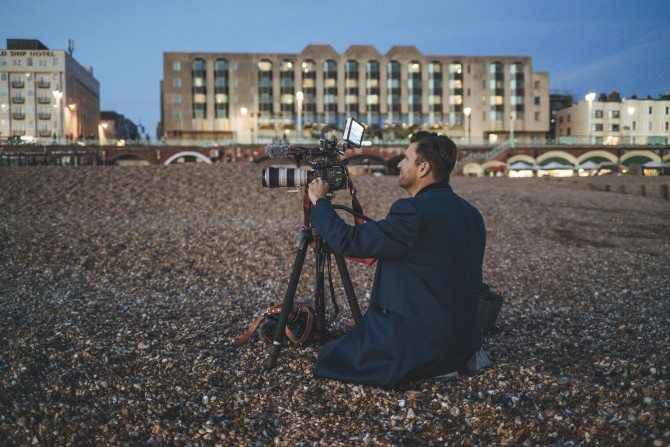
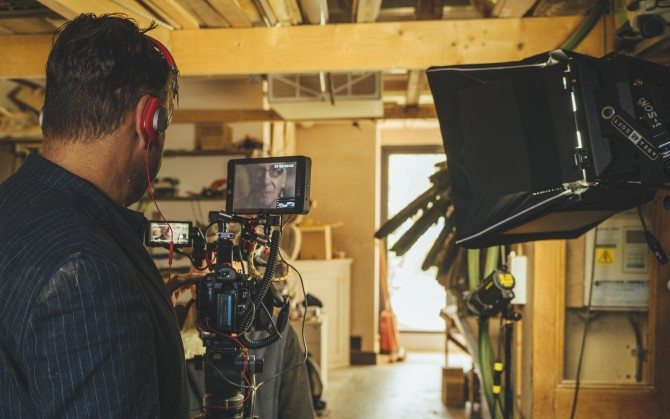
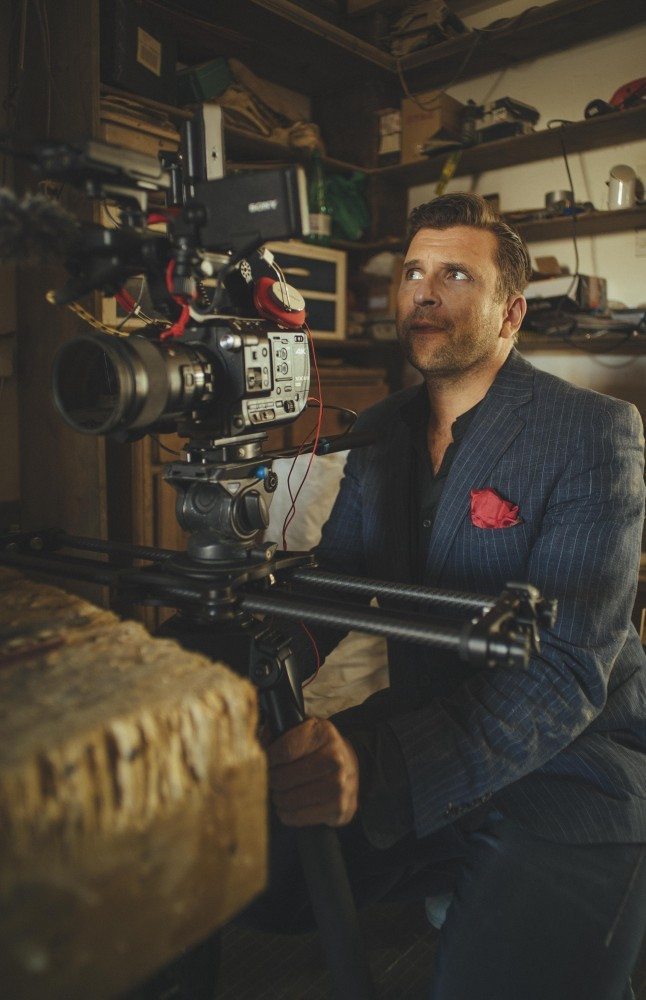
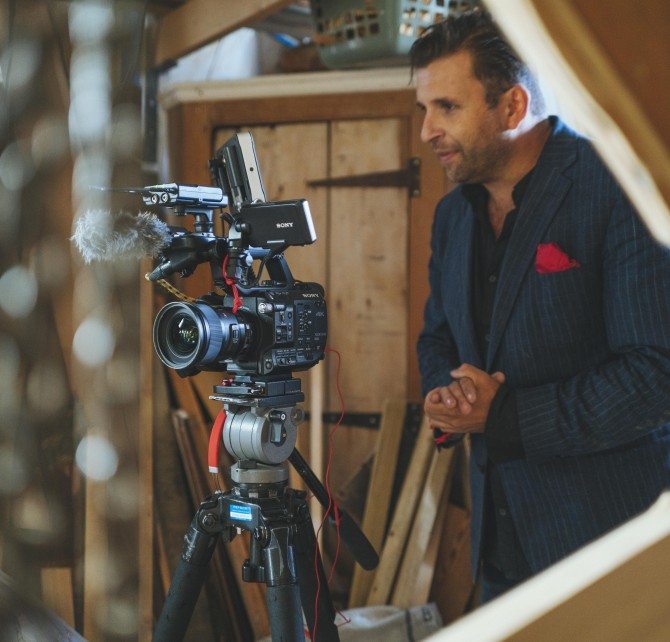
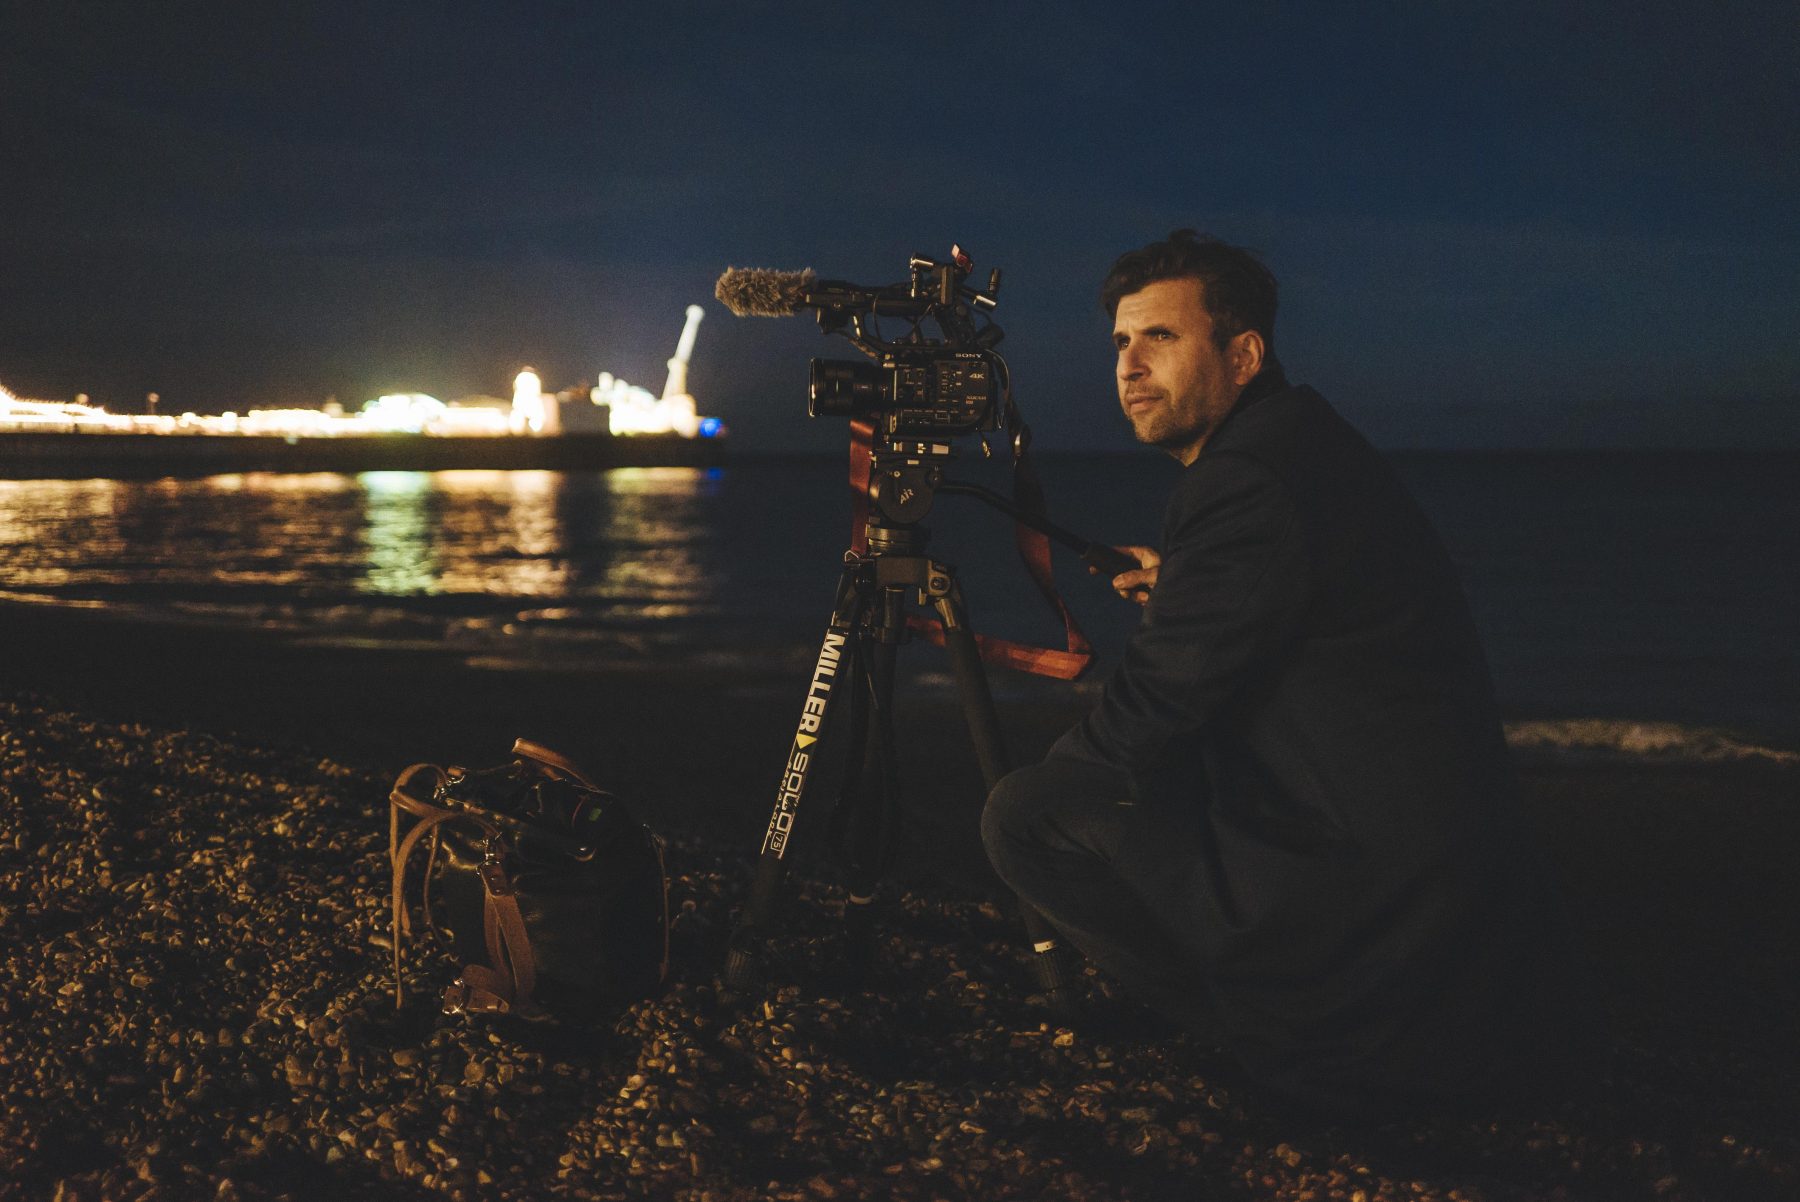
I hired Julian Wakefield of Teralon Media to film the BTS for me, which I would use to open the video. Sony wanted me on camera talking about the FS5 as part of the video as well as the mini documentary. Julian has assisted me on two episodes of The Wonder List, so I knew he was a safe pair of hands.
PRE-PRODUCTION & CHOOSING THE GEAR
There was very little pre-production done. I spoke briefly to Nick before hand, but I didn’t go into huge detail as to what I was going to ask him about, as I really don’t think you need to. What you don’t want is for prospective interviewees rehearsing too much what they are going to say. I simply said I wanted to find out about his art, both the physical and mental process especially, and that I wanted to film him at work. You want to put people at ease, not stress the out. I told him it would be a low-key shoot and we wouldn’t take too long!
LIGHTS
On the day I brought with me too much gear. This is quite common when I am driving to a job. Whereas most of my work is a flight away, which means being much more selective over gear, I was taking my truck this time so I could bring more than I might need. One of the biggest unknowns was how much light there would be in the studio.
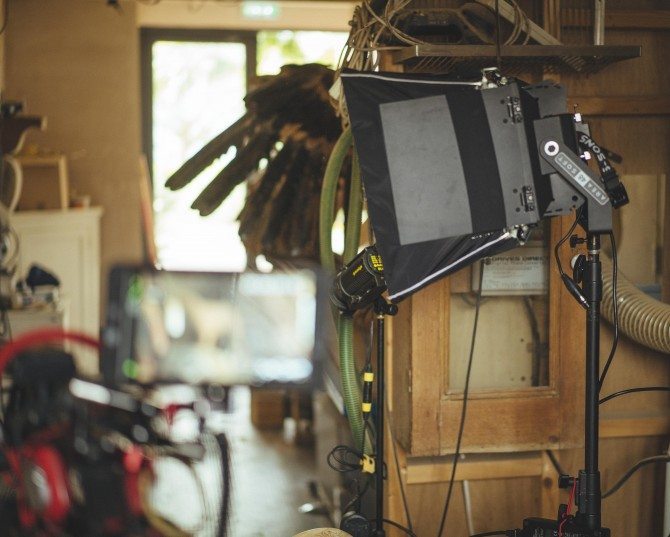
The lights I actually ended up using were my BBS lighting Area 48, which is one of my favourite lights and a couple of others. All the lights I used are remote phosphor LED lights. The quality of light you get from these remote phosphor lights is simply remarkable. Completely even, beautiful colour rendition, and the strength is the same no matter what colour temperature you choose, as that is determined by the phosphor you put in front of the searing blue LEDs. To learn more about these type of lights and this one in particular, check out the below video featuring my friend Vincent LaForet.
I only used one light for the interview. The AREA 48 with a soft box, which gave it a really lovely soft modelling around Nick’s face. It’s difficult when lighting someone with glasses, really I wanted the light to be about 1 foot lower, but I kept getting a reflection in his glasses, so I raised the light. The biggish downside to this was that I lost the catch light in his eye for a lot of the interview as it was really on the cusp of being in. With more time, I would have put up a second light whose job would solely be the catch light. It need not be that bright, just enough to reflect, but I was up against time as the clocks had gone back losing me a whole hour of daylight, and I needed every ounce of that daylight, not just for the interview but for the B-roll and for the shots in Brighton which I shot after this, which I needed for the intro.
There is a lot of daylight coming in behind Nick, which I am using to separate him from the background, as well as to light the dog and the background. There was a window behind me, which I covered over with a blackout to give me full control of the light on his face and also to make the light continuous, as the sky had a lot of broken clouds. I could edit around the background changing because of this, as the effect would be quite minor, but it would be much more jarring on his face.

HIGH FRAME RATE RECORDING
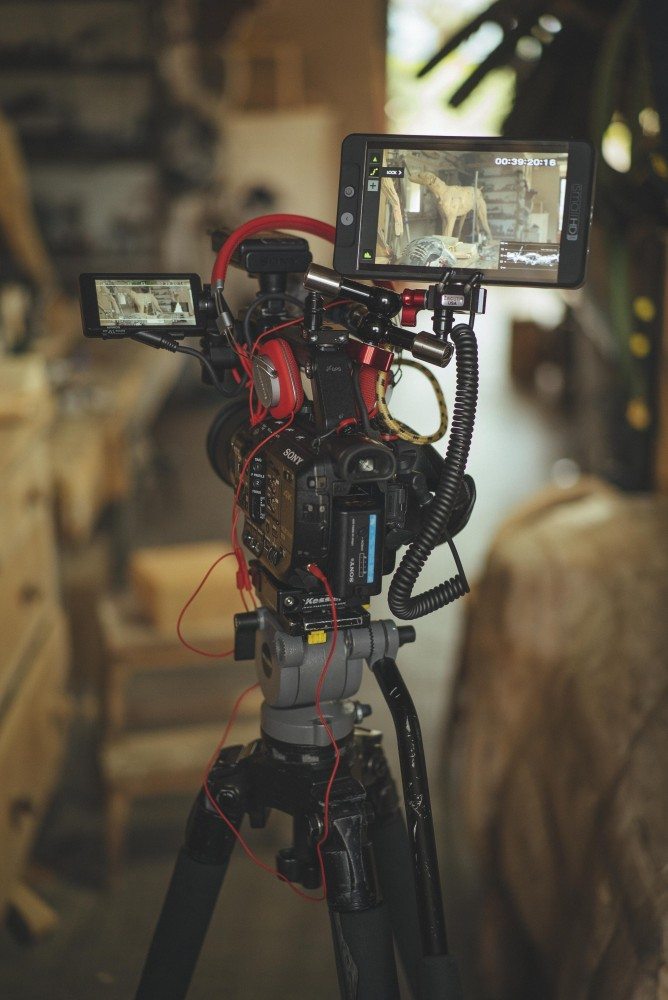
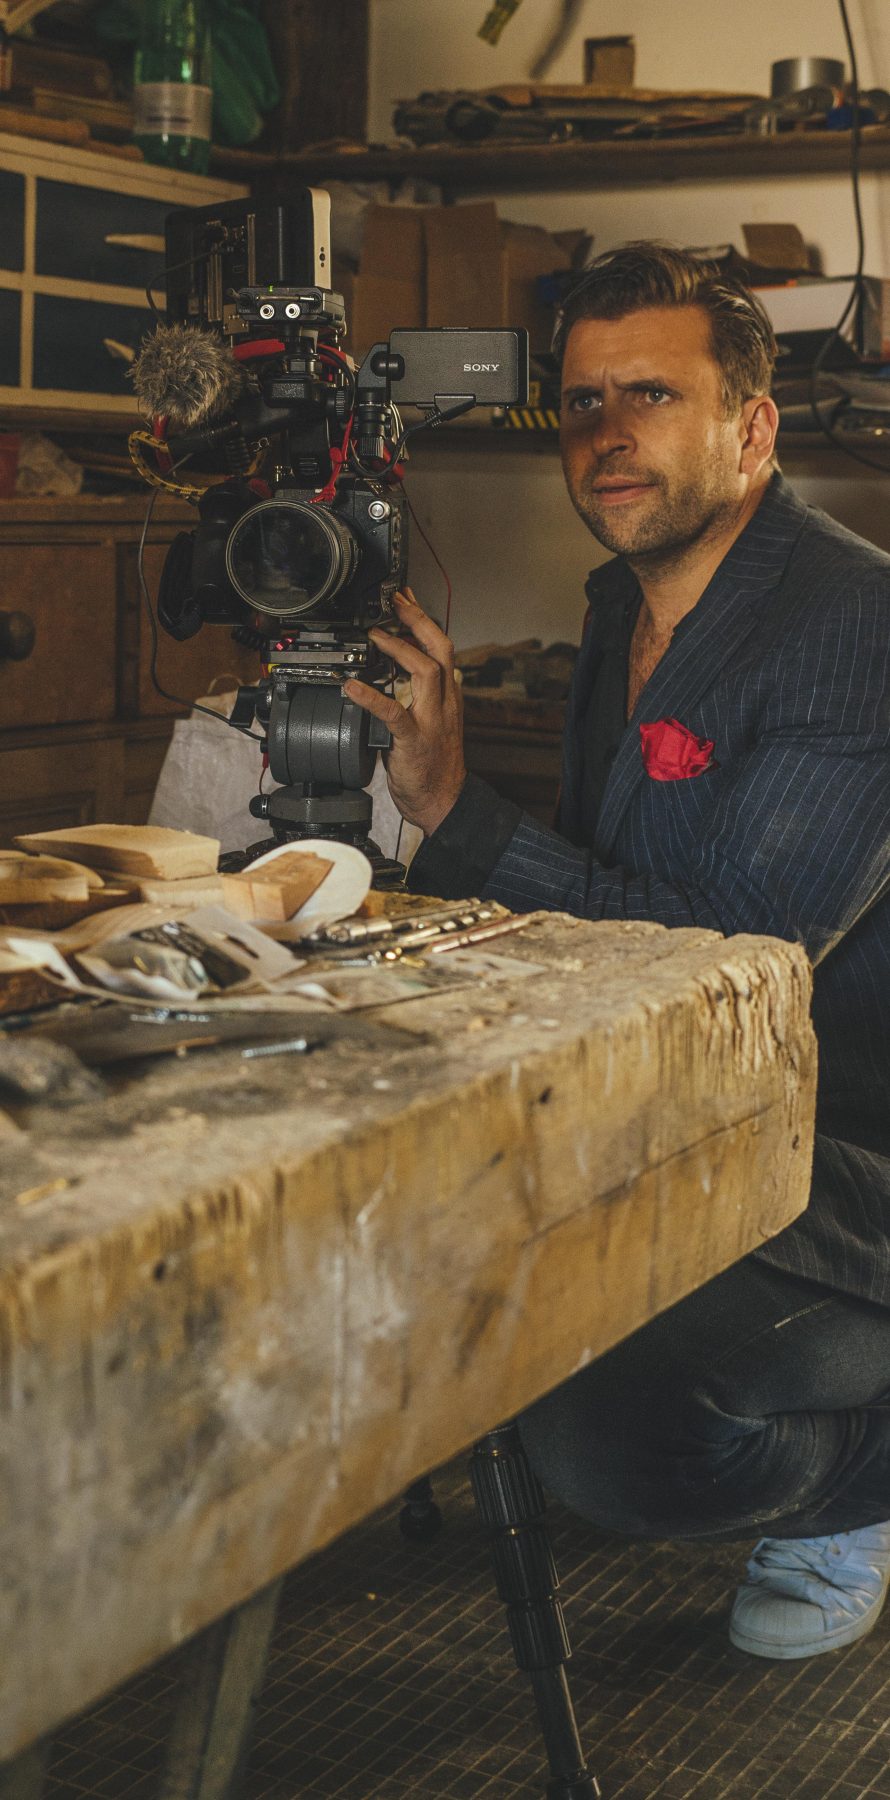
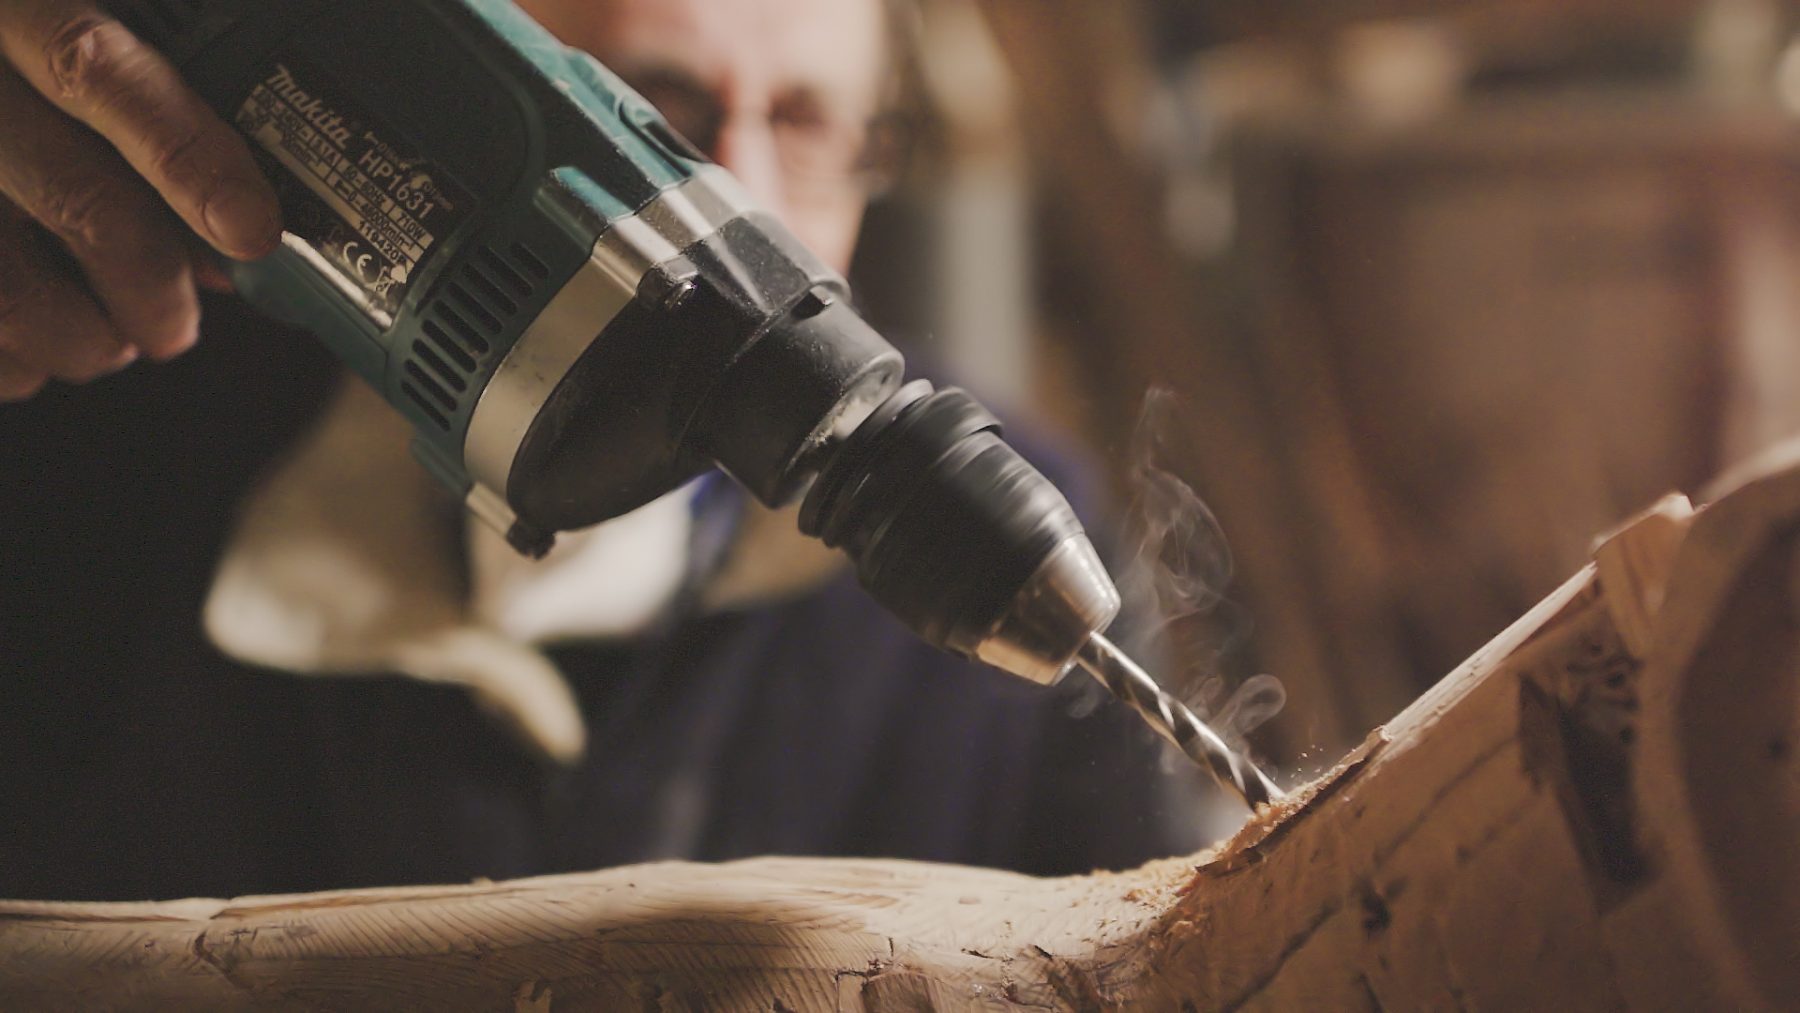
I used a smaller remote phosphor LED for most of the high frame rate shots, the Cineo Lighting Matchbox. These are wonderful small lights. Super portable, run off of AC or batteries (I use Sony L batteries) and perfect for quick placement of lights as you can see in the below photo while Nick’s son Milo is holding it for me as I light his father whilst filming some 200 fps shots of the circular saw.
When using high frame rate recording, you have to make sure you are using either nice bright natural light, or if indoors, nice bright high quality artificial light like the lights I was using. If you use domestic lights, you are guaranteed to get horrendous flicker, even if it is not the main light source. You will see it on the edge of things or in the background. Turn them all off. At 200fps, which is what I shot the slow motion at, your shutter speed needs to be no less the 1/400th of a second. Although there isn’t that actual shutter speed, close but not exact. If it is not lower that 1/400th, you will start getting unsightly motion blur. Normally I set my shutter speed to degrees on my FS7, 180 degrees, so when I change from normal speed to slow motion I don’t have to fiddle with the shutter, as it is automatically double the frame rate. The FS5 currently does not have shutter angle. I hope it comes in a future firmware upgrade, as it makes switching between modes much quicker and less prone to accidentally shooting at 1/215th of a second or whatever it goes to automatically! This is too slow, and the motion blur is way too much!
I didn’t go any higher than 200fps on this shoot. You can only shoot 240fps if your base frame rate is 24p or 30p. As mine was 25p, this was the most I could go to with it looking great. I found the 400fps too ugly in my tests prior to shooting the mini doc. I won’t even mention the 800fps!

The fact that the camera uses a buffer and can only record around 8 seconds or so is not a massive limitation for something like this. The shots are very directed, so start trigger mode was used, end trigger is used for when the shot isn’t directed and you are waiting for the shot to happen and then when it has you hit record which saves the previous 8 seconds. The shot of the two seagulls in the video was done via this mode, as seagulls don’t take direction well! Yes, you do have to wait 20-30 seconds or so for the buffer to write to the card, and if you mess up you simply hit cancel and try again. When you hit cancel it still saves whatever it has written to the card up to that point.
THE SLIDER
One thing you may think is odd in the BTS part of the video is how fast I was moving the FS5 on the Rhino Slider. Because I am shooting at 200fps at 25p, I really need to make the camera move about 8 times faster than I normally would, so when it plays back it will look like a normal slider move, but in slow motion!

The Rhino slider I have been using since the end of July. I backed it on Kickstarter, and when it arrived I was super impressed! The package I bought was the EVO 24″ carbon and aluminium rails with EVO motion. The rails are swappable between the two.
The carbon is super light and strong and can take some pretty big payloads, as long as you have good support. It has built-in feet (that’s the best support as it’s on both sides not just in the middle like you have when you mount it on a tripod) which is a lovely touch.
If you are going to use one manually, it is essential to buy the flywheel attachment which adds substantial inertia which makes it feel like the camera if floating on the slider.
It is, without question, the smoothest slider I have ever used. I will do a blog post soon on it, where I will also talk about lovely EVO motion add-on which is so compact, but powerful. You may have guessed I am pretty taken with it! I have used it on all 6 episodes of season 2 of The Wonder List for video motion as well as time-lapse. Five months of solid use in 8 countries across 6 continents and it is still going strong!
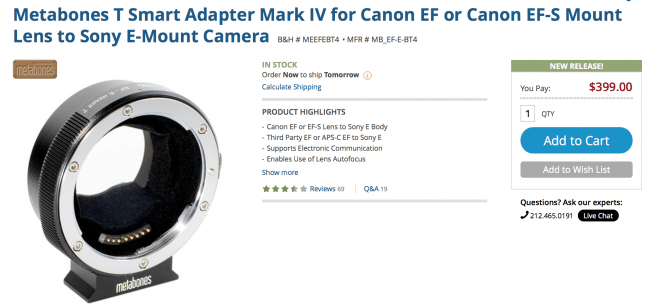
For almost all of the slider shots I used the marvellous Sigma 18-35 F1.8. This is a crop sensor lens. I have the Canon mount version, so I used the normal Metabones EF – E version IV. More on lenses later on…
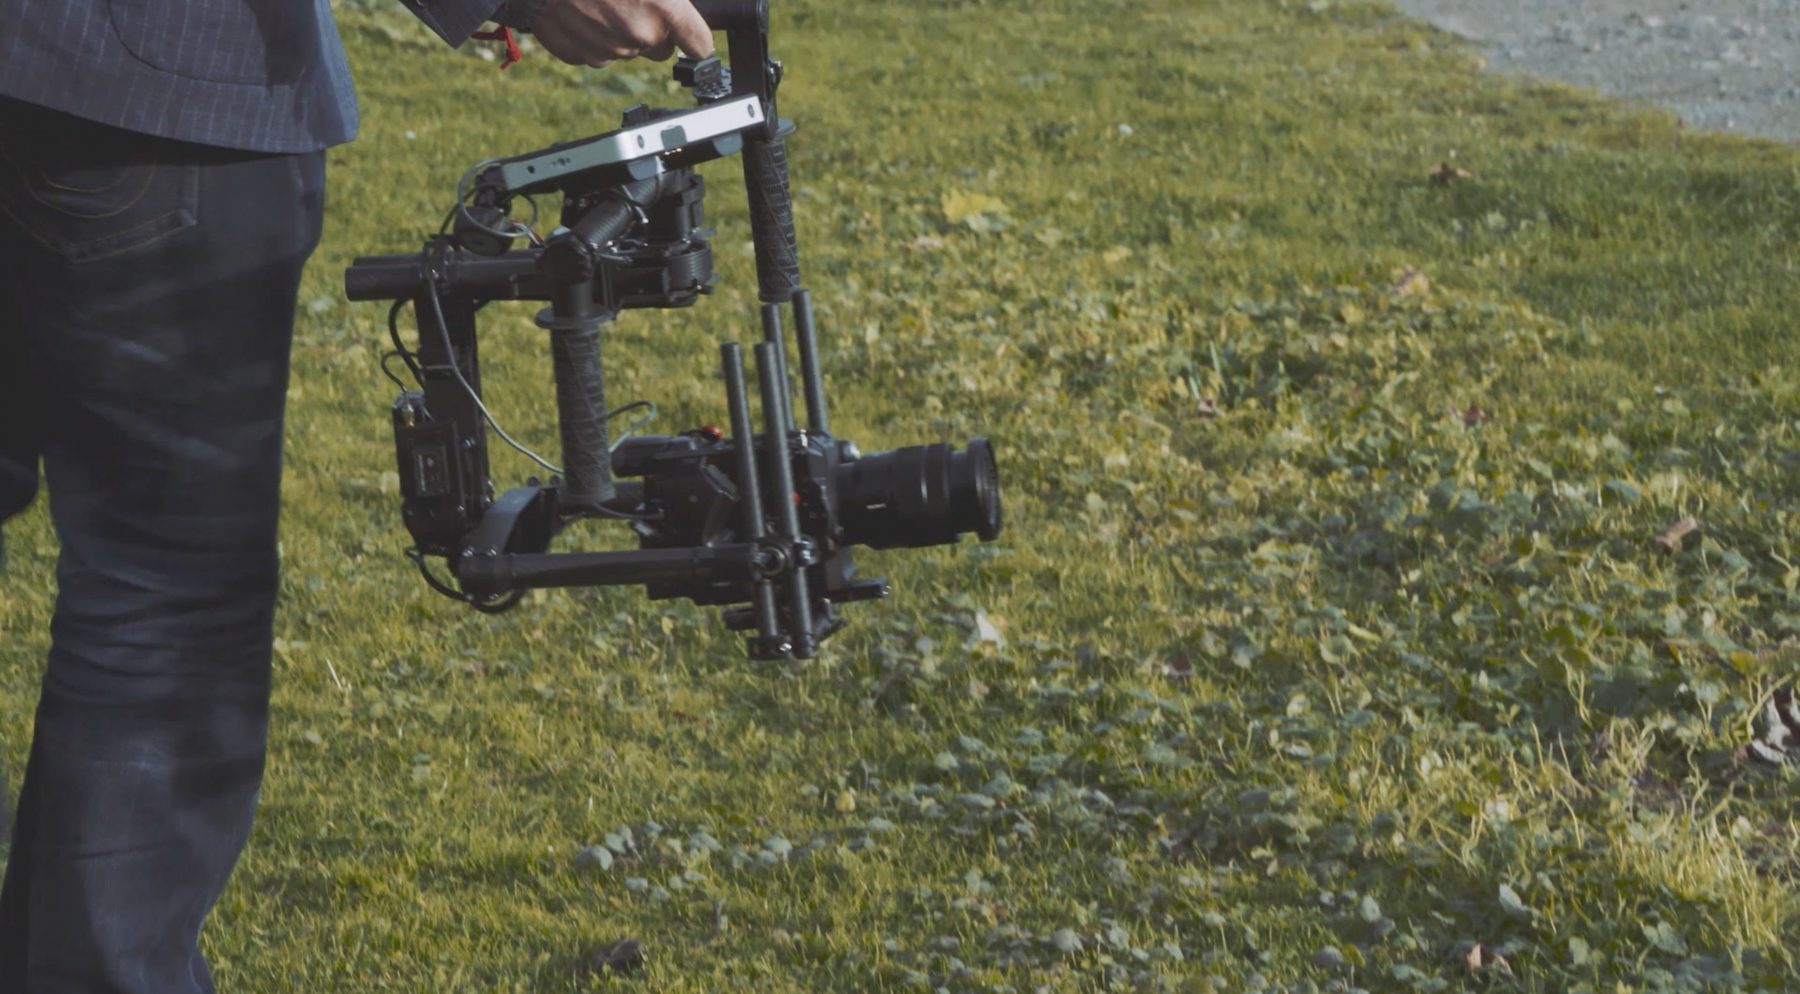
THE GIMBAL
When you strip the camera down, the camera is super light and a nice form factor to go on a 3-axis gimbals. Now it will fit on a MOVI M5 and Ronin-M, although I actually used my MOVI M15 simply because I found the viewfinder was still slightly getting in the way on tilts up and down as you cannot remove it. What I needed to do but didn’t have the right bits with me, was move the camera slightly forward and either use a lighter lens (I used the excellent Sony 16-35 FE F4) or screw in something onto one of the 1/4″ 20 holes that are all along the top of the camera. Nothing big and heavy, just enough weight to allow me to move the camera forward but make it possible to balance on the smaller gimbals. With the M15, as you can see below, there is a huge amount of space at the rear, as this gimbal is designed for longer camera bodies like the FS7.
QUIRKS
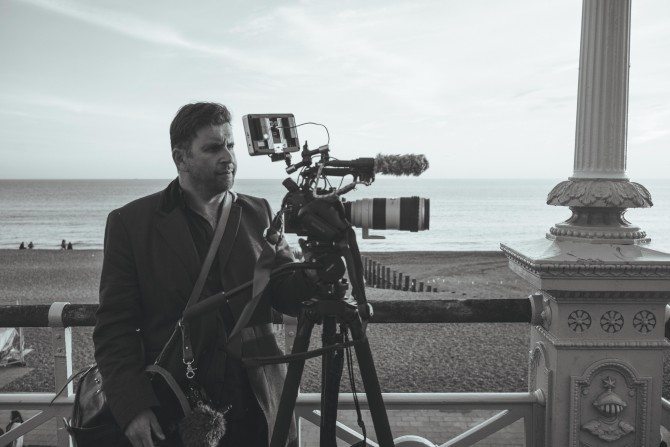
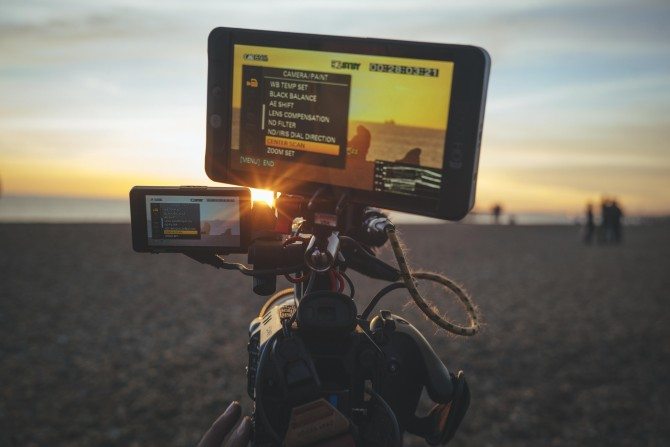
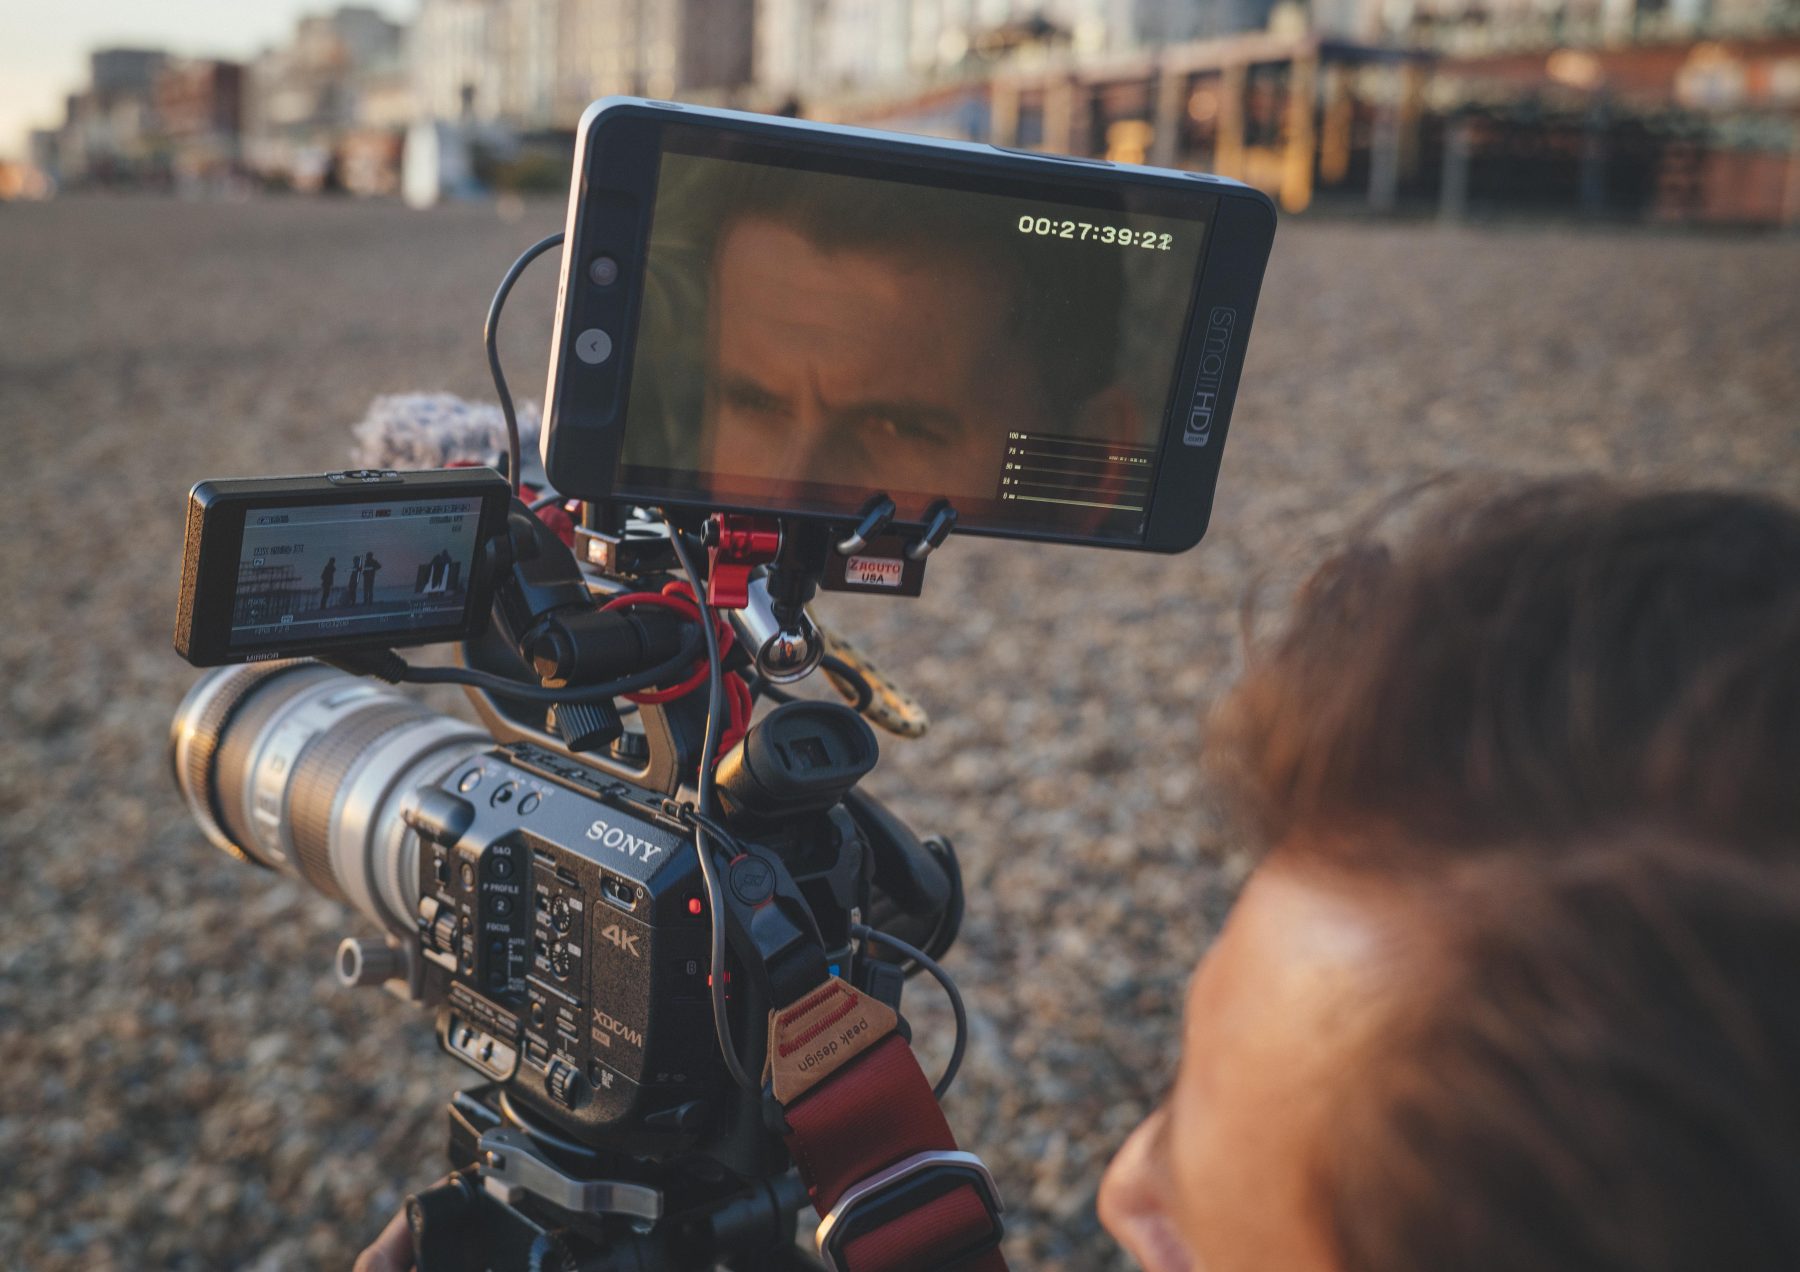
One major frustration I had with the FS5 on the shoot was the output to my fabulous Small HD 702 monitor. At the time of shooting, in 4K mode, when I hit record, the output to the monitor went blank. Basically it did not support internal recording in 4K and output at the same time. This was fixed just before Christmas with firmware 1.1. This was a real pain when shooting. The finished film was always going to be HD because of the high frame rate recording, but the interview was 4K as I wanted to crop in on the shot on my HD timeline. Without seeing the image on the monitor, it was tough at times to see if I was in focus. The LCD screen is OK, but even with peaking I struggled to be sure. That is why I had the monitor.
THE INTERVIEW
Now normally I wouldn’t be looking at the monitor during an interview (unless I was only shooting it), I would be looking at the interviewee and making that important eye contact, except I had asked Nick how he felt about answering directly to camera as I find it a much more intimate way of telling stories for viewers. It isn’t easy and normally I would use my EyeDirect but I had somehow managed to forget it! I tried a couple of questions and he was a natural, so I stuck with it.
The interview itself was probably about 30 minutes long. It was very conversational. My questions were not traditional short to the point questions, they were very much answers to his answers, much as a conversation would be in real life. I connected to him very much, as his thought processes and struggles were very familiar to me in my own work. It made for a lovely interview.
Shot wise and framing wise, I filmed the interview in two positions (well two and a half really!). The wide shot and a tight shot (and a slightly tighter shot!)
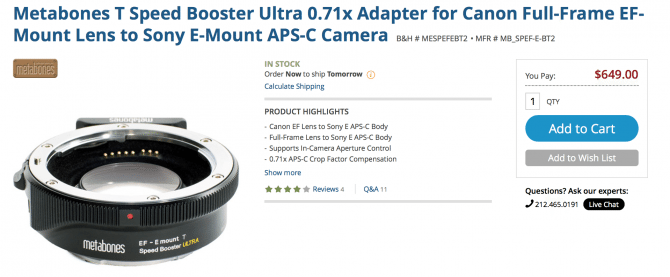
The wide was on my excellent Sigma ART 24-35 F2 lens using a Metabones Speedbooster, which gave me very close to the proper field of view and aesthetic of a full frame camera. The FS5 is of course Super 35mm, and the E-mount lens is probably my favourite lens mount because the shallow flange means I can put just about any lens on it that covers the sensor, with the added bonus of using full frame glass to their full effect with the wonderful Speedbooster Ultra from Metabones.
Sometimes you don’t want that full frame depth of field, as it can be too shallow. Also the FOV of super 35mm, mainly on longer focal lengths, is one of the key reasons why I switch between the Speedbooster and normal Metabones EF-E V4 mount depending on what I want. That flexibility is wonderful!
Half way through the interview I changed lenses to the Sigma ART 50mm F1.4. Whilst I did crop in on the wider shot on the HD timeline line, what that will not give you, of course, is a change in-depth of field when you crop. For that you need to be optically tighter, hence I changed lenses and I also cropped in on that too! As long as what you have shot is exposed correctly, has a low ISO and is in focus, you can crop to 1:1 on the FS5 4K with no visible loss of quality.
AUDIO
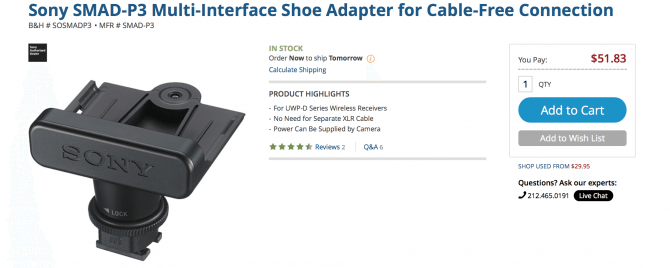
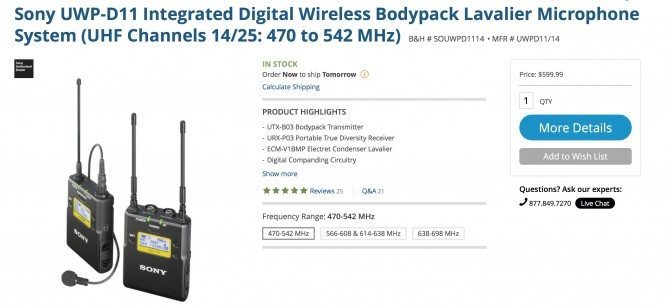
For the audio I had a RODE NTG 4 in the front XLR input and Nick’s mic was the Sony UWP wireless mic connected to the hot shoe of the FS5 directly using the catchily named “Smad-P3 Multi-interface shoe adaptor”! No XLR or AA batteries needed! The mic that I used on the Sony UWP was the RODE lav as I prefer it and it is smaller, which makes it easier to hide using Rycote undercovers. I hate seeing mics, even lav mics, so I always hide them!
For the natural sound for all the high frame rate stuff that is mute when recording, I did the very obvious and simple trick of doing the shot in normal speed as well, so I could get the audio. It is actually very easy to accidentally record a shot in normal speed, because once you are in HFR mode if you press the menu button at any point to change something, it reverts to normal speed. The FS700 did this and it was annoying. The FS5 also does this and it is still annoying!
Also, do make sure you record some nice room tone as well, to fill in the blanks of the interview. Sometimes you want to put pauses in the edit when the interviewee is talking over shots, and that room tone comes in so handy there!
CAMERA SETTINGS
I shot the whole thing in S-LOG 3 with Cinema colour. I would have used S-Gamut colour, but this is where the camera differs from my FS7 in that the S-Gamut on offer were all tied to colour temperatures, which is interesting. I need to read up more on this, as it is the first time I have come across it. Also as my BTS FS7 camera is shooting in “Custom mode”, there is no S-Gamut; that is only available in Cine EI mode which I don’t use. I explain why I don’t use it in my FS7 review. So I used cinema colour for the FS5 to match my FS7. The sharpness was also turned all the way down. There does not appear to be an “off” as there is in the FS7, so all the way to negative whatever it was! Sharpen it in post, not in-camera! With my FS7 I tend to use the “aperture” setting to add a little sharpening, but there is no option for that in the FS5.
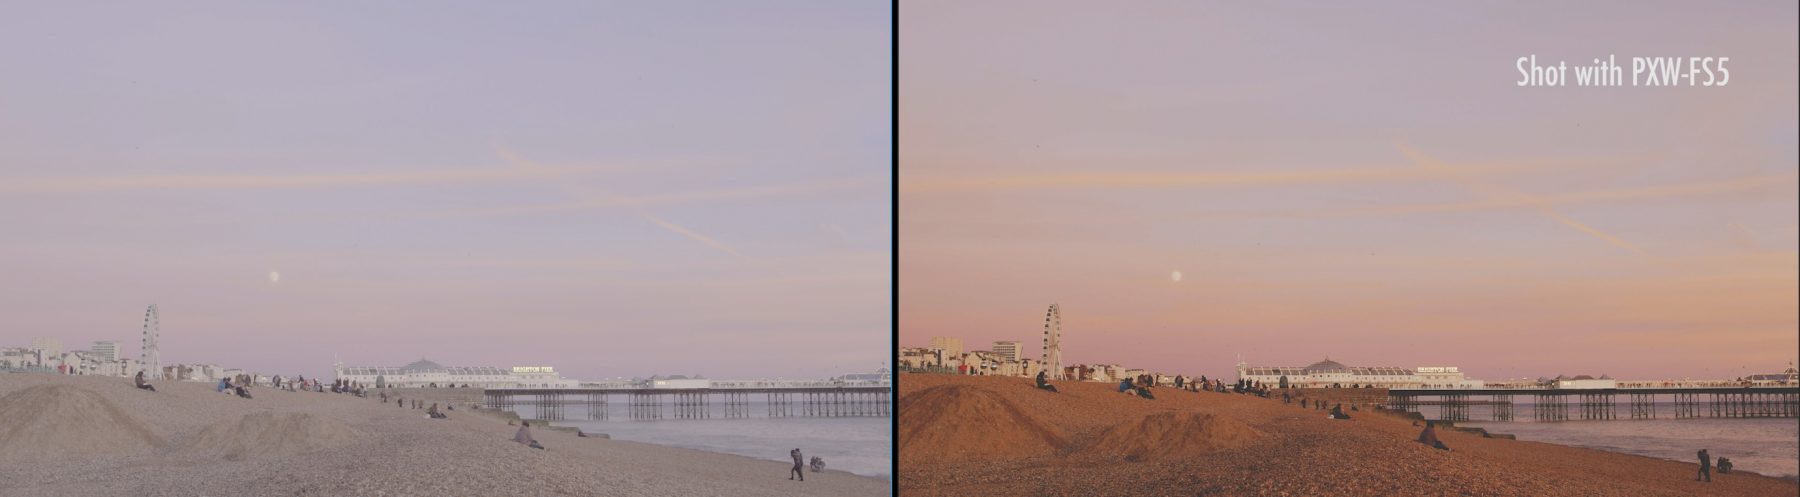
S-LOG 3 looks noisy in the shadows, more than S-LOG 2, and absolutely more than the other gamma curve settings. The thing is it just looks noisy, it isn’t ACTUALLY noisy! You are not creating noise by shooting in these modes. S-LOG 3 looks noisier as the log curve has lifted shadows, more so than S-LOG 2, but it is more linear than S-LOG 2, so when you do grade the image it is actually much easier. I really recommend reading Alastair Chapman’s blog post about it here to better understand S-LOG 3. and also watch his terrific two and a half hour long presentation about the camera, which I have embedded at the bottom of this post.
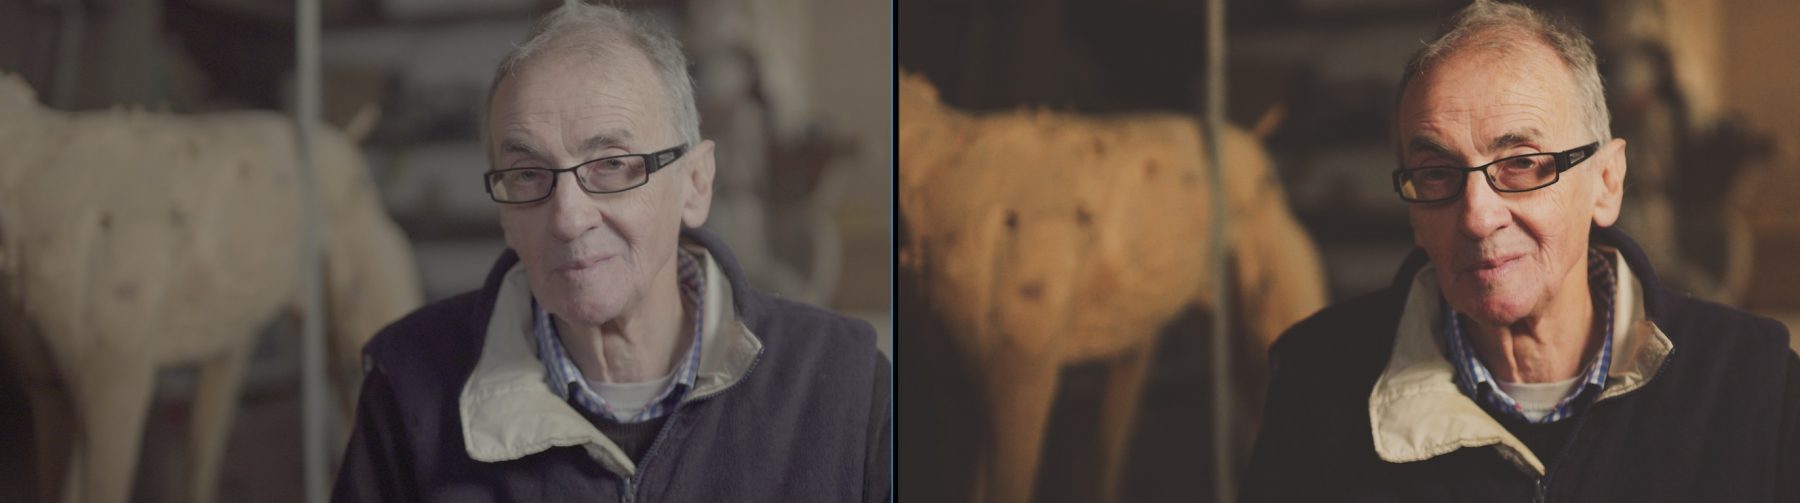
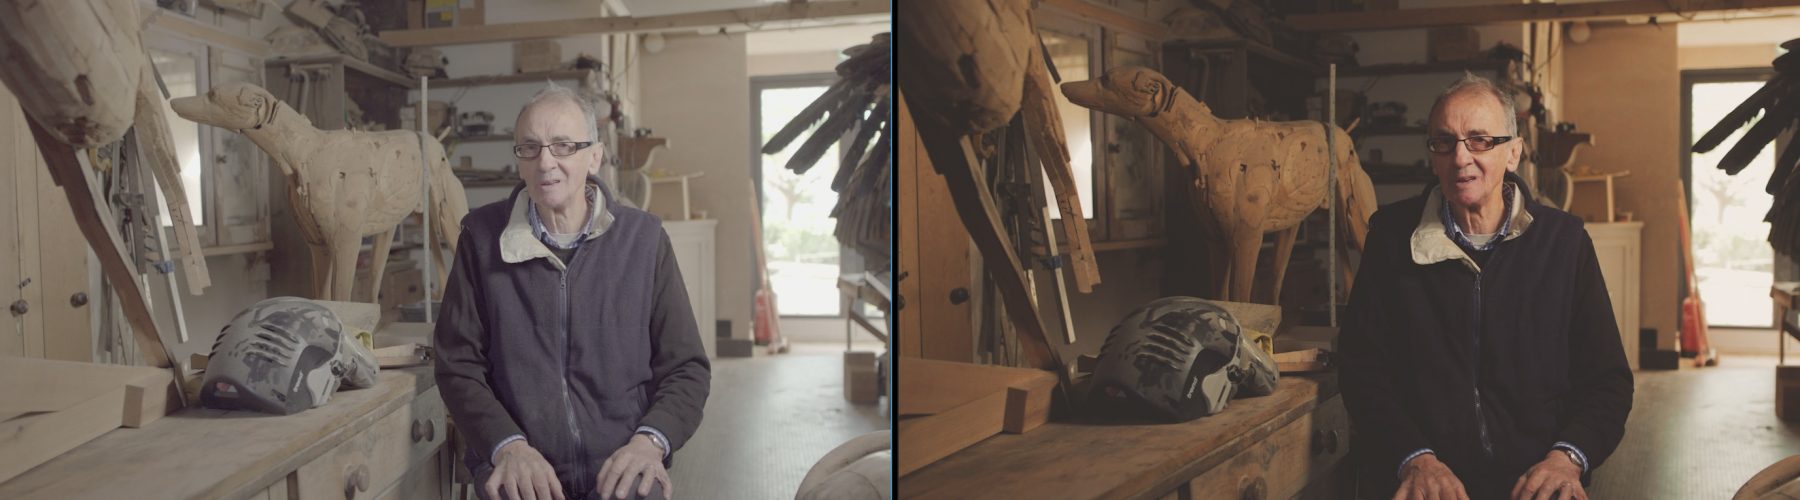
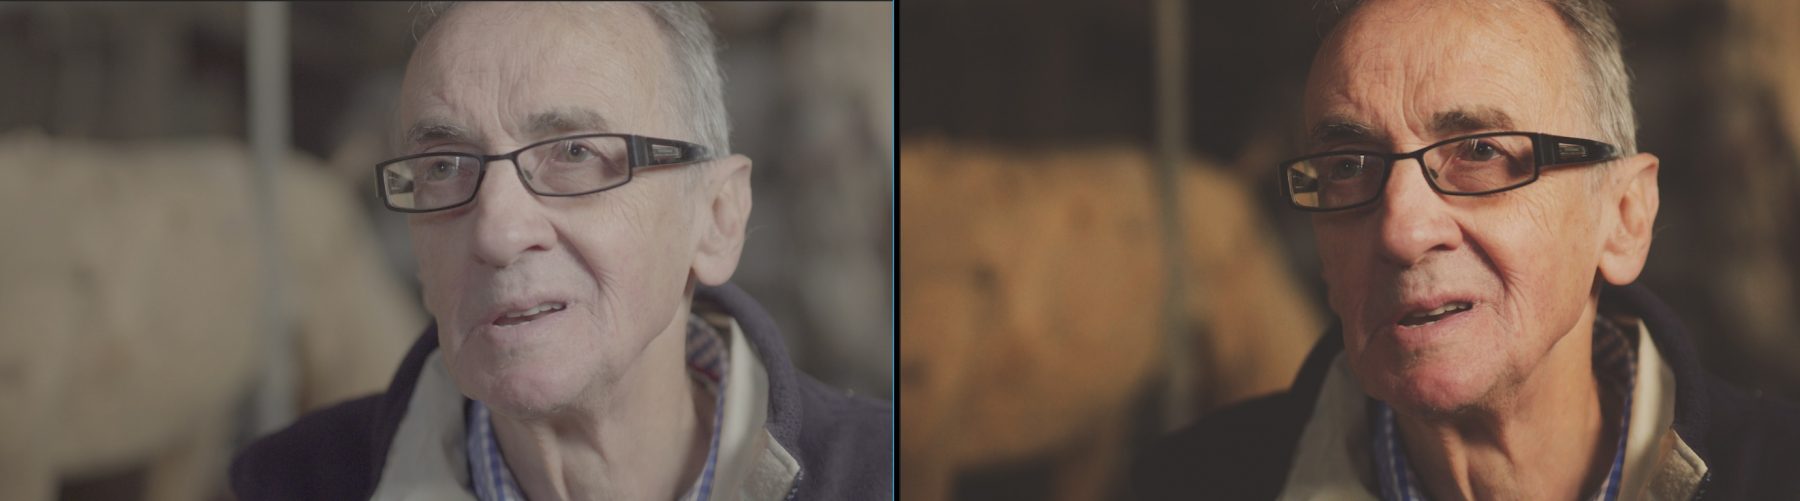
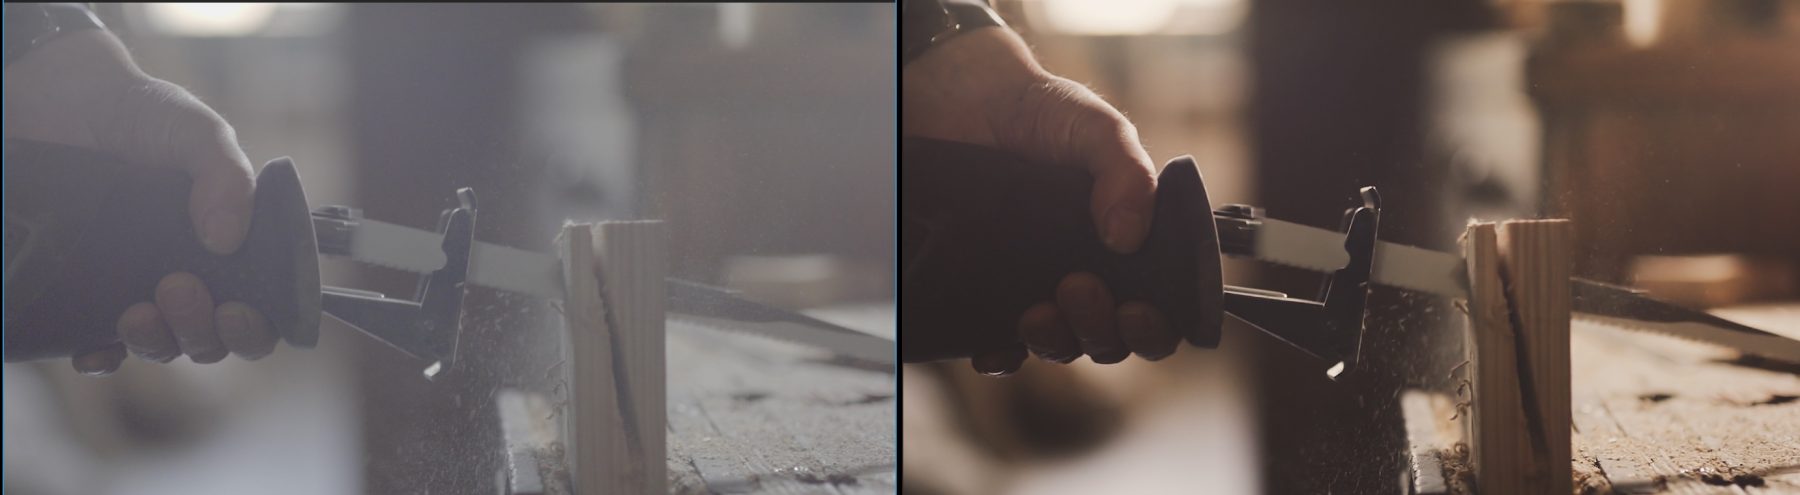
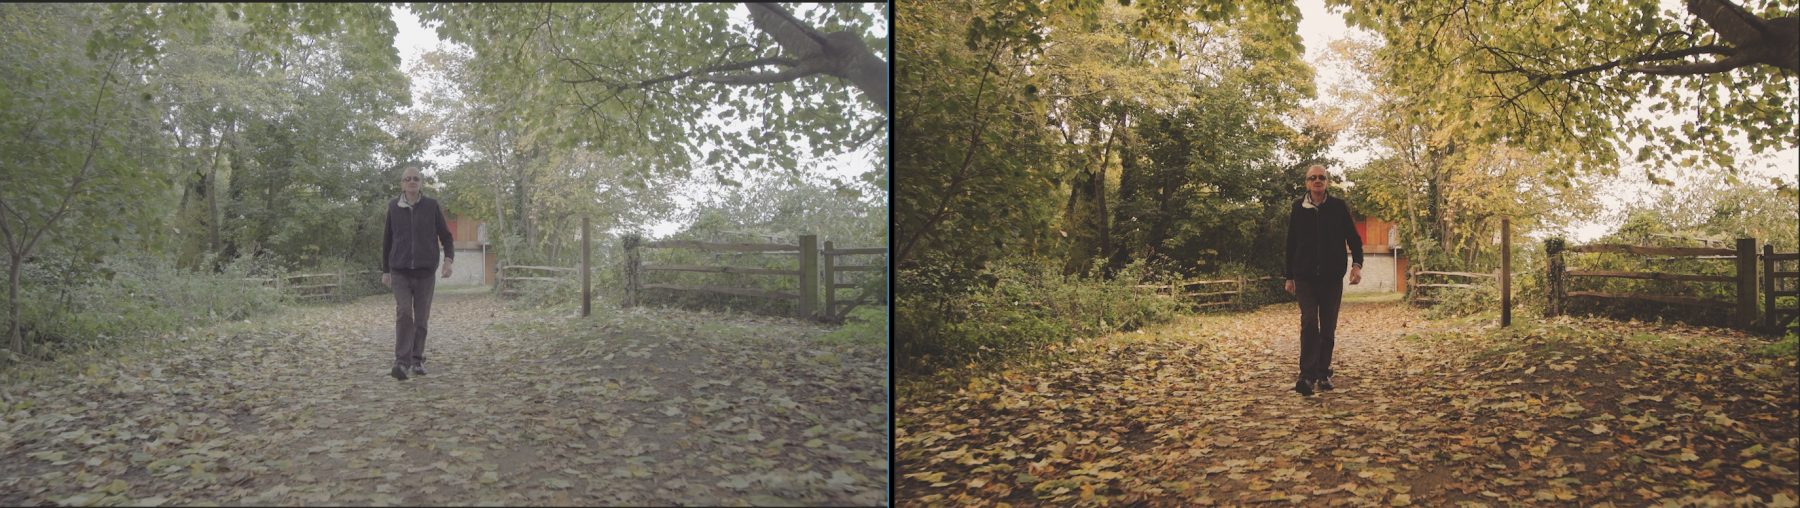
In high frame rate mode, which is anything over 50fps in 50hz mode to 60fps in 60hz mode, the noise becomes VERY apparent and can be quite scary. The key to making your pictures clean when shooting in these modes in make sure you have light. Do not underexpose high frame rate shots, as you will need to do a fair bit of work with noise reduction to make them acceptable. There is no waveform on the FS5, but there is a histogram. In my experience, exposing more to the right with the histogram gave me much more acceptable images. The shot below is 200fps log, and you can see the noise on the left on Nick’s coat below his hand in the frame. The second image is my graded shot, as you can see, the noise is gone.
I REPEAT! DO NOT UNDER EXPOSE HFR SHOTS! The solution to underexposed HFR shots is not pushing up the ISO. It needs to be done optically or with more light; otherwise all you are doing is adding more noise to the noise!

GRADING
As per usual, I used Film Convert as my base for my grade. This software is fantastic. I know proper colourists will sneer at it, but I am not a professional colourist. I have people who do that on bigger jobs. I do it myself on my personal work and on lower budget work like this. Colour grading is fun and it most definitely is an art. My grading recently has tended to be with lifted blacks, giving the image a more milky, vintage feel. This is purely my aesthetic choice and nothing to do with the camera!
Normally I start with a preset in film convert for the actual camera and setting I have used, but as the camera was so new there were no presets available when I edited this, so I used the FS7 ones which are very similar. The film stock I use normally is Velvia but here I used Provia with some adjustments. I also did a fair bit of other work in the Lumetri panel of Premiere with curves and faded blacks.
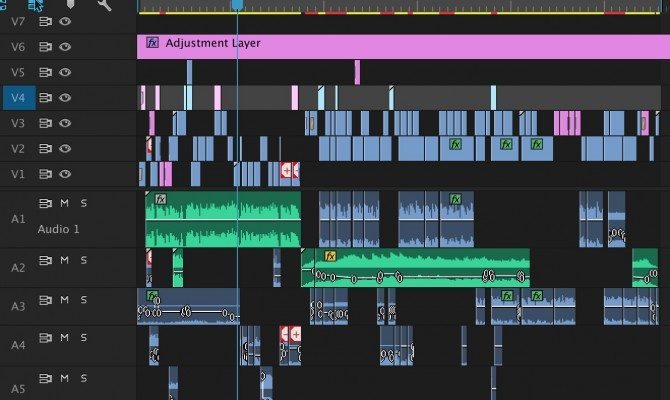
I set the grain to “full frame” and 25%. Film convert was placed on an adjustment layer above the edits as an overall wash on the colour corrected (to even out exposure and balance etc) shots.
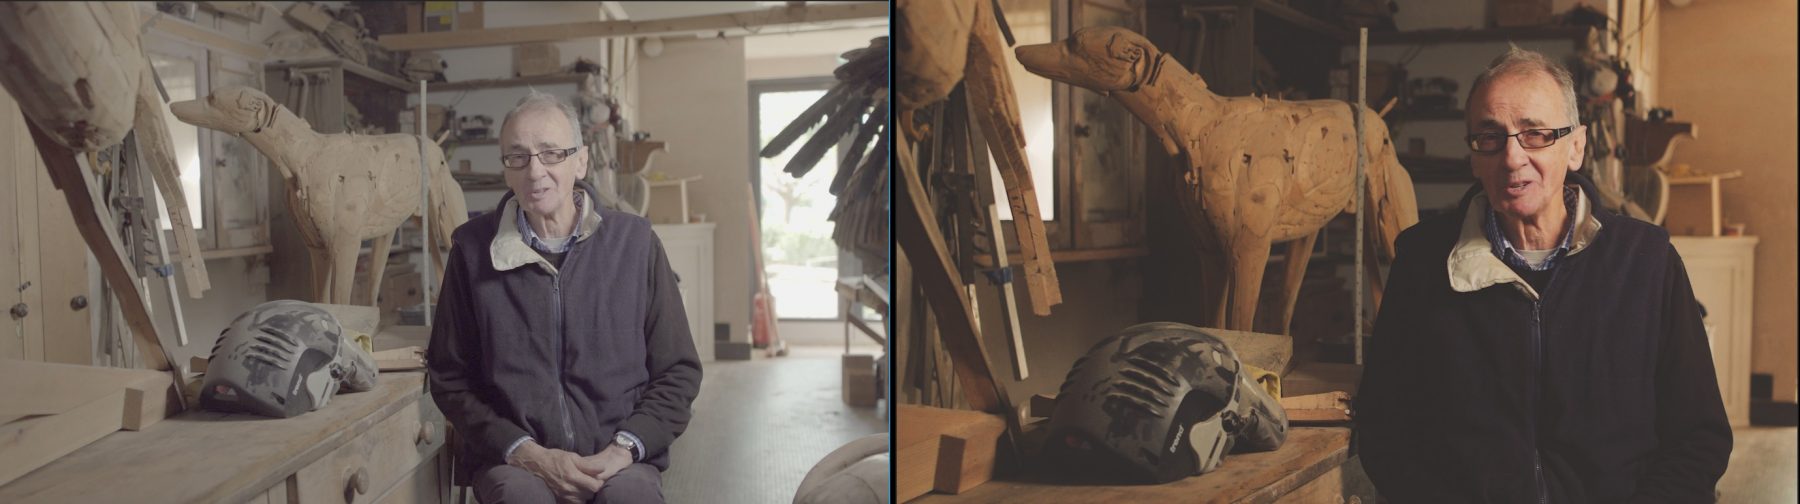
Below are some examples of S-LOG 3 and graded side by side. Click the images to see them better.
If you are interested in FilmConvert, you can get 10% off by clicking the below banner!
OVERALL
It was a pleasure shooting with the camera. It’s amazing that a camera so small packs such a punch with its features and at such a competitive price. There are a few things I didn’t like for sure; the below par (for Sony) EVF, the LCD screen and lack of loop (although I hate the FS7 loop!), 8-bit 4:2:0 4k, lack of 10-bit 4k output, no slow motion in 4K, and that the codec is not liked by Premiere that much. The menus confuse as usual. They are more akin to the FS700 than the FS7. They need a “User Menu” at the top where you can add your most common features to change. This saves me so much time with my FS7.
If you are coming from an FS700, you will find this camera to be very familiar to you, just a lot easier to use and hold with loads more features. The hand grip’s ergonomics alone will blow you away with so many key shortcuts on and full access to the menus. No fiddling around with a gazillion buttons as you might be used to.
I love the size (I may have already mentioned that!), the Variable ND is fantastic, the image is wonderful, and having a 10-bit 4:2:2 internal codec at this price is great (shame the 4K isn’t), HFR via cache recording is actually not a bad thing. Ideally I would like to have both, because I am constantly eating up way too much data using continuous with my FS7 waiting for something to happen. An end trigger mode on that camera would be lovely! Centre crop mode is a nice feature (only works in HD) but be careful of using that with high ISOs, as it will be noisy. Clear zoom is also present on this camera. This is a feature that is simply amazing. I used it a lot recently with my A7SII and A7RII in Africa whilst shooting the wonder list. Below is a clip (which you can download the 4K version of directly on Vimeo) of a shot in S35 mode on the camera at the end of a 400mm lens with 2x clear zoom on! It’s astonishing!
4K: Martial Eagle eating bird claw. Sony A7R II 400mm, 4K S35 mode, 2x Clear image zoom from Philip Bloom extras on Vimeo.
So the big question is “Will I buy one?” well…I would like to for sure, but I don’t have the funds for it and I don’t REALLY need it as I own an F55, FS7, A7SII and A7RII. I would love to have one though, as the portability of it is so appealing, the size for gimbal work too….I could see me using it a lot, if I owned one!
I think Sony should think about making a version of this camera with all the frame rates and codecs of the FS7. Make it the same price as the FS7. Or more likely a bit more, given the price difference between the two is so small. Having all the benefits of the FS7, especially the codec and slow motion features in this size would be unbeatable.
With a price difference of around £600 between the FS7 and FS5, if you are looking to buy one and are not sure which then it certainly isn’t easy. The appeal of the FS5 is the size/ weight and variable ND, but for just £600 more you get 10-bit 4K up to 60p and continuous high frame rate recording in HD. It’s a tough call!
For the next evolution of video cameras, I think it is time we saw a full frame full featured video camera from them. We are close to it with this and the FS7 with the Speedbooster but I mean a TRUE full frame video camera and with that lovely 5 axis stabilised sensor please! Oh…and whilst I am dreaming let’s have 120 fps in 4K and 1000fps in lovely quality too! 🙂
The Wood Carver: A Sony FS5 mini documentary from Philip Bloom on Vimeo.
1 comment