Please read my ethics statement here
After the great response to her first lighting blog the brilliant Eve Hazelton has whipped up another one!
This one is how to use lights you already have to add that certain je ne sais quoi!!
If you want to support her and one of the most interesting kick-starter projects I have seen then please do. I signed up. I think it’s simply brilliant! They have now added a $50 reward which is a downloadable 1 hour lighting tutorial by Eve! Great stuff!
PLEASE be aware of health and safety risks when using lights and electricity. Certain things demonstrated below need to be done with care and attention making sure the way you use them adhere to their health and safety warnings and instructions. Be careful!
So…wow! last week’s tutorial went down so well that “The Bloom” has got back in touch and asked if we would like to do another couple of guest blogs for philipbloom.net! OF COURSE WE WOULD!
Last time we were talking about lighting techniques. How you can place lights and use different types of lights to light a interview/blog type set up.
We had loads of questions about this, which was great! It’s nice to know people are watching and finding it useful! One of the main questions that came through was “What were the model/make of lights you were using”. A perfectly valid question which we have tried to answer where possible, but the main point of the tutorial last week wasn’t what make/model of lights we were using, but more how we were using them.
SO, this week we thought it would be a great idea to bring you a tutorial showing how you can use lights that are just kicking about your house (or if not are VERY easy and cheap to get hold of) and give you examples of ways you can use them in creative ways to light your scenes.

Ok, so #1 – Most of you have one, or envy a friend who has one, and that is an iPhone. Get yourself an app that allows you to turn your phone’s LED light on and off (we are using one called droid-light). You can then make yourself a support from a couple of clothes pegs (aka c47’s in industry – something to do with gaffers not being allowed to put “clothes pegs” on their expenses forms) – which will allow you to stand your phone up on a flat surface. You can then hide this light in your scene to pick up a bit of detail or colour. We used this recently to back light a steaming cup of coffee in order to really emphasise the warm & cosy feel of the shot.

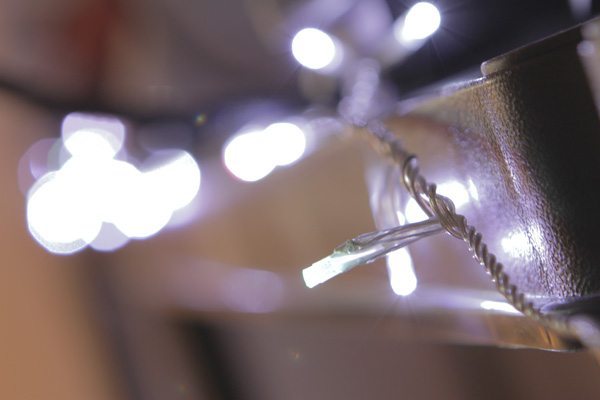
#2 – Fairy lights! It’s Christmas. Don’t try stealing them off the tree just yet, but do go bag yourself some in the sale to keep in your lighting kit. We all know Phil loves a bit of Bokeh! and when you are shooting at a shallow DOF with these lights in the background its easy to see why! The beautiful out of focus discs of light can add colour, interest and of course movement (gentle twinkling of the lights – I’m not talking disco! – eeek!)

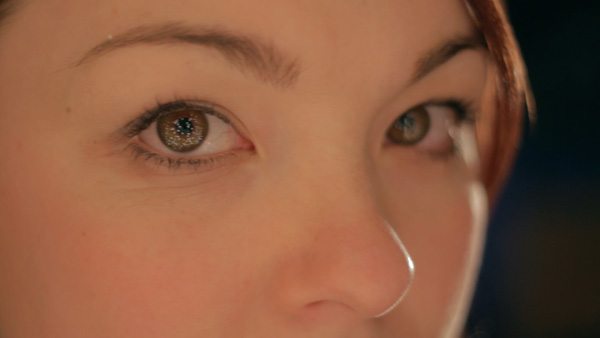
A group of fairy lights can give off a beautiful soft light as well, we strung ours across a board of 4×4 poly. Cut a hole in the middle of that board, and poke your camera lens through the middle to shoot a subject the other side, and you have effectively made yourself a ring light – WIN! Ring lights are used heavily in fashion photography because they flatter the skin, no shadows, no wrinkles and fine lines ( who needs expensive skin care when you have a ring light). You are also going to get a magical eye light!
This technique would works great for quirky music videos! Stick a wide angle lens on your camera, get you subject to sit close to that board and you are going get some amazing big eyes, with funky crazy eye lights and a really stylised look.

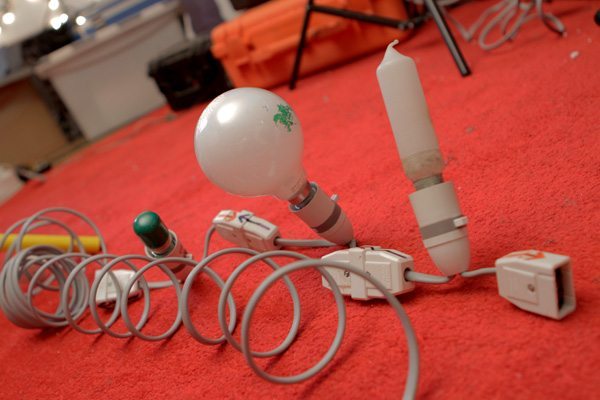
#3 – Cock lights (giggle) or festoon lighting (BLOOM EDIT: We can see where they learned their craft! ;)). The Lego of lighting. Highly modular, and as they are made from standard light fittings, you can really go crazy with the bulbs available to you. These lights aren’t designed to use as main light sources in your scenes, but are great for getting in behind things and hiding within your scenes. They can add separation, areas of colour, and highlight details.

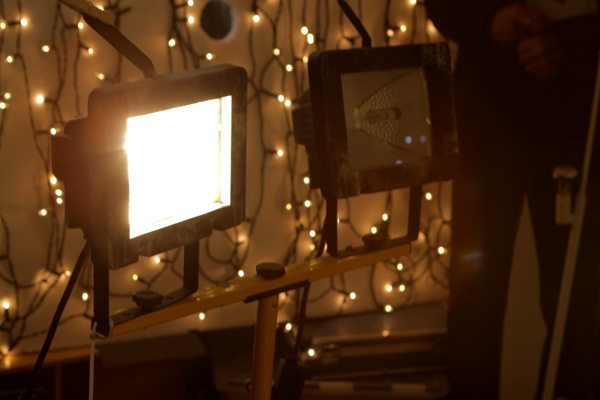
#4 – Builder’s work lights. Two lamps, one stand: £10. These use exactly the same bulbs as ‘film and video’ halogen lights (the very same we were using last week as our key light.) They don’t come with any “pro” accessories (barn doors, soft boxes etc) and I wouldn’t recommend turning up to a corporate job to light with them, HOWEVER, you can mod them up to work exactly the same. Weld a second hand barn door on to the front to allow yourself to control light spill, add a dimmer to the circuitry to allow you to control output, and even better… grab yourself a cheap reflector/ silk, stick it to a stand (or put it on a chair in front of it) and you have that wonderful soft light back
There you have it. Four ways to use things easily available to light your scenes.
If you haven’t all ready done so, get your ass over to our kickstarter campaign page! We have now added a brand new $50 reward – an hour long masterclass ALL ABOUT LIGHTING! This will include loads more info about light theory, industry gear, and most importantly how you can go from script > lighting plan > execution when lighting some actual dramatic scenes of your own!
A massive thank you once again to Mr Philip Bloom for all the support and for allowing us to come back and play for another week.
From myself and all the team here at Realm! – Have a very Merry Christmas!!
Thanks again Eve, you can follow her (not literally as that is creepy!) on twitter here!


17 comments
Thank you very much!!! This is so amazing!
I am right now on a budget and this tutorial just inspired me to build and construct my own lights, softboxes etc. I especially like the part with the builder’s work light. This is killer! Why actually spend so much money (unless you have it) when you can virtually get the same for less!
You guys are amazing! 🙂
Best
Michael
I really enjoy your tutorials Eve. No offense Philip, but she’s much easier on the eyes… Keep them coming. Thanks Eve!!!
Nice tutorials Eve, thank you! Not to mention, you’re hot! Okay, I had to say it, now that that’s off my chest, I can move on.
Another great tutorial. Thanks for putting this together. May have to kick in another $50 to get the class.
Just to share the best and cheapest dimmer I have found. A variable speed control for a router. They sell for about $15-20 and I have used them on lights unto 750 watts, that is the biggest I have. For smaller lights under 300 watts you can get lamp dimmer switches, great for bringing down practicals.
could you post a link please? sounds like the thing that i need 🙂
I just had a light-bulb moment (no pun intended)
Wonderful video. Eve’s lighting videos are fantastic. I had to contribute to the kickstarter campaign as I very much look forward to her 1 hour masterclass on lighting. Best of luck to reaching your goal.
Great tutorial! I was about to buy a softbox, so that photo reflector idea actually saved me a lot of money. Both of these have been rather eye opening, I will definitely pitch in the money for the full tutorial set…
Question: How much does it cost to manufacture the LED lights you are giving away plans for? I was also considering donating for that package too, so it’d be nice to get a hint of what I’d be getting in to.
read tha faq on the bottom of the kickstarterpage:
“That depends on how many lights you want, how long you want the battery to last, and how rugged you want them to be!
We made 2 x 8 banks with massive 4 hour battery packs, chargers, mains adapters, frames and supports – completely waterproof for $1500
You can quite easily build a non waterproof 4 bank for $500 – of course it depends how much you shop around for the parts locally! We tell you where to get the uncommon parts, but the glue/rivets/cables are up to you to source!”
Thanks so much Philip and Eve for the awesome info!
Would love to learn more about the white balancing aspect, and how it gets affected by mixing color temps in the lighting setup…anyway to ask Eve to throw that in on the next tutorial? Thanks guys!
I love these tutorials so much, really taught me a lot. I’m wondering which supermarket you got the builders lights for £10 from? I’ve never seen them that cheap before….
Great tutorial. Much more interesting than the first one. Thanks!
Wow thanks. As a newbie film maker this was very timely and helpful. Not to mention Eve is seriously charming.
i have a crush!
Outstanding teaching skills and brilliant ideas from a very intelligent and creative woman with magic teeth. :]
Wow! Thanks every one for you extremely kind words. I am glad you found the tutorial useful! You have made my Christmas. 😀
Hello Philip and Eve
I’m a new girl to your fascinating looking site (and film-making) and am delighted to have found you both. Eve, you mentioned plans for a DIY LED tube/s source during your green screen video. Would you please point me in the right direction? I don’t know where to look. Philip, thanks for mentioning AVID MC6 was not suitable for PC.
Kindest regards
Lars